


8
The Glide-out™ Grill
Caution: Accessible parts may be hot
when the grill is in use. Young children
should be kept away.
Before using the grill for the fi rst time, make sure
that all packing materials have been removed
and then to dispel manufacturing odours, turn on
the grill and run for 30 minutes with the grill pan
in position, pushed fully back, and the grill door
open.
Make sure the room is well ventilated to the
outside air, by opening windows or turning on a
cooker hood for example. We recommend that
people with respiratory or allergy problems
should vacate the area for this brief period.
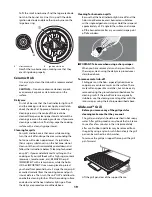
Using the grill
Open the grill door and pull the grill pan carriage forward
using the handle.
The Grill pan gets very hot when the grill is on.
Don't touch the pan or trivet unless you are sure it
is cool.
After placing your food on the grill grid, slide the grill
carriage into the grill chamber. Make sure it is pushed
right in.
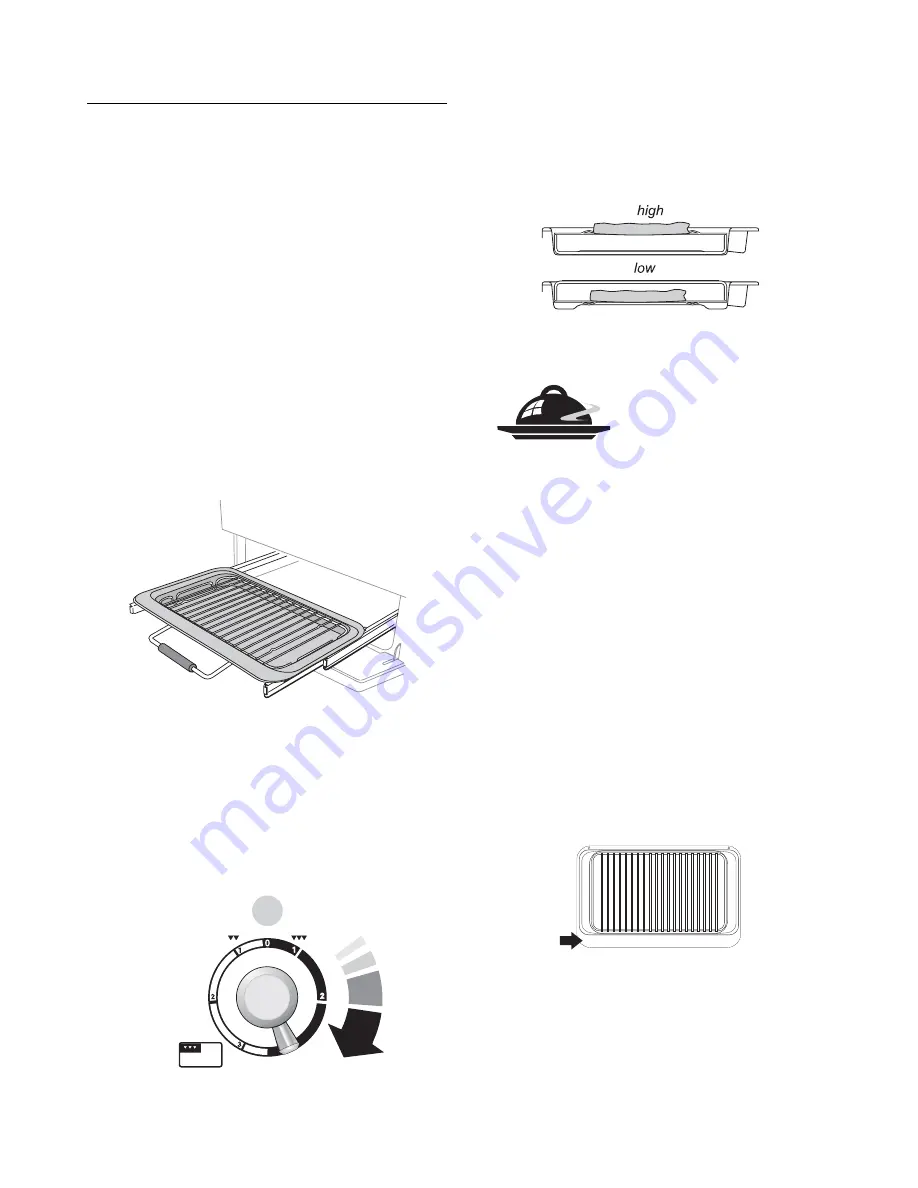
The grill has two elements that allow either the whole
area of the pan to be heated or just the right hand half.
To heat the whole grill, turn the knob clockwise.
To heat the right hand half turn it anticlockwise.
The neon indicator light by the grill control will come on.
For best results preheat for 2 minutes with the grill pan in
position. After placing your food on the grill pan grid, slide
in the grill carriage. Adjust the heat to suit by turning the
knob.
Make sure the grill carriage is pushed right in.
Never close the grill door when the grill is on.
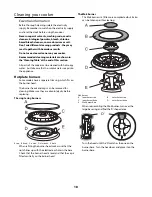
The grill pan grid can be turned over to give two grilling
positions.
Don’t leave the grill on for more than a few moments,
without the grill pan underneath it.
For best results, especially with toast, preheat the
grill with the grill pan in the cooking position for
two minutes before use.
Before you remove any of the grill parts for
cleaning make sure that they are cool or use oven
gloves.
The grill trivet can be removed and the food placed
on it while you are waiting for the grill to preheat.
The grill pan grid can be turned over to give two
grilling positions.
The grill pan and grill pan carriage can be easily
removed for cleaning. See the
‘Cleaning your
cooker’
section of these instructions.
When you pull the grill pan forward is the wide rim at
the front? It's important that the wider part is at the
front.
Summary of Contents for Classic 110 Deluxe Duel Fuel
Page 1: ...Classic Deluxe 110 Dual Fuel Users Guide Installation Service Instructions U108810 03...
Page 41: ...41...
Page 42: ...42...
Page 43: ...43...
Page 44: ...040506...


