9
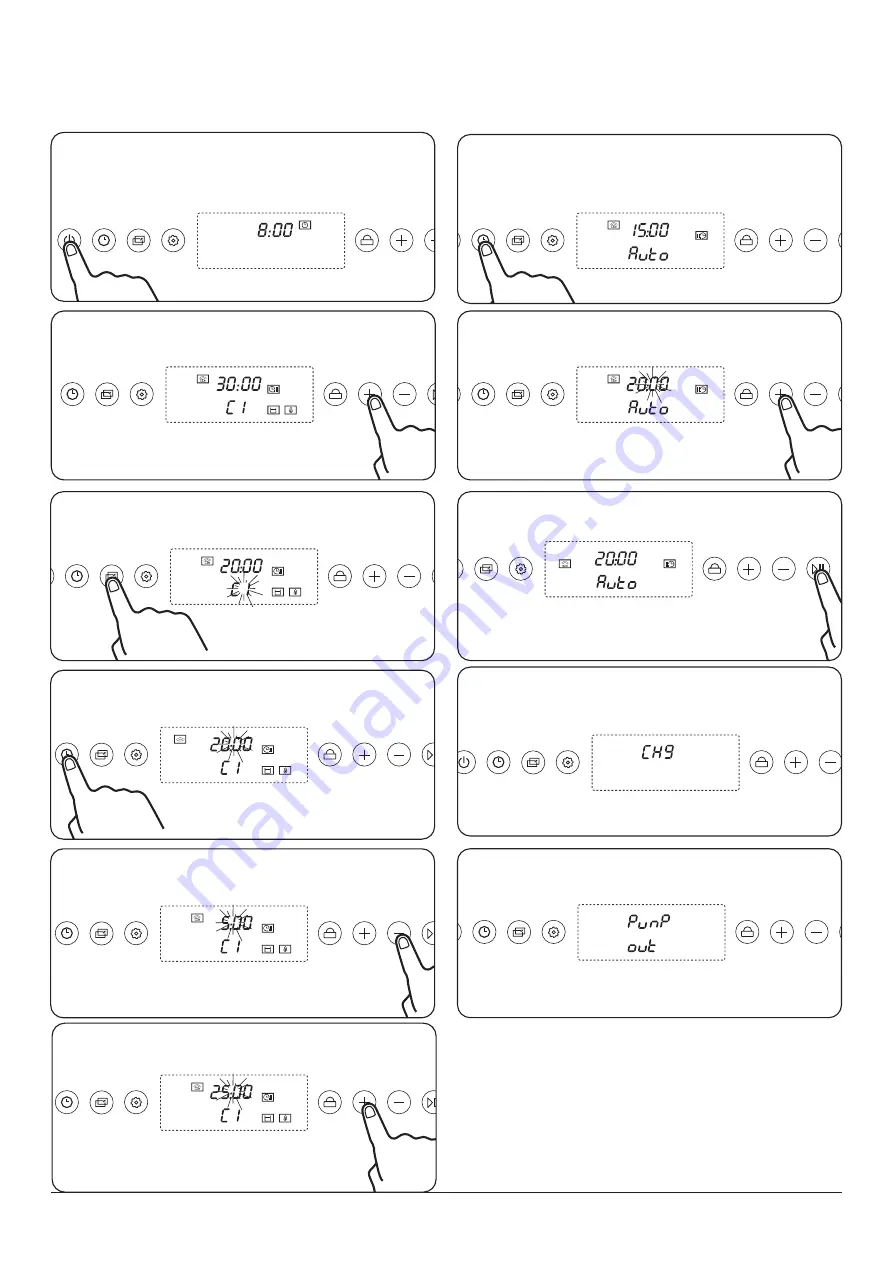
Step 1.
Firmly press the "Standby" button.
Step 5.
Decrease time.
Step 6.
Increase time.
Step 2.
Press the “+” button to select the “Meat” feature.
Step 3.
Press the Function button and then press “+” to
choose your desired setting from the
.
Step 4.
Press the “timer” button to set the duration.
Setting the delayed start for the Meat
NOTE:
At the end of each cooking process the oven will emit 3
beeps every 30 seconds for five minutes or until the oven
door is open or when you press the
Start / Pause
.
Step 7.
After setting your desired parameters. Press the
"Timer" button twice to set the delayed start.
Step 8.
Decide when the cooking will start.
Step 9.
Press "start" to confirm start time. Once set, the
display will show the function and "
AUTO
" text.
Step 11.
This display will show when the cooking process
has stopped/finished. It will take 60 secs to complete.
Press the “+” or “-” button to stop this process and to
continue cooking.
Step 10.
If no button is pressed while the
CH9
is showing, it
will operate after 60 secs.
CH9
is a reminder to use fresh water.
Summary of Contents for ECL45SCBL/BL
Page 1: ...RMB45SCBL SS ECL45SCBL BL User Guide Installation Service Instructions U110609 09A...
Page 37: ...45 NOTE...
Page 38: ...46 NOTE...
Page 39: ...47 NOTE...


