


RANGEMASTER COOKWARE
Our range cookers are well known for providing the
best possible cooking performance and years of
faithful service. However, a great cooker alone cannot
guarantee perfect results every time. The other vital
ingredients are of course enthusiasm and quality
cookware.
We offer cookware to work perfectly with all fuel types
manufactured by Rangemaster, including induction
hobs. You can be assured of functionality with style, as
well as the quality and meticulous attention to detail
you expect from the pioneers of range cooking.
Visit: www.rangemastercookshop.co.uk
Ingredients
•
Oil for greasing
•
100 g strawberries
•
100 g raspberries
•
100 g redcurrants
•
100 g blackberries
•
or a 400 g mixture of any soft
fruits
•
2 medium eggs
•
30 g caster sugar
•
80 ml skimmed milk
•
2 tsp vanilla extract
•
60 g plain flour (sifted)
•
1 tsp baking powder
•
Icing sugar to dust
Method
1. Preheat the oven to 200 °C (for a conventional oven),
180
o
C (for a fan oven) or gas mark 6.
2. Lightly grease a dish 26 cm wide x 4 cm deep.
3. Thickly slice any large strawberries and place them with the other fruits
into an ovenproof dish, deep enough so the berries are about 2 deep.
4. Whisk the eggs and caster sugar until pale and fluffy. Beat the milk and
vanilla extract into the mixture and then fold in the sifted flour and
baking powder.
5. Pour the cake mix over the fruit and bake on the centre shelf of the
oven for 15-20 minutes, or until the mixture is cooked through and
golden on the top.
6. Dust with icing sugar and serve immediately with cream or crème
fraiche.
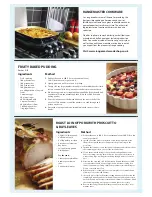
FRUITY BAKED PUDDING
Serves 4–6
Ingredients
•
3 kg (6½ lb) skinned and
boned loin of pork
•
2 x 70 g packs prosciutto
•
Grated zest of 2 lemons
•
Bay leaves
•
Salt and freshly ground
black pepper
For the sauce:
•
1 tablespoons plain flour
•
4 tablespoons lemon
juice
•
Chicken stock/water
Method
1. Preheat the oven to 220 °C (for a conventional oven), 200 °C (for a fan
oven) or gas mark 7.
2. Spread one of the packs of prosciutto over a chopping board; place
the pork on top with the outer (fat) part of the pork resting on the
prosciutto.
3. Sprinkle the lemon zest onto the inside of the meat and season well. Lay
the remaining prosciutto on top of the zest and roll up.
4. Secure the pork with string or silicone bands and thread bay leaves
under the string, covering the whole piece of pork. Put the meat on to
a trivet over a large roasting tin containing enough water to cover the
base.
5. Place into the oven and cook for 30 minutes. Reduce the heat to 180 °C
conventional oven/160 °C fan oven/gas 4 and continue roasting for a
further 25 minutes per 500 g. Should the prosciutto start becoming too
brown, cover with some foil.
6. When the pork is cooked, place onto a warm plate, cover with foil and
allow to rest for at least 20 minutes.
7. Spoon off most of the fat from the roasting tin and stir the flour into the
remaining. Gradually add the stock and lemon juice, adding more stock
until the desired consistency is reached and simmer for 5 minutes. Check
the seasoning, adding more pepper or lemon juice as necessary.
8. Remove the string or bands from the pork and carve into slices, serve
with the sauce.
ROAST LOIN OF PORK WITH PROSCUITTO
& BAY LEAVES
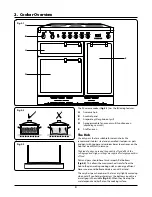
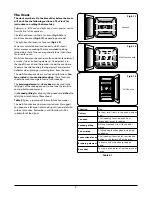
Summary of Contents for ELAS90EC
Page 1: ...90 Ceramic Britain s No 1 Range Cooker USER GUIDE INSTALLATION INSTRUCTIONS...
Page 4: ...ii...
Page 37: ...33 Notes...
Page 38: ...34 Notes...


