INSTALLATION
Check the appliance is electrically safe and gas sound when you have finished.
24
ArtNo.010-0004 Moving the cooker
Moving the Cooker
n
n
On no account try and move the cooker while it is
plugged into the electricity supply.
n
n
The cooker is very heavy, so take great care.
We recommend that two people manoeuvre the cooker.
Make sure that the floor covering is firmly fixed, or removed,
to prevent it being disturbed when moving the cooker
around.
To help you, there are two levelling rollers at the back, and
two screw-down levelling feet at the front.
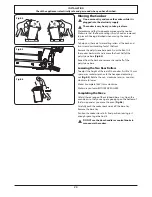
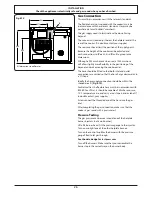
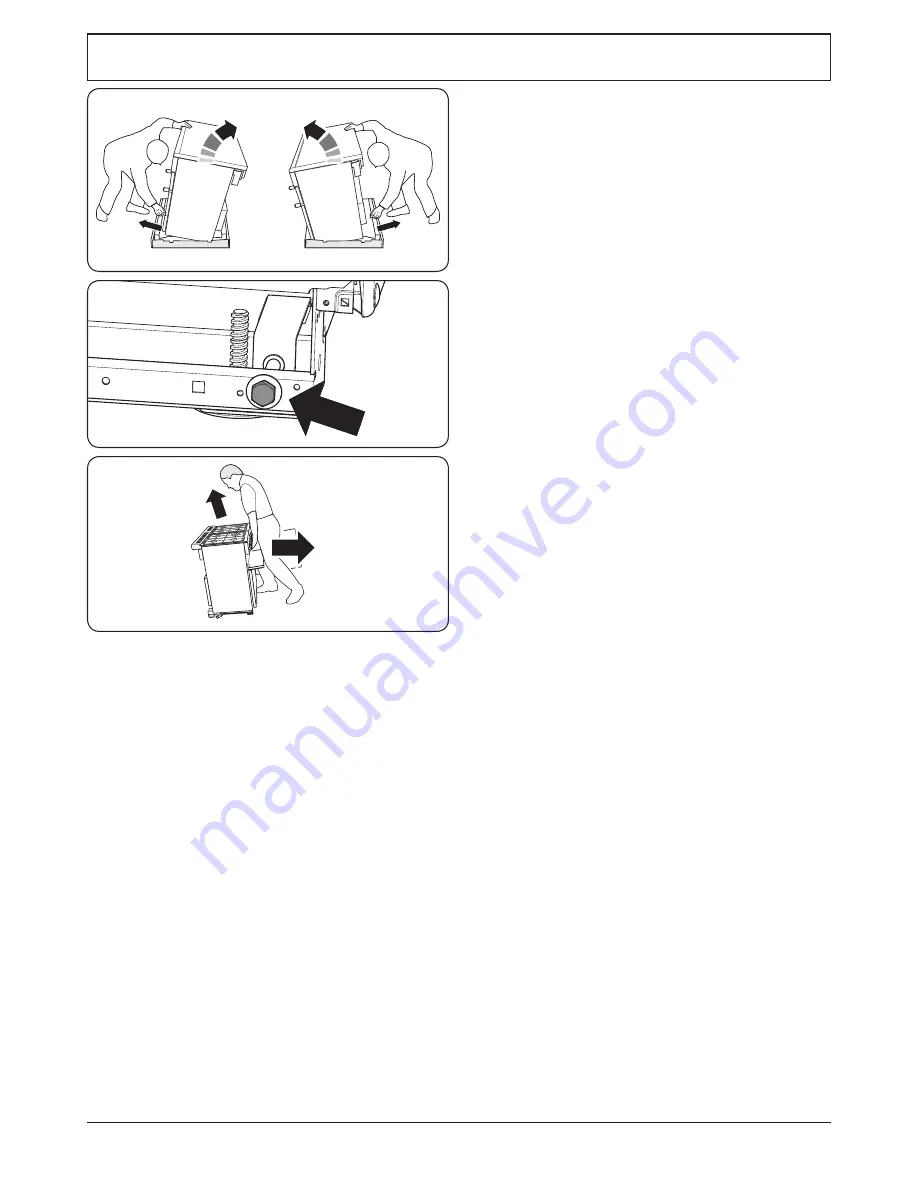
Remove the polystyrene base pack. From the front, tilt
the cooker backwards and remove the front half of the
polystyrene base
(Fig.8.4)
.
Repeat from the back and remove the rear half of the
polystyrene base.
Lowering the Two Rear Rollers
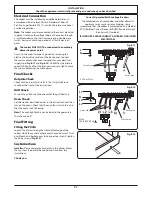
To adjust the height of the rear of the cooker, first fit a 13 mm
spanner or socket wrench onto the hexagonal adjusting
nut
(Fig.8.5)
. Rotate the nut – clockwise to raise – counter-
clockwise to lower.
Make 10 complete (360°) turns clockwise.
Make sure you lower BOTH REAR ROLLERS.
Completing the Move
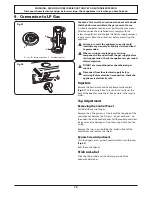
Unfold the rear edge of the cardboard base tray. Open the
oven doors so that you can get a good grip on the bottom of
the fascia panel as you move the oven
(Fig.8.6)
.
Carefully push the cooker backwards off the base tray.
Remove the base tray.
Position the cooker close to its final position, leaving just
enough space to get behind it.
n
n
DO NOT use the door handles or control knobs to
manoeuvre the cooker.
Fig.8.4
Fig.8.5
Fig.8.6


