background image

14

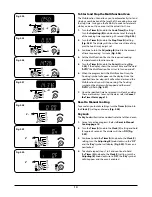
To Start and Stop the Multifunction Oven

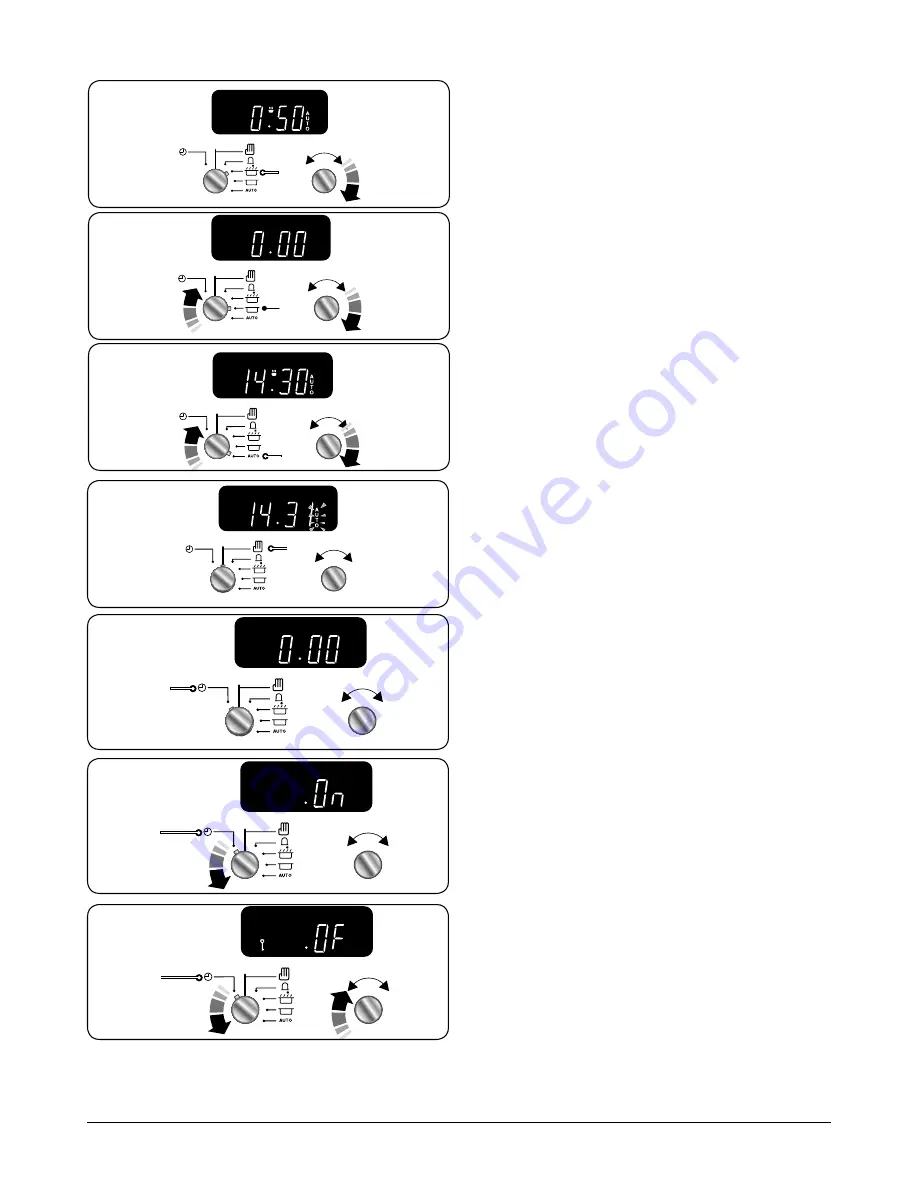
The Multifunction Oven allows you to automatically start and 

stop by a combination of the length of the cooking time and 

the stop time. Giving you the flexibilty to cook casseroles etc 

while you are out. You cannot set the actual start time. 

1. 

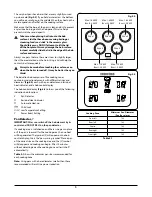
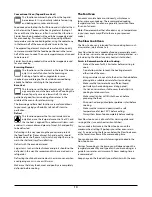
Turn the 

Timer (A)

 knob to the 

Cook Time (F)

 setting. 

Turn the 

Adjusting (B)

 knob clockwise to set the length 

of the cooking time required e.g. 50 seconds 

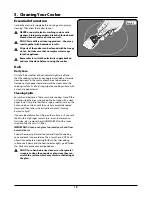
(Fig. 2.24)

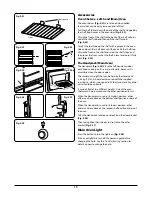
2. 

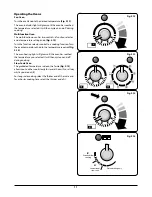
Turn the 

Timer (A)

 knob to the 

Stop Time (G)

 setting 

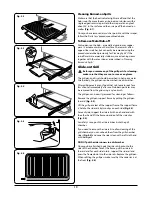
(Fig. 2.25)

. The display will show the current time of day 

plus the ‘cook time’ you just set. 

3. 

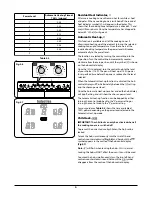
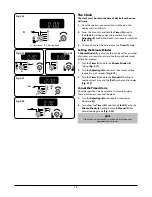
Continue to turn the 

Adjusting (B)

 knob to the amount 

of time required e.g. 1 minute 

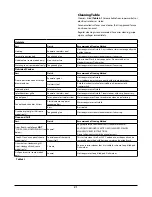
(Fig. 2.26)

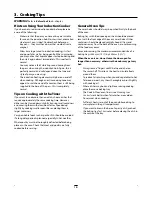
4. 

Set the Multifunction Oven to the required cooking 

temperature and function mode. 

5. 

Turn the 

Timer (A)

 knob to the 

Auto (H)

 setting 

(Fig. 

2.26)

. If the display shows the current time and the word 

‘AUTO’

 the Multifunction Oven is set to turn on and off. 

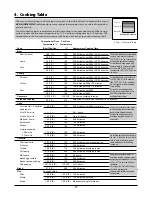
6. 

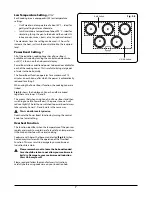
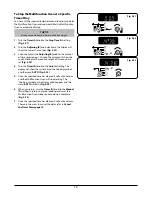
When the program starts the Multifunction Oven, the 

‘Cooking’ symbol will appear on the display. Once the 

specified time has elapsed it will emit an alarm and the 

Multifunction Oven will stop working. The ‘Cooking’ 

symbol on the display will disappear and the word 

‘AUTO’ 

will flash 

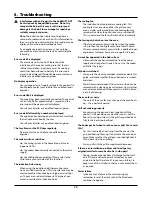
(Fig. 2.27)

7. 

Once the specified time has elapsed it will emit an alarm. 

There are two ways to cancel the alarm refer to 

Cancel 

the Timer Alarm page 12

Reset to Manual Cooking

To cancel any automatic settings turn the 

Timer (A)

 knob to 

the 

Clock (C)

 setting and release 

(Fig. 2.28)

.

Key Lock

The 

Key Lock

 will activate and deactivate the left-hand oven. 

1. 

Cancel any active programs. Refer to 

Reset to Manual 

Cooking page 14

.

2. 

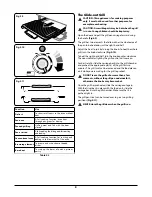
Turn the 

Timer (A)

 knob to the 

Clock (C)

 setting and hold 

for approx 8 seconds. The display will show 

‘ON’ (Fig. 

2.29)

.

3. 

Continue to hold the 

Timer (A)

 knob onto the 

Clock (C) 

setting, turn the 

Adjusting (B)

 knob clockwise, the 

‘OF‘


and the 

‘Key’


symbol will display 

(Fig. 2.30)

. The oven is 

now locked.

4. 

To activate repeat steps 1 to 2 and continue to hold 

the 

Timer (A)

 knob onto the 

Clock (C)

 setting, turn the 

Adjusting (B)

 knob clockwise to 

‘ON’

, the 

‘Key’

 symbol 

will disappear and the oven is enabled.

ArtNo.301-0007 2BC

Stopping the oven 1

D

A

B

ArtNo.301-0007 2BC 

Stopping the oven 1 

A

B

C

Art No. 301-0011 2BC 

Activating the key lock 1 

A

B

C

ArtNo.301-0012 2BC 

 Activating the key lock 2 

A

B

C

ArtNo.301-0008 2BC

Stopping the oven 2

G

A

B

ArtNo.301-0008 2BC 

Stopping the oven 2 

H

A

B

ArtNo.301-0010 2BC 

Setting the cooking time 

A

B

F

Fig. 2.24 

Fig. 2.25 

Fig. 2.26 

Fig. 2.27 

Fig. 2.28 

Fig. 2.29 

Fig. 2.30 

Summary of Contents for Excel 110 G5 Induction

Page 1: ...Excel 110 G5 Induction Britain s No 1 Range Cooker USER GUIDE INSTALLATION INSTRUCTIONS...

Page 2: ...known for providing the best possible cooking performance and years of faithful service However a great cooker alone cannot guarantee perfect results every time The other vital ingredients are of cou...

Page 3: ...Glide out Grill 19 Control Panel and Doors 20 Ovens 20 Cleaning Table 21 6 Troubleshooting 22 7 Installation 25 Dear Installer 25 Safety Requirements and Regulations 25 Provision of Ventilation 25 Lo...

Page 4: ...ii...

Page 5: ...ief period Ventilation n n CAUTION The use of a cooking appliance results in the production of heat and moisture in the room in which it is installed Therefore make sure that the kitchen is well venti...

Page 6: ...en roof n n NEVER heat unopened food containers Pressure build up may make the containers burst and cause injury n n DO NOT use unstable saucepans Always make sure that you position the handles away f...

Page 7: ...Should a crack appear in the surface disconnect the appliance immediately from the supply and arrange for its repair Always LIFT pans off the hob Sliding pans may cause marks and scratches Fig 1 4 Alw...

Page 8: ...nduction hob so please check carefully before purchasing any cookware Pans made of copper aluminium or ceramic are not suitable for use on an induction hob The kind of pan you use and the quantity of...

Page 9: ...a lid will help the contents boil more quickly n n Always take care before touching the surface even when the hob is turned off It may be hotter than you think The induction hob comprises of five cook...

Page 10: ...ctivated the hob control display will flash alternately between the A setting and the chosen power level Once the Automatic Heat up time has ended the hob display will stop flashing and will show the...

Page 11: ...the cooking zones are linked Fig 2 8 shows the hob layout Zones A and B are linked together as are zones C D and E This means that when using zone A on Power Boost and then switching zone B to Power...

Page 12: ...he grill to preheat n n DO NOT leave the grill on for more than a few moments without the grill pan underneath it otherwise the knobs may become hot Once the grill has preheated slide the carriage out...

Page 13: ...out The oven temperature is then maintained by the fan oven element and fan Should you choose to place food into the cold oven prior to cooking while using the Rapid Response function make sure that c...

Page 14: ...and joints should not be defrosted in this way We recommend this be carried out in a refrigerator Defrosting should not be carried out in a warm oven or when an adjoining oven is in use or still warm...

Page 15: ...unction Turn the oven temperature knob to the temperature required Fig 2 14 The oven heating light will glow until the oven has reached the temperature you selected It will then cycle on and off durin...

Page 16: ...red e g 20 seconds Fig 2 18 3 Turn the Timer A knob to the Manual D setting to see the current time and the Bell symbol on the display Fig 2 19 Cancel the Timer Alarm Once the specified time has elaps...

Page 17: ...2 22 4 Turn the Timer A knob to the Auto H setting The display will show the current time the Cooking symbol and the word AUTO Fig 2 22 5 Once the specified time has elapsed it will emit an alarm and...

Page 18: ...the display will disappear and the word AUTO will flash Fig 2 27 7 Once the specified time has elapsed it will emit an alarm There are two ways to cancel the alarm refer to Cancel the Timer Alarm page...

Page 19: ...tin which is designed to fit the Handyrack Any other vessel could be unstable It can be fitted at two different heights One of the oven shelves must be removed and the other positioned to suit When th...

Page 20: ...e foods such as pork or fish should be avoided if a long delay period is planned especially in hot weather Whole poultry must be thoroughly defrosted before being placed in the oven Check that meat an...

Page 21: ...0 minutes according to size 2 3 hours 45 60 minutes 40 45 minutes 2 to 3 hours 20 30 minutes 15 20 minutes 15 20 minutes per 500g Steaks according to thickness Conventional Oven Temperature C Shelf Po...

Page 22: ...r spills and boil overs that occur while cooking turn off the unit and wipe the area surrounding the hot zone with a clean paper towel If a spill other than a sugary substance is on the hot zone do no...

Page 23: ...Stubborn particles may be removed from the grid using a nylon brush The grill pan can be easily removed for cleaning as follows Remove the grill pan support frame by pulling the grill pan forward Fig...

Page 24: ...abrasive cleaners or sharp metal scrapers to clean the oven door glass since they can scratch the surface which may result in shattering of the glass Ovens Cook Clean Panels The ovens have side Cook...

Page 25: ...ides and plinth Painted surface Hot soapy water soft cloth Splashback rear grille Enamel or stainless steel Hot soapy water soft cloth Cream cleaner with care if necessary Control panel Paint enamel o...

Page 26: ...5 pans are used simultaneously The type of pan may also contribute to induction noise The cooling fan The induction hob incorporates a cooling fan This cooling fan is active when either the grill or...

Page 27: ...same depth all over For example if it is deeper at the back then the back of the cooker should be raised up or the front lowered If the cooker is not level arrange for your supplier to level it for y...

Page 28: ...o protect your fingers with a glove in case the bulb should shatter unscrew the old bulb Screw in the new bulb clockwise and then screw the bulb cover back on Turn on the electricity supply and check...

Page 29: ...a combustion products evacuation device Therefore particular attention must be given to the relevant requirements regarding ventilation All rooms require a window that can be opened or equivalent whil...

Page 30: ...ides and rear of the appliance should be heat splash and steam resistant Certain types of vinyl or laminate kitchen furniture are particularly prone to heat damage and discolouration We cannot accept...

Page 31: ...cooker Repositioning the Cooker Following Connection If you need to move the cooker once it has been connected make sure it is switched off at the supply switch before gripping under the fascia panel...

Page 32: ...pans of the correct size and material Grill Check Turn on the grill control and check that the grill heats up Oven Check Set the clock as described earlier and then turn on the ovens Check the oven fa...

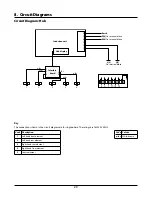
Page 33: ...phase Circuit diagram 5 3 4 Earth N 6 N 4 L 2 L 3 E 5 4 3 2 1 Interface board 1 2 5 3 4 Induction unit Hob display w br w br w br w br w br 1 2 On terminal block On terminal block On terminal block Co...

Page 34: ...ription A1 Grill thermostat A2 Grill elements A3 Grill front switch B1 Multi function oven thermostat B2 Multi function oven control B2a Multi function oven thermostat front switch B3 Multi function o...

Page 35: ...Positioning the Cooker Ratings Max 1 85 kW Boost 2 5 kW Max 1 85 kW Boost 3 0 kW Max 1 85 kW Boost 2 5 kW Max 1 15 kW Boost 2 0 kW Max 1 15 kW Boost 2 0 kW Zone 1 Zone 2 Zone 3 Zone 5 Zone 4 Hotplate...

Page 36: ...y Consumption ECElectric cooking Wh kg 180 Zone 3 cm 18 5 Heating Technology Energy Consumption ECElectric cooking Wh kg 172 Zone 4 cm 15 5 Heating Technology Energy Consumption ECElectric cooking Wh...

Page 37: ...ght hand Efficiency Fuel type Electric Cavity type Fanned Power conventional Power forced air convection 2 5 Volume Litres 73 Energy consumption electricity conventional kWh cycle Energy consumption e...

Page 38: ...34 Notes...

Page 39: ...authorised to act on behalf of AGA Rangemaster Exceptions Items not included under the free 1 year warranty include pan supports griddles wok rings baking trays grill pans trivets filters light bulbs...

Page 40: ...ed Office Juno Drive Leamington Spa Warwickshire CV31 3RG Search Rangemaster UK Rangemaster continuously seeks improvements in specification design and production of products and thus alterations take...

Reviews: