


4
•
DO NOT
use the top of the flue (the slot
along the back of the cooker) for warming
plates, dishes, drying tea towels or
softening butter.
•
DO NOT
use water on grease fires and
never pick up a flaming pan. Turn the
controls off and then smother a flaming
pan on a surface unit by covering the pan
completely with a well fitting lid or baking
tray. If available, use a multi-purpose dry
chemical or foam-type fire extinguisher.
•
DO NOT
modify this appliance. This
appliance is not intended to be operated
by means of external timer or separated
remote-control system.
•
If flammable materials are stored in the
drawer, oven(s) or grill(s) it may explode
and result in fire or property damage.
•
If the supply cord is damaged, it must be
replaced by the manufacturer, its service
agent or similarly qualified persons in
order to avoid a hazard.
Peculiar Smells
When you first use your cooker it may give off
an odour. This should stop after use.
Before using for the first time, make sure that
all packing materials have been removed and
then, to dispel manufacturing odours, turn the
ovens to 200 °C and run for at least an hour.
Before using the grill for the first time you
should also turn on the grill and run for 30
minutes with the grill pan in position, pushed
fully back and the grill door open.
Make sure the room is well ventilated to the
outside air (see ‘Ventilation’ below). People with
respiratory or allergy problems should vacate
the area for this brief period.
Ventilation
The use of a cooking appliance results in the
production of heat and moisture in the room
in which it is installed. Therefore, make sure
that the kitchen is well ventilated: keep natural
ventilation holes open or install a powered
cookerhood that vents outside. If you have
several hotplates/burners on, or use the cooker
for a long time, open a window or turn on an
extractor fan
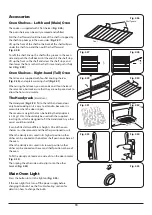
Oven Care
•
When the oven is not in use and before
attempting to clean the cooker always be
certain that the control knobs are in the
OFF
position.
•
Use oven gloves to protect your hand from
potential burns.
•
Cooking high moisture content foods can
create a ‘steam burst’ when the oven door
). When opening the oven,
stand well back and allow any steam to
disperse.
•
The inside door face is constructed with
toughened safety glass. Take care
NOT
to scratch the surface when cleaning the
glass panel.
•
Accidental damage may cause the door
glass panel to fracture.
•
Keep oven vent ducts unobstructed.
•
DO NOT
use harsh abrasive cleaners or
sharp metal scrapers to clean the oven
door glass since they can scratch the
surface, which may result in shattering of
the glass.
•
Make sure the shelves are pushed firmly
to the back of the oven.
DO NOT
close the
door against the oven shelves.
•
DO NOT
use aluminium foil to cover
shelves, linings or the oven roof.
•
When the oven is on,
DO NOT
leave the
oven door open for longer than necessary,
otherwise the control knobs may become
very hot.


