


4
The Hob
When you cook on a ceramic hob its
very
important
to use the right sort of pans...
1
Use only pans that are suitable for ceramic hobs.
We recommend stainless steel and enamelled steel
pans because pots and pans with copper or aluminium
bases leave traces on the hob that are diffi
cult to
remove.
Glass-ceramic cookware is not suitable because of its poor
conductivity.
2
Pots and pans should have thick, smooth, fl at bottoms.
This ensures that there is the maximum heat transfer from
the hob to the pan, making cooking quick and energy
effi
cient.
Never use a round bottomed Wok even with a stand.
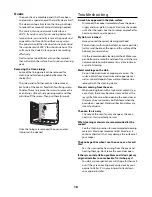
3
The very best pans have bases that are very slightly
curved in when cold. If you hold a ruler across the bottom
you will see a small gap in the middle. When they heat up
the metal expands and lies fl at on the cooking surface.
Make sure that the base of the pan is clean and dry to
prevent any residue burning onto the hob panel. This
also helps prevent scratches and deposits (such as lime
specks).
4
Always use pans that are the same size as (or slightly
larger than) the areas marked on the hob top. Using
smaller pans wastes heat, and any spillage will be burnt
on. Using a lid will help the contents boil more quickly.
5
Always lift pans off the hob. Sliding pans may cause marks
and scratches. Always turn the control to the off position
before removing a pan.
6
There are indicator lights for each of the cooking areas.
These come on when a hob control is turned on and
stay lit while the surface cools. Always take care before
touching the surface even when it is turned off - it may be
hotter than you think.
7
The ratings of the cooking areas are shown on the
diagram above.
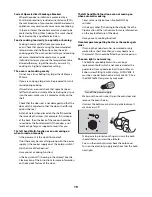
8
On the right of the hob is a dual purpose area. The
inner ring marks out a 1.2kW hob area, the outer line
marks the extent of the Warmer. Turn the control to the
fi rst (Warmer) position to heat the whole area to a low
temperature. Use the Warmer for keeping food warm
while the fi nal touches are put to a meal. For best results,
pre-heat a covered serving dish for 10 minutes before
adding food to it.
For best results, pre-heat a covered serving dish for 10
minutes before adding food to it.
Use only heat resistant dishes
.
Turn it further to use the inner ring as a normal hob plate.


