background image

26

INSTALLATION 

Check the appliance is electrically safe and gas sound when you have finished.

Dear Installer

Before you start your installation, please complete the details 

below, so that, if your customer has a problem relating to 

your installation, they will be able to contact you easily.

ArtNo.050-0011 - Installer information table

Installer’s Name

Appliance Serial Number

Installer’s Telephone Number

Installer’s Company

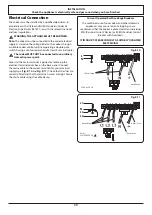
Safety Requirements and 
Regulations


n

This cooker must be installed in accordance with 

the relevant instructions in this booklet, with the 

relevant national and local regulations, and with the 

local electricity supply companies’ requirements.


n

The appliance must be installed in accordance with 

the regulations in force and only in a well ventilated 

space.


n

Read the instructions before installing or using this 

appliance.

Provision of Ventilation

This appliance is not connected to a combustion products 

evacuation device. Particular attention shall be given to the 

relevant requirements regarding ventilation.
All rooms require a window that can be opened, or 

equivalent, while some rooms require a permanent vent in 

addition to the window.

Location of Cooker

The cooker may be installed in a kitchen/kitchen diner but 

NOT in a room containing a bath or shower.


n

This appliance is designed for domestic cooking 

only. Use for any other purpose could invalidate any 

warranty or liability claim.

You will need the following equipment to complete the 

cooker installation satisfactorily:

• 

Multimeter: For electrical checks.

You will also need the following tools:
1. 

Electric drill

2. 

Masonry drill bit (only required if fitting the cooker on a 

stone or concrete floor)

3. 

Wall plugs (only required if fitting the cooker on a stone 

or concrete floor)

4. 

Steel tape measure

5. 

Cross head screwdriver

6. 

Flat head screwdriver

7. 

Spirit level

8. 

Pencil

9. 

Adjustable spanner

10. 

Screws for fitting stability bracket

11. 

13 mm spanner or socket wrench
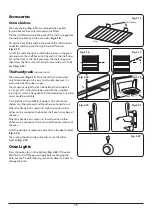
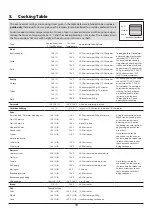
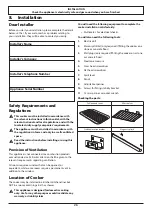
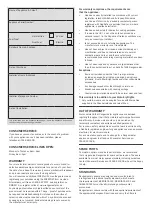
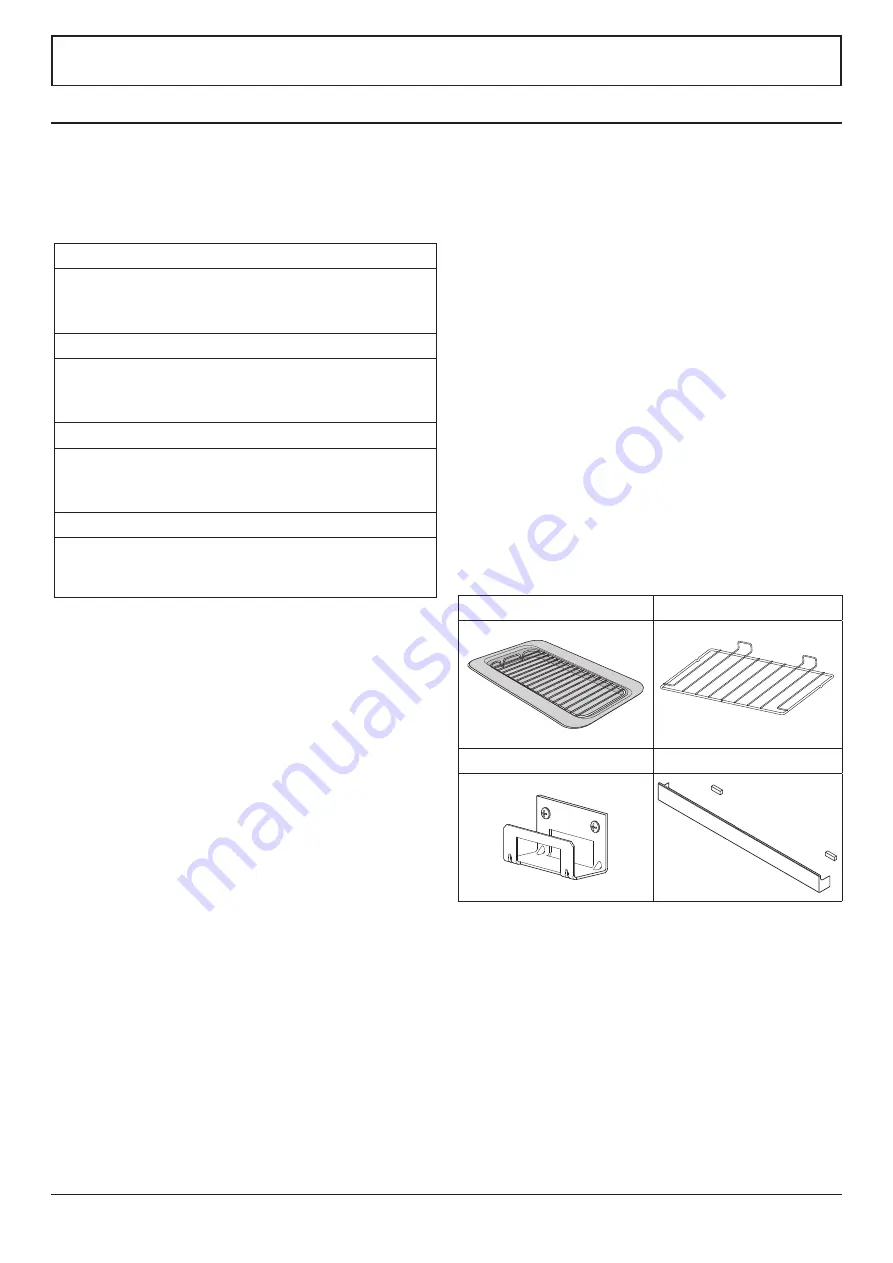
Checking the parts:

8. Installation

Grill pan and trivet

4 flat shelves

Stability location bracket

Magnetic plinth

Summary of Contents for U111031 - 01

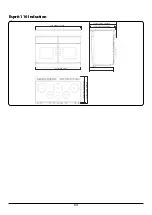
Page 1: ...Esprit 110 Induction U111031 01 USER GUIDE INSTALLATION INSTRUCTIONS...

Page 2: ...acted via e mail Facebook Twitter message or Instagram comment 4 We cannot guarantee your kitchen will be professionally photographed 4 Any photographs received and professional photographs taken will...

Page 3: ...st Setting P 12 Overheat Function 13 Glide out Grill 13 The Ovens 14 Fan oven 14 Operating the ovens 14 Accessories 15 Oven Lights 15 3 3 Button clock 16 4 Cooking Tips 18 5 Cooking Table 19 6 Cleanin...

Page 4: ...ii...

Page 5: ...after you have stopped cooking Care should be taken to avoid touching heating elements Children less than 8 years of age shall be kept away unless continuously supervised CAUTION A long term cooking p...

Page 6: ...quirements The cooker may be installed in a kitchen kitchen diner but NOT in a room containing a bath or shower The cooker MUST NOT be connected to an ordinary domestic power point It is normal for th...

Page 7: ...ually WARNING Before removing replacing the bulb turn off the power supply and make sure that the oven is cool DO NOT use cooking vessels on the hotplate that overlap the edges ALWAYS allow the cooker...

Page 8: ...ak because of the sudden change in temperature Only certain types of stainless steel enamelled steel or cast iron cookware with enamelled bases are suitable for induction hob cooking ALWAYS heat fat s...

Page 9: ...riddle plate or pans may cause marks and scratches Fig 1 6 Take care NOT TO PLACE HOT LIDS onto the hob surface Fig 1 7 Lids that have been used to cover a hot pan can stick or create a vacuum effect...

Page 10: ...ontrol DO NOT rely on the pan detector Oven care When the oven is not in use and before attempting to clean the appliance ALWAYS be certain that the control knobs are in the OFF position Use oven glov...

Page 11: ...low anyone to climb or stand on the hob DO NOT use the hob surface as a cutting board DO NOT leave utensils foodstuffs or combustible items on the hob when it is not in use e g tea towels frying pans...

Page 12: ...water seeps into the appliance Before you remove any of the grill parts for cleaning make sure that they are cool or use oven gloves DO NOT use any abrasive substances on the grill and grill parts DO...

Page 13: ...of pan you use and the quantity of food affects the setting required Higher settings are required for larger quantities of food Pots and pans should have thick smooth flat bottoms Fig 2 2 This allows...

Page 14: ...of the following induction hob functions Pan Detector H Residual Heat Indicator A Automatic Heat up Child Lock L1 L2 Low Temperature Setting P Power Boost Setting Pan Detector n IMPORTANT After use sw...

Page 15: ...r choice 1 to 9 The pan will heat up at 100 power for a specified time before the power is reduced to the level selected When the Automatic Heat up function is activated the hob control display will f...

Page 16: ...shown on the hob control display Power Boost allows additional power to be made available for each of the cooking zones This is useful to bring a large pan of water to the boil quickly The Power Boos...

Page 17: ...arriage forward using the handle Fig 2 9 The grill has two elements that allow either the whole area of the pan to be heated or just the right hand half Adjust the heat to suit by turning the knob To...

Page 18: ...for a non fan oven NOTE Please remember that all cookers vary so temperatures in your new ovens may differ to those in your previous cooker Operating the ovens Fan Ovens Turn the oven knob to the des...

Page 19: ...hich is designed to fit the Handyrack Any other vessel could be unstable It can be fitted at two different heights One of the oven shelves must be removed and the other positioned to suit When the Han...

Page 20: ...ch an alarm will sound 1 Press the mode M button once Fig 3 2 The bell symbol will flash on the display Select the desired countdown from 00 01h to 23 59h using the button Fig 3 3 The countdown will a...

Page 21: ...rent time will be displayed along with the word AUTO Fig 3 9 3 Set the oven to the required cooking temperature 4 During the cook period the cook symbol is illuminated in the display 5 When cooking is...

Page 22: ...d especially in hot weather n DO NOT place warm food in the oven to be timed n DO NOT use a timed oven that is already warm n DO NOT use the timed oven if the adjoining oven is already warm Whole poul...

Page 23: ...0 C 150 C for remainder Do not forget to include the weight of the stuffing For fresh or frozen pre packed poultry follow instructions on the pack Thoroughly thaw frozen poultry before cooking Cassero...

Page 24: ...unding the hot zone with a clean paper towel If a spill other than a sugary substance is on the hot zone do not clean until the unit has completely cooled down and then follow the instructions below C...

Page 25: ...de clips Fig 6 3 For safety push the side rails back into the grill chamber If you need to remove the side rails to allow cleaning of the grill chamber you can unhook them from the grill chamber sides...

Page 26: ...ove the cooker forward to gain access to the sides see the Moving the Cooker section under Installation Cook Clean Panels The ovens have side Cook Clean panels which have been coated with a special en...

Page 27: ...ermarket Sides and plinth Painted surface Hot soapy water soft cloth Splashback rear grille Enamel or stainless steel Hot soapy water soft cloth Cream cleaner with care if necessary Control panel Pain...

Page 28: ...is noisy The note of the oven fan may change as the oven heats up this is perfectly normal The cooling fan The induction hob incorporates a cooling fan This cooling fan is active when either the grill...

Page 29: ...red to turn it round during cooking If two shelves are used check that space has been left for the heat to circulate When a baking tray is put into the oven make sure that it is placed centrally on th...

Page 30: ...acuation device Particular attention shall be given to the relevant requirements regarding ventilation All rooms require a window that can be opened or equivalent while some rooms require a permanent...

Page 31: ...room temperature DO NOT box the cooker in it must be possible to move the cooker in and out for cleaning and servicing If the cooker is near a corner of the kitchen a clearance of 130mm is required t...

Page 32: ...then you need to unplug it and having gripped under the fascia panel and lifted the front of the cooker slightly Fig 8 6 you need to check behind the cooker to make sure that the gas hose is not caugh...

Page 33: ...omestic power point Access to the mains terminal is gained by removing the electrical terminal cover box on the back panel Connect the mains cable to the correct terminals for your electrical supply t...

Page 34: ...g 8 12 Final Checks Hob Check Check each cooking zone in turn Be sure to use pans of the correct size and material Grill Check Turn on the grill control and check that the grill heats up Oven Check Se...

Page 35: ...4 E 5 4 3 2 1 INTERFACE BOARD 1 2 5 4 3 INDUCTION UNIT HOB DISPLAY Earth N 6 N 4 L 2 L 3 On Terminal Block On Terminal Block On Terminal Block w br w br w br w br w br Code Description 1 Left hand fro...

Page 36: ...gle phase The ratings are for 230V 50Hz Code Description X01 Grill Front Switch X02 Grill Energy Regulator X03 Left Hand Grill Element X04 Right Hand Grill Element X05 Left Hand Oven Thermostat X07 Le...

Page 37: ...ng the Cooker Ratings Max 1 85 kW Boost 2 5 kW Max 1 85 kW Boost 3 0 kW Max 1 85 kW Boost 2 5 kW Max 1 15 kW Boost 2 0 kW Max 1 15 kW Boost 2 0 kW Zone 1 Zone 2 Zone 3 Zone 5 Zone 4 Hotplate energy sa...

Page 38: ...34 Esprit 110 Induction 1083 PLINTH WIDTH 608 EXCLUDING HANDLES 572 PLINTH 646 INCLUDING HANDLES 1100 OVERALL WIDTH 646 INCLUDING HANDLES 608 EXCLUDING HANDLES...

Page 39: ...ergy Consumption ECElectric cooking Wh kg 172 Zone 3 cm 18 5 Heating Technology Energy Consumption ECElectric cooking Wh kg 180 Zone 4 cm 15 5 Heating Technology Energy Consumption ECElectric cooking...

Page 40: ...e Electric Cavity type Fanned Power conventional Power forced air convection 2 5 Volume Litres 79 Energy consumption electricity conventional kWh cycle Energy consumption electricity forced air convec...

Page 41: ...37 NOTES...

Page 42: ...38 NOTES...

Page 43: ...by persons or organisations other than those authorised to act on behalf of AGA Rangemaster Exceptions Items not included under the free 1 year guarantee include pan supports griddles wok rings bakin...

Page 44: ...cular appliance Clarence Street Royal Leamington Spa Warwickshire CV31 2AD England Consumer Services 44 0 1926 457628 Fax 44 0 1926 450526 E mail consumers agarangemaster co uk www rangemaster co uk F...

Reviews: