37
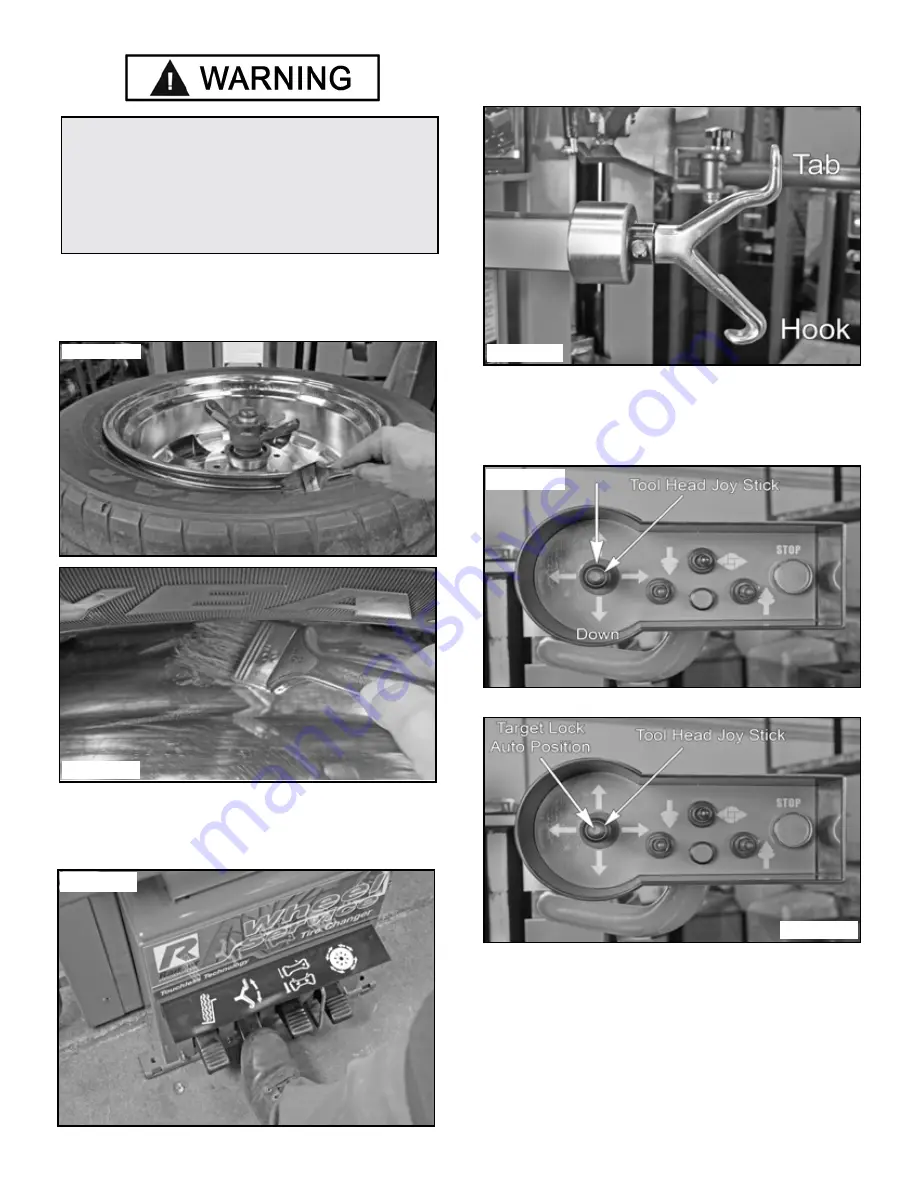
25. Apply tire manufacturer’s approved rubber lubricant
liberally to entire circumference of both Upper and Lower
Beads after loosening Beads. (See Fig. 11.21 - 11.22)
26. If necessary press the Hook Rotation Pedal to
position the Tool Head with the Hook pointing Down.
(See Fig. 11.23)
27. Using the Tool Head Control, lower the Tool Head
down to just above the rim. (See Fig. 11.24)
28. Then press the Target Lock™ button on the Tool
Head Control Joystick and hold. The Tool Head will
extend from it’s preset position to approximately 1/4” -
3/8” from the Rim edge. (See Fig. 11.25 - 11.26)
WARNING!
ALWAYS USE A LIBERAL AMOUNT OF TIRE
MANUFACTURE’S RECOMMENDED LUBRICANT.
FAILURE TO DO SO CAN DAMAGE THE TIRE, RIM
OR THE ELECTRIC MOTOR AND MAY VOID THE
WARRANTY.
Fig. 11.21
Fig. 11.22
Fig. 11.23
Fig. 11.25
Fig. 11.26
Fig. 11.24
Summary of Contents for RX3040
Page 29: ...29 Fig 9 47 Fig 9 48...
Page 58: ...58 CRITICAL SAFETY WARNINGS...
Page 59: ...59 CRITICAL SAFETY WARNINGS...
Page 61: ...61 Parts Breakdowns...
Page 62: ...62...
Page 63: ...63...
Page 64: ...64...
Page 65: ...65...
Page 66: ...66...
Page 67: ...67...
Page 68: ...68...
Page 69: ...69...
Page 70: ...70 T I R E C H A N G E R X Electric Schematic Diagrams 12...
Page 71: ...71 T I R E C H A N G E R All electric appliances must be installed by electricians 13...


