17
WEIGHT LOCATION
VERIFICATION PROCEDURE
NOTE:
Before performing the Weight Location Verification
Procedure, make sure the balancer is bolted down and/or
rigid to the floor and that the shaft and centering cones are
clean and undamaged. Even the slightest dirt or damage
can cause inaccurate readings. PAY CLOSE ATTENTION
to the following procedure. If not followed correctly, the
balancer will not perform accurately. This balancer
should be checked every 30 days.
NOTE:
A standard 14” steel wheel and tire balanced to within 5
grams on either inner or outer with minimal wear or
damage to the tire or wheel is required for this procedure.
1. Balance an average size tire and wheel to “00”—“00”
2. Add a 100 gram wheel weight to the outer edge of
the wheel.
3. Press the Start button (close Hood). Wheel will spin
and stop.
4. The balancer should call for 100 grams on the outer
indicator and “00”on the inner indicator.
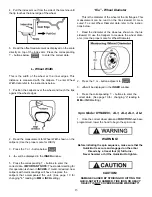
5. Rotate the wheel until all the LEDs on the outer
indicator are lit.
6. The 100 gram wheel weight should be at 6(o clock)
Bottom Dead Center.
7. Remove the 100 gram wheel weight from the outer
edge of the wheel.
8. Install the 100 gram wheel weight on the inner edge of
the wheel.
9. Press the Start button. Wheel will spin and stop.
10. The balancer should call for 100 grams on the inner
indicator and “00” on the outer indicator.
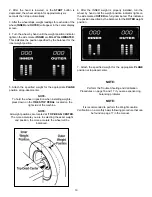
11. Rotate the wheel until all the LEDs are lit on the inner
indicator are lit.
The 100 gram wheel weight should be at (6 o’clock)
Bottom Dead Center.
If the location is not as Bottom Dead Center (6 o’clock),
please contact the Ranger Products Customer Service
Department.
BendPak Inc. / Ranger Products
1645 Lemonwood Dr.,
Santa Paula, CA. 93060
1-805-933-9970
1-800-253-2363
www.rangerproducts.com
www.bendpak.com
SELF-CALIBRATION PROCEDURE
NOTE:
Before performing the self-calibration procedure,
make sure the balancer is bolted down and/or rigid to the
floor and that the shaft and centering cones are clean and
undamaged. Even the slightest dirt or damage can cause
inaccurate readings. PAY CLOSE ATTENTION to the
following procedure. If not followed correctly, the balancer
will not perform accurately. This balancer
should be checked every 30 days.
1. Turn on the power. The display will show USA 511.
2. Select a centering / mounting cone that best fits the
center hole of the wheel.
NOTE:
A standard 14” steel wheel and tire with minimal wear or
damage to either is recommended for this procedure.
3. Lift the wheel onto the arbor and slide it back against the
arbor hub.
4. Slide the cone over the arbor and into the center hole of
the wheel. It will be necessary to lift the wheel slightly.
5. While holding the wheel and cone in position, thread the
Quick-Nut over the arbor and secure tightly.
5. Enter the correct wheel data. (Refer to page 12.)
7. Press and hold the “R” and “START” button until the
Weight Indicator lights stop flashing. The screen will then
display “CAL CAL”
8. Close the hood and/or press START to begin the
calibration.
9. The wheel will spin for approximately 6 seconds then
stop. “Add 100” will be displayed if Grams is selected or
“ADD 3.50” if OZ is selected.
10. Place one 100 gram weight (included with balancer) on
the outer edge of the rim.
11. Close the hood and press the START button. The wheel
will spin for approximately 6 seconds and “END Cal” will be
displayed.
NOTE:
It is a good idea to keep the known good “calibration tire”
set up for the monthly calibration procedure.


