14
Calibration
Take the calibration plate in accordance with the selected scanning zone: large for scanning zones №
1,2, small for scanning zone № 3. Install the plate on the magnetic stand in front of the scanner. The
approximate distance to fields is specified in the table.
Scanning zone, №
1
2
3
Distance, cm
65-70
37-40
15-18
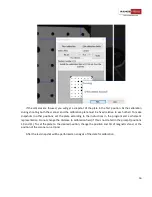
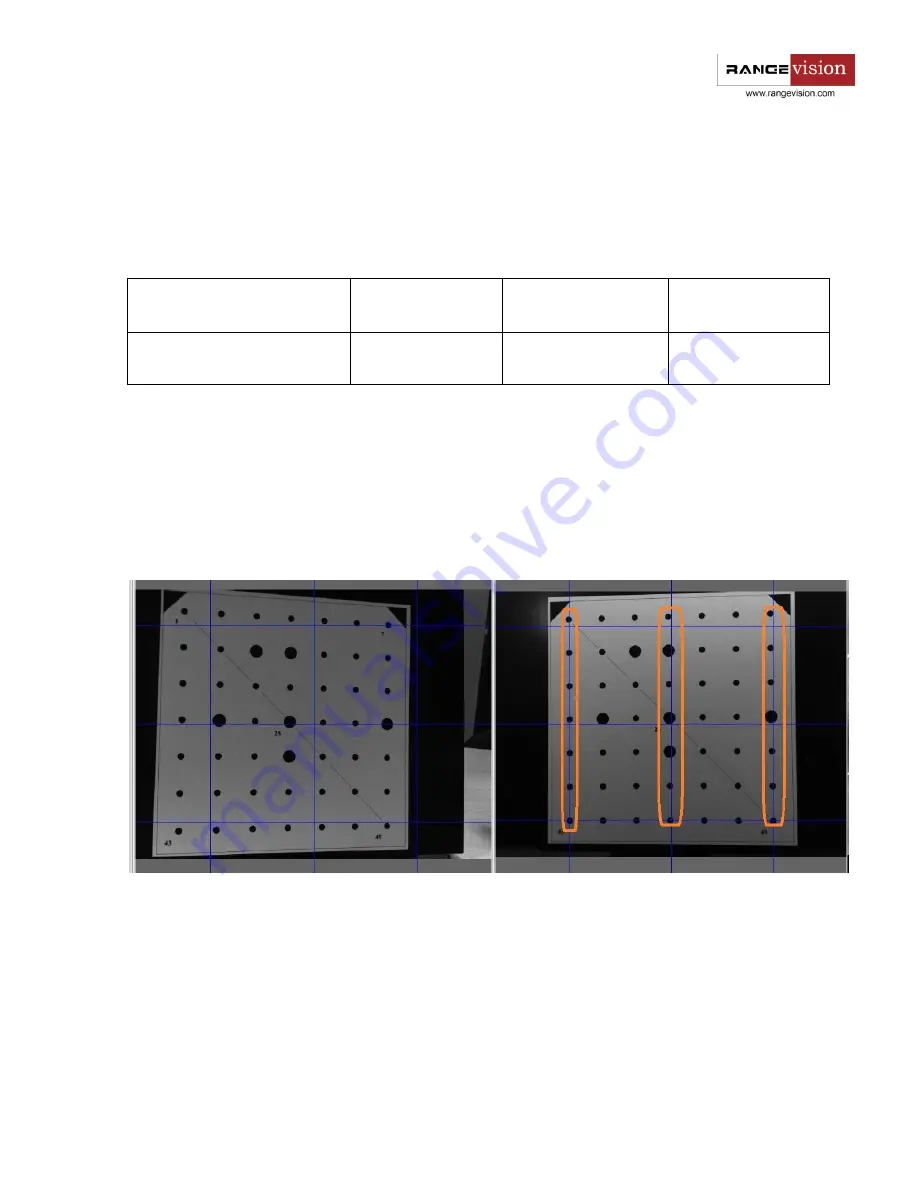
Install the plate in such a way as to ensure that the blue markings on the view from
one of the cameras
has matched with furthest marks on the calibration plate, as shown in the figure below. When placing plate
on the stand, pay attention that top part of the plate has black triangles. Move the plate closer to or further
away from the scanner, until the image from the camera will not display that the vertical lines of grid cross
the furthest marks on the plate. On the figure the working distance is determined by the right-hand camera.
The distance from the scanner cameras to the plate shall be maintained in this position during calibration
and scanning (hereinafter - working distance).
Move the plate or the scanner so that the view of the plate from both cameras is symmetrical, keeping
the distance from the scanner to the plate unchanged. Turn on the mode
Lines and stripes
and adjust the
focus of the projector, so that the lines are as sharp as possible. Setting up is carried by scrolling a wheel
next to the projector lens.


