46
Caution!
When scanning large objects (like a car) and moving the scanner frequently, the scanner
eventually may report that it cannot find markers.
You need to perform orientation.
●
If the scan during stitching is in obviously incorrect position, it is clear that such scan should
be deleted - select it in the tree and press Delete. If you want to create the reference grid
press the
File
→
Save reference grid.
●
Scan an object from all required sides, visually observing the correct alignment of the scans
in the model view mode.
●
Go to ScanMerge for further processing or create a new project to scan the object from the
other side.
Scanning on the turn table
Scanning on the turn table is performed without markers. Scanned object is installed on the platform of
the table and is automatically scanned from multiple angles.
Scanning on the turn table:
●
Create new
project on turn table
or open an existing one
●
Center the object on the platform of the table
●
Place the turn table to the scanner so that during scanning the object is on the optimal
distance from the scanner.
●
Configure exposure, brightness of lines and stripes, projector sharpness
●
Go to
Options
, set the scan area clipping parameters in the field
Cut cylinder
, based on the
size of scanned object
●
Set the number of scans per the full turn of the table in the
Positions
field, or specify the set
of rotation angles in angles in the
Angles
line.
Note
The optimal number of table positions - 8-12. With the increase in the number of the
possible positions, surplus amount of object fragments may also be created, which will led
to a more long processing.
●
Remove the scanned object from the platform of the table and set a calibration plate instead.
The size of this calibration plate should be one size smaller than the one used during the
scanner calibration procedure. For calibration of turn table on the 4th scan area you should
use the field "Evaluate rotation axis".
●
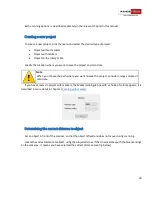
Measure the distance from the central marker on the plate to the table plane, record this
value in the field
Height of central marker in Options.
●
Press the button
Define the axis of turn table
in the
Table calibration
menu
.

