23 |
P a g e
LEAK TEST
Although all gas connections on the grill are leak tested at the factory prior to shipment,
a complete gas tightness check must be performed after assembly to ensure fittings were
not damaged after leaving the factory. Periodically check the entire system for leaks
following the procedures listed below.
BEFORE TESTING
Make sure that all packing material is removed from the grill including tie-down straps.
Make a soap solution of one part liquid detergent and one part water. You will need a
spray bottle, brush, or rag to apply the solution to the fittings. For the initial leak test, make
sure the LP cylinder is full.
WARNING
NEVER PERFORM LEAK TEST WITH AN OPEN FLAME OR WHILE
SMOKING.
If there is excessive abrasion, wear, or damage to the hose, parts must be
replaced prior to operation. The replacement hose must be specified by the
manufacturer.
TO TEST
1. Make sure the control valves are in the
OFF
position then turn on the gas supply.
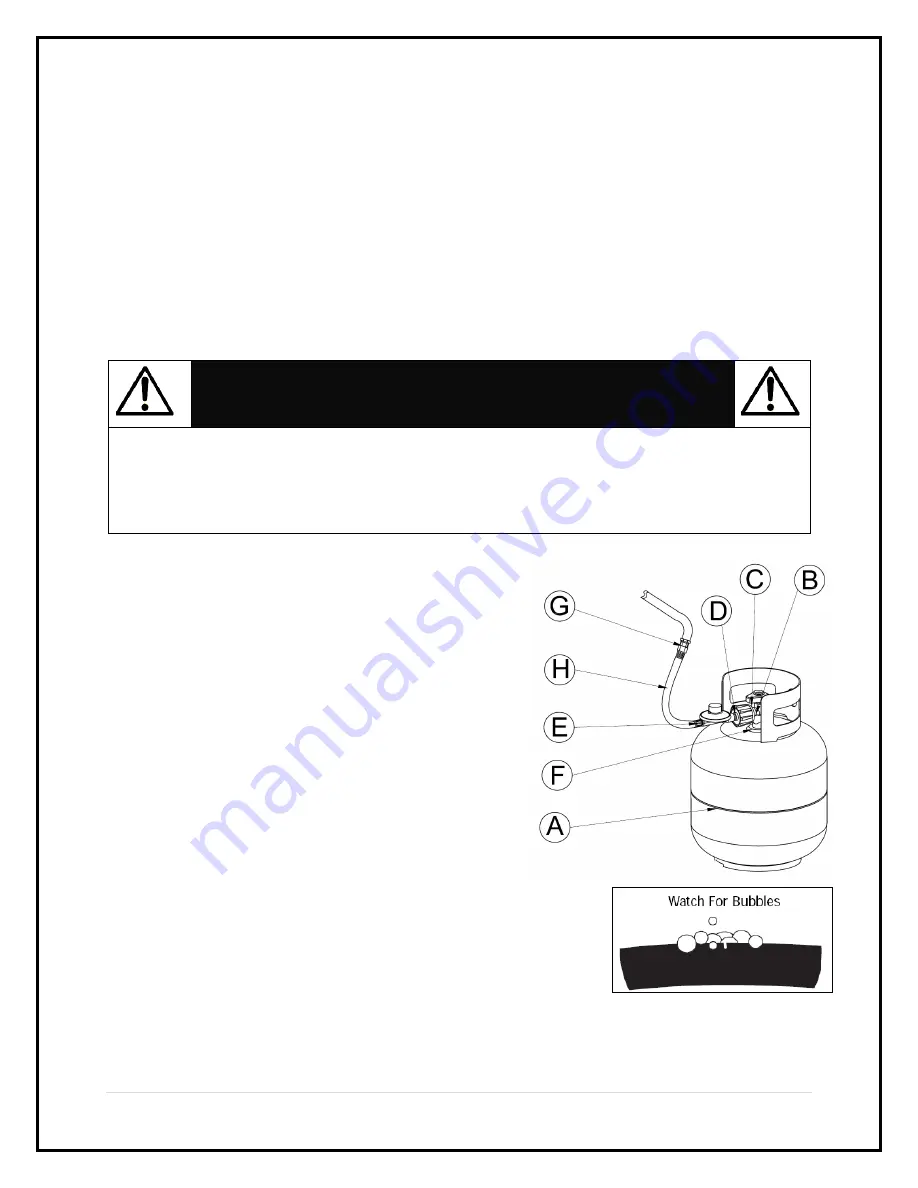
2. Check all connections from the gas cylinder, LP
gas regulator, and supply valve, including all
connections to the pipe for the burners.
Points where the soap-water mixture should be
applied
(soap bubbles will appear if a leak is present):
A Supply tank (cylinder) weld.
B Connection nut to tank valve.
C Back side of connection nut to brass nipple.
D Brass nipple connections to gas supply hoses.
E Regulator connections to gas supply hose.
F Tank valve to cylinder
G Hose connection to gas manifold.
H The full length of gas supply hose.
3. If a leak is present, immediately turn off the gas supply and tighten the leaky fittings.
4. Turn the gas back on and recheck.
Summary of Contents for Member's Mark GR2298906-MM-01
Page 7: ...7 P a g e Package Contents...


