12 Installation and Set Up
Power Cord
The Eastey L-Bar Sealer can be used in a variety of locations. To allow the option of
hard wiring the power cord into an existing electrical panel the Eastey L-Bar Sealer is
shipped without a three pronged plug attached to the power cord. If the L-Bar sealer is
going to be used with a typical three pronged outlet attach a certified and approved
three pronged plug to the power cord.
Attention!
Ensure that any wiring complies with all electrical wiring
codes and specifications that apply to the installation
location.
Location Requirements
There are four casters located on the bottom of the L-Bar Sealer to help in moving the
machine. When the sealing machine is in the operating location adjust the four leveling
pads for correct height.
When installing the L-Bar Sealer please be aware of the following considerations:
1. The mounting surface is flat and level.
2. Alignment with any existing packaging lines or conveyors.
The machine should be placed on a flat, level floor so that it does not rock or move. We
recommend that the machine be securely locked in place when used.
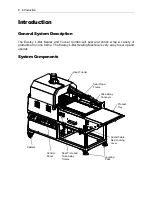
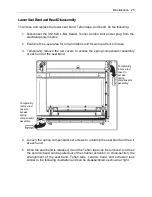
When the Eastey L-Bar Sealer Tunnel Combo is positioned in the operating location you
will need access to:
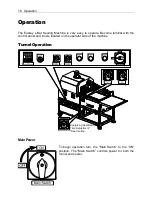
1. The control panel.
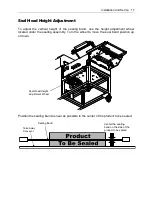
2. Seal head handle.
3. Sealer table height adjustment wheel.
4. Sealer table horizontal red locking lever.
5. Shrink film roller.
6. Pin perforation wheels.
These locations are generally accessible from the operator side of the machine. The
film and pinwheel rollers are located under the product table.
Summary of Contents for Eastey Value Series
Page 2: ......
Page 4: ......
Page 6: ......
Page 29: ...Electrical Schematic 29 Electrical Schematic...
Page 30: ...30 Electrical Schematic Electrical Schematic Continued...
Page 31: ...Illustrated Parts List 31 Illustrated Parts List...
Page 32: ...32 Illustrated Parts List...
Page 33: ...Illustrated Parts List 33...
Page 34: ...34 Illustrated Parts List...
Page 35: ...Illustrated Parts List 35...
Page 36: ...36 Illustrated Parts List...
Page 37: ...Illustrated Parts List 37...
Page 38: ...38 Illustrated Parts List...
Page 39: ...Illustrated Parts List 39...
Page 40: ...40 Illustrated Parts List...
Page 41: ...Illustrated Parts List 41...
Page 42: ...42 Illustrated Parts List...
Page 43: ...Illustrated Parts List 43...
Page 48: ......
Page 49: ......


