background image

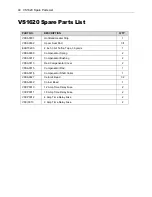
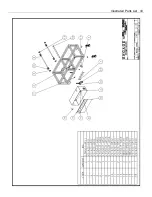
44   VS1620 Spare Parts List 


VS1620 Spare Parts List 


PART NO. 

DESCRIPTION 

Q

’TY 

VSSA0001 

Hot Band Heater Strip 

VSSA0002 

Upper Seal Pad 

3 ft. 

EAST0200 

2 inch 3 mil Teflon Tape, 36 yards 

VSSA0009 

Compensator Spring 

VSSA0012 

Compensator Bushing 

VSSA0013 

Red Compensator Cover 

VSSA0015 

Compensator Rod 

VSSA0016 

Compensator Shaft Collar 

VSSA0027 

Ceramic Bead 

32 

VSSA0032 

Corner Bead 

VSCP0010 

12 Amp Time Delay Fuse 

VSCP0011 

10 Amp Time Delay Fuse 

VSCP0012 

4 Amp Time Delay Fuse 

VSC)0013 

2 Amp Time Delay Fuse 


Summary of Contents for Eastey Value Series

Page 1: ...VS1620 L Bar Sealer Tunnel Combo Unit Value Series User Guide Rapid Packaging Inc 763 404 8900 info RapidPackaging com www RapidPackaging com...

Page 2: ......

Page 3: ...v D Copyright and Trademarks Copyright 2013 2015 Eastey Enterprises Inc All rights reserved All trademarks and brand names are the property of their respective owners Eastey Enterprises Inc 7041 Boone...

Page 4: ......

Page 5: ...the Shrink Tunnel 16 Seal Head Height Adjustment 17 Operation 18 Tunnel Operation 18 Main Power 18 Conveyor and Blower 19 Tunnel Heat 19 Setting the Tunnel Temperature 19 Blower Speed 20 Conveyor Spee...

Page 6: ......

Page 7: ...cuitry or the mechanical assemblies of this machinery Heat sealing equipment can become very hot after a period of use Keep hands away from hot surfaces if the machine is in operation or has been runn...

Page 8: ...eal and shrink wrap a variety of products all on one frame The Eastey L Bar Sealing Machine is very easy to set up and operate System Components Heat Tunnel Seal Head Frame Take Away Conveyor Product...

Page 9: ...8in 20cm 18in 45 cm width Voltage 220VAC 50 60Hz 30 Amps Machine Weight 662lbs 300kg Machine Dimensions Length A 85 6in 218cm Width B 31 5in 80cm Height C 53 5in 136cm Energizing Seal Band Time Adjus...

Page 10: ...uction Dimensions See the table at the bottom of the previous page page 9 Machine Dimensions in the Specifications table for overall machine length width and height Height C Length A Side View End Vie...

Page 11: ...a forklift or several people to move safely off the shipping pallet For shipping the product tray has been disassembled from the L Bar Sealer Assembly The Eastey L Bar Sealer has been assembled at the...

Page 12: ...machine When the sealing machine is in the operating location adjust the four leveling pads for correct height When installing the L Bar Sealer please be aware of the following considerations 1 The mo...

Page 13: ...one eighth to one quarter inch from the lower seal band Loading the Film Load the new roll of polyolefin shrink film onto the film roller under the product tray Install the film roll so the center fo...

Page 14: ...perforation rollers away from the rubber roller Position the pin perforation rollers according to the product size After threading the film move the perforating wheels back to the operating position...

Page 15: ...end roller the shrink film will split with the top of the film traveling over the product tray and the bottom traveling underneath the product tray Film Threading Diagram Perforation Pinwheels Produc...

Page 16: ...ase the red lever stopper and position the entire sealer and product tray assemblies in line with the shrink tunnel opening centering the product down the center of the tunnel Reset the red lever stop...

Page 17: ...ustment wheel located under the sealing assembly Turn the wheel to move the seal band position up or down Position the sealing band as near as possible to the center of the product to be sealed Seal H...

Page 18: ...e familiar with the control panel and timers located on the operator side of the machine Tunnel Operation MainPower To begin operation turn the Main Switch to the ON position The Main Switch controls...

Page 19: ...ink tunnel The programmable switch will display the current temperature inside the heat tunnel top and the temperature setting Press the SET button to set the temperature Press this button to select t...

Page 20: ...al time The seal time is the amount of time that the magnets will hold the seal head down on the film The seal time may vary according to the type of film in use When the seal bar frame is pressed dow...

Page 21: ...t Note The Energizing Seal Band Time Adjustment has been set at the Eastey facility and should not have to be changed See the information below for adjustment if needed The Energizing Seal Band Time i...

Page 22: ...l seal the product and release automatically according to the sealing time setting After the seal head has been released the take away conveyor will move the product into the shrink tunnel Repeat for...

Page 23: ...the Teflon tape is not torn or missing on upper and lower seal areas Replace as needed Check conveyor belt for tears Check the conveyor height adjustment wheel Lubricate chain and screws as needed Ch...

Page 24: ...d If after verifying the factors that affect heat and cycle timing Aligning the Seal Head Limit Switch and Actuator and Seal Time Take Away Time and Energizing Seal Band Time settings and the followin...

Page 25: ...sembly at each end of the seal band 4 Loosen the spring compensator set screws to unclamp the seal band and free it at each end 5 Once the seal band is released it and the Teflon tape can be removed a...

Page 26: ...s tape and bands in reverse order of disassembly 1 Carefully press the silicone pads into the sealer channels The silicone pads should be the same length as the channel extrusions into which they are...

Page 27: ...ion between the spring compensators and ceramic corner radius with no sticking or binding at any point along the band The spring compensators secure each end of the seal band and maintain uniform tens...

Page 28: ...28 Maintenance Reinstall and secure red cover over spring compensator Reinstall and secure red cover over spring compensator...

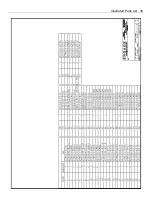
Page 29: ...Electrical Schematic 29 Electrical Schematic...

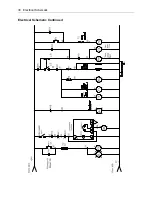
Page 30: ...30 Electrical Schematic Electrical Schematic Continued...

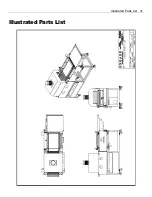
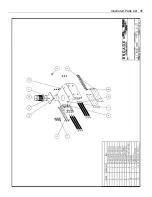
Page 31: ...Illustrated Parts List 31 Illustrated Parts List...

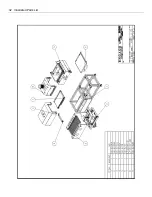
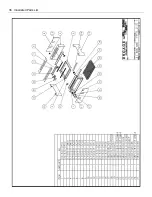
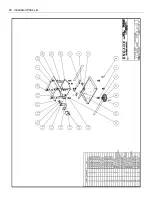
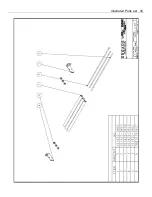
Page 32: ...32 Illustrated Parts List...

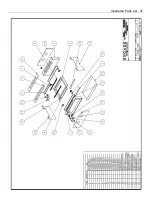
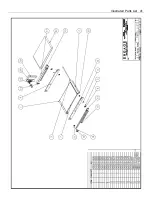
Page 33: ...Illustrated Parts List 33...

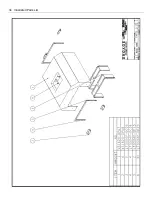
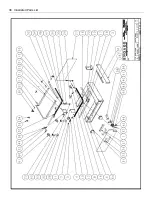
Page 34: ...34 Illustrated Parts List...

Page 35: ...Illustrated Parts List 35...

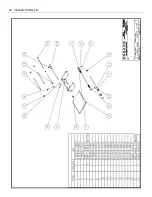
Page 36: ...36 Illustrated Parts List...

Page 37: ...Illustrated Parts List 37...

Page 38: ...38 Illustrated Parts List...

Page 39: ...Illustrated Parts List 39...

Page 40: ...40 Illustrated Parts List...

Page 41: ...Illustrated Parts List 41...

Page 42: ...42 Illustrated Parts List...

Page 43: ...Illustrated Parts List 43...

Page 44: ...eflon Tape 36 yards 1 VSSA0009 Compensator Spring 2 VSSA0012 Compensator Bushing 2 VSSA0013 Red Compensator Cover 2 VSSA0015 Compensator Rod 1 VSSA0016 Compensator Shaft Collar 1 VSSA0027 Ceramic Bead...

Page 45: ...ort number toll free at 1 800 835 9344 or 763 428 4846 or Fax 763 795 8867 or e mail info eastey com Based on the recommendation from Eastey technical support replacement components may be shipped out...

Page 46: ...AL CONSEQUENTIAL INDIRECT OR SIMILAR DAMAGES INCLUDING LOST PROFIT OR LOST OPPORTUNITIES OF ANY TYPE ARISING OUT OF THE USE OR INABILITY TO USE THESE PRODUCTS EVEN IF EASTEY ENTERPRISES INC HAS BEEN A...

Page 47: ...bo please contact your authorized Eastey reseller or Eastey Technical Service at one of the numbers listed below Toll Free Phone 800 835 9344 Phone 763 428 4846 Fax 763 795 8867 E mail eastey eastey c...

Page 48: ......

Page 49: ......
Reviews: