background image


Outside


Hood


Wiring


for


LED


Strings


to


V+


and


V

‐ 


Now


that


the


LEDs


are


connected


to


the


LED


strings,


we


have


to


attach


the


drivers


to


those


wires


to


get


power


to


the


LEDs.


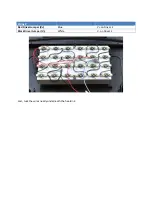
The


wires


were


attached


according


to


the


table


above.


If


you


have


a


constant


current


kit,


ensure


you


connect


the


LPC

60

1050


to


the


white


LEDs


and


the


LPC

35

700


to


the


blue


LEDs.


If


you


haven’t


already,


strip


the


outside


jacket


off


of


both


wires


and


then


use


a


wire


nut


to


connect


them


together.


An


example


is


below,


but


the


colors


differ.


Using


a


wire


nut,


connect


V+


from


the


driver


to


a


blue


(or


red)


wire


coming


from


your


hood


and


connect


V

‐ 

from


the


same


driver


to


the


corresponding


wire


according


to


our


table,


in


this


case


it


should


be


connected


to


the


white


wire


from


our


hood.


Summary of Contents for Coralife BioCube 29 Aurora Array Retrofit

Page 1: ...f lighting retrofit there are many dangers difficulties and pitfalls that may occur The Rapid LED Coralife BioCube 29 retrofit should only be attempted by people familiar with AC power and wiring elec...

Page 2: ...you must remove three fasteners from the rear of the hood to get it off of the tank We found it easiest to insert a hex wrench into one side of the fastener and gently tap laterally with a hammer unti...

Page 3: ...or and LED sockets from the hood Reflector removal requires unscrewing the two metal fluorescent bulb holders and the LED strip socket in the middle of the hood The reflector should lift out easily Cu...

Page 4: ...ews as indicated by the arrows in the photo below unclip and remove the sockets Ballast Removal The end goal of this section is to remove the ballasts and the right side AC line in two power cords fro...

Page 5: ...ications on this step be and look different depending on manufacturer modifications out of our control Keep in mind the actual goal of the step as opposed to the photos To begin with the hood facing u...

Page 6: ...Next strip and tightly cap the AC wires cut from the ballast with wire nuts...

Page 7: ...Next unclip the power connector for the left ballast...

Page 8: ...ballasts from the hood There are two screws per ballast Transformer Removal To remove the transformer on the right we first unplug it from the circuit board Simply unplug the two wires from their soc...

Page 9: ...mage the components or hurt yourself in this step the connections can be very tight and difficult to remove Please note that we will leave 4 connections as is which will switch the fans on and off Nex...

Page 10: ...rom the right side of the hood First unscrew the strain relief holding down the right side power cords Next cut the ends off of the cords and pull them out of the hood Replace the strain relief unscre...

Page 11: ...Prepared Hood Your prepped hood should look like the one below You should be able to plug it in and switch the fans off and on...

Page 12: ...osses from the hood in which case you will have to attempt repair with super glue For this retrofit it is easiest to line up one of the rearmost screws and screw it in first Next rotate the heatsink a...

Page 13: ...After the four bottom screws are snugly affixed screw in the top two screws Ensure you do not make them too tight Over tightening the top two screws may warp your hood and then the cover won t fit...

Page 14: ...ecessary More is NOT necessarily better Too little will lower conductivity and too much will create a mess A thin layer works best The photo below is about how much you should use After the thermal gr...

Page 15: ...o the first LED in your string Plug the LEDs together with the LED to LED jumpers and insert a terminal plug jumper into the last connector of the last LED in your string Remember to Apply no power un...

Page 16: ...rs the LED strings Since we cannot put the drivers in the hood next to the LEDs we will attach some wire to the driver jumpers and run that through the empty space left from removing some of the power...

Page 17: ...the strain relief post to prevent damage to internal components if the outer wires get pulled too hard Next we wire the LED strings jumpers to the bulk wire we just ran Here are wiring tables for thi...

Page 18: ...String 2 Red Driver Jumper V Blue V on Driver 2 Black Driver Jumper V White V on Driver 2 Last tuck the wires neatly underneath the heatsink...

Page 19: ...nect the LPC 60 1050 to the white LEDs and the LPC 35 700 to the blue LEDs If you haven t already strip the outside jacket off of both wires and then use a wire nut to connect them together An example...

Reviews: