background image


37


Summary of Contents for Red Sea Max 250 Retrofit

Page 1: ...her 3 Opening the Hood 5 Removing the T5 Bulb Sockets and Large Ballasts 8 Removing T5 Sockets and T5 Wiring 9 Removal of Ballasts and T5 Sockets 11 Drilling the Reflector for Heatsink Mounting Holes 11 Mounting Heatsinks to Reflector 17 Preparing the LDD Driver Board 21 LDD H 4 Board Layout 21 Pulldown Jumpers 21 Inserting LDD H Drivers Into the LDD H 4 Board 22 Installing Standoffs 24 Installing...

Page 2: ...open hood remove the stock ballasts T5 sockets and bulb clips 2 Drill 4 mounting holes in RSM reflector for each heatsink Zip tie heatsinks to RSM reflector 3 Complete LED work attach LEDs to heatsink and then wire them together Your LED strings will likely jump across two heatsinks so be aware of this when wiring 4 Install HLG and LDD drivers 5 Drill hole for dimming controller wiring if necessar...

Page 3: ...ard as it covers some screws Popping the plugs out is most easily done with a very thinly bladed flat screwdriver a regular flat blade screwdriver might be too thick After removing the plugs with a Philips screwdriver remove all screws that were previously covered by the plugs The plugs are indicated by the arrows in the photos below Remove all plugs and screws revealed by their removal There are ...

Page 4: ...4 ...

Page 5: ...screw plugs and removed the screws we missed one initially and almost cracked the hood by trying to force it open Don t force it Beginning with the outer edges gently pull it apart until you separate the two pieces when the outer edges release the rest of the separation is much easier Do not be rough and do not force it open it only takes a bit of coaxing to get the two main pieces to separate Wor...

Page 6: ...ently pushing up at the outermost edges we were able to get separation and work our way to the center eventually rotating the top cover of the hood away to reveal the inside of the hood Begin separation here ...

Page 7: ...7 Main separation point Main separation point Top Half Rotated 90 ...

Page 8: ... the clip outward and downwards with a screwdriver to release each socket You may have to clip some zip ties to release the fan wires bundled to the T5 socket wires white wires as we will remove the T5 sockets and leave the fans Repeat the process for both sides all 10 sockets Push Clips Out and Down to Release Clips 12 total per side Clips for T5 Sockets Removed ...

Page 9: ...he hood To do this we must disconnect them from the ballasts To disconnect the T5 socket harnesses from the ballasts start by disconnecting all wires from each of the three large ballasts The wire terminals on the ballasts are spring loaded Simply press the terminal to unlock it and then slide the wires out Side 2 Side 1 ...

Page 10: ...10 Push down with screwdriver on spring Loaded terminals and slide wires out All wires removed Repeat for ALL wires on ALL ballasts ...

Page 11: ...allasts and T5 wiring sockets and harnesses removed from hood small ballasts at bottom right of photo are not removed Drilling the Reflector for Heatsink Mounting Holes Unfortunately we do not have any photos of the drilling process only the completed drilling To complete this step simply place the heatsink on top of the reflector hold it firmly in place and using the holes in the heatsink as a te...

Page 12: ...tsink was placed on top of where the holes are drilled and used as a template for drilling The process was repeated for the right side Zip ties will be used to secure the heatsink to the reflector Drilling completed for right side Ballast work should not be completed yet ...

Page 13: ...ire them together http www vinnymarini com pictures rapid_docs LED 20DIY 20Oveview pdf Attaching LEDs to the Heatsinks Thermal Grease When attaching an LED to the heatsink first apply thermal grease to the back of the LED This ensures good thermal conduction of heat away from the LED into the heatsink A small dab on the back of the LED is all that is necessary Mounting an LED to a Heatsink The hea...

Page 14: ...heatsinks The sections are divided up by color The blue LED strings are exactly the same on both heatsinks The white and color strings need to jump across heatsinks One heatsink will have the power wires from the LED driver connected to the white color string the end of the string on that heatsink will jump across to the part of the same string on the 2nd heatsink and that string will have a plug ...

Page 15: ...trings to the Heatsinks Next we attached seven White LEDs to each heatsink as shown below White LED Locations White LED string 1 and 2 connected together across heatsinks 3 5 1 5 6 1 5 6 4 5 Plug on one string only From 1st string ...

Page 16: ...the red LED clearly because the center of it is red The other LEDs in the string are UV UV Color LED String Wired Across Heatsinks White LED String power from LDD Driver Jumper connecting white string across heatsinks Plug at end of white LED String 4 5 4 5 3 5 1 5 4 5 To Color and UV LED String on 2 nd Heatsink From LDD Driver Plug at end of UV Color LED String Jumper connecting UV Color string a...

Page 17: ...p tie into one corner hole of the heatsink It should go through the LED face of the heatsink and through the mounting hole in the reflector that is co axial with it Pull it all the way through Next on the underside of the hood slide a second zip tie over the first tightening it such that it will secure the 1st zip tie heatsink and reflector together Zip tie 1 from heatsink side Slide 2nd zip tie o...

Page 18: ...th zip tie over the 3rd which should be sticking through the second mounting hole as shown above Tighten it down Trim excess from zip ties Repeat process to mount both heatsinks to reflector 3rd zip tie should be attached to 2nd only a few clicks After attaching 3rd zip tie to 2nd slide 3rd through reflector hole and up through heatsink hole 2nd zip tie 3rd zip tie ...

Page 19: ... One Side Mounted and Trimmed Repeat 3 more times to attach both heatsinks to reflector Slide 4th zip tie over 3rd and tighten Trim off excess Repeat three more times to fasten both heatsinks to reflector ...

Page 20: ...20 Your completed zip tie wiring will look similar to this ...

Page 21: ...uino or keep them open if we are not using a lighting controller Second insert the LDD drivers into the LDD driver board Third install adhesive standoffs LDD H 4 Board Layout Pulldown Jumpers If you are using a lighting controller short the pulldown jumpers as shown below LDD Driver Sockets PWM Inputs from controller Pulldown Jumpers open LED Outputs Vin DC from HLG Vin DC from HLG ...

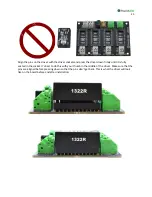
Page 22: ...e same goes for Vout The text will be oriented the same direction on both if the driver is rotated properly If the driver is upside down text in the middle of the driver socket and the text on the LDD will be upside down in relation to each other Be careful to install the driver in the correct orientation such that Vin and Vout on the driver are aligned with the Vin and Vout of the driver socket N...

Page 23: ... firmly until it is fully seated in the socket It s best to do this with your thumb in the middle of the driver Make sure that the pins are aligned before pressing down so that the pins don t get bent This is what the driver will look like on the board before and after installation ...

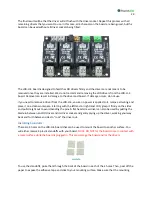
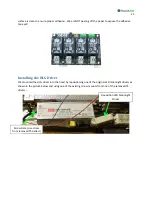
Page 24: ...on a clean workspace Starting with the leftmost or rightmost LDD grasp it firmly on the sides and pull straight out to avoid bending the pins A flat head screw driver can also be used by putting the blade in between an LDD driver and its driver socket and gently prying up the driver working your way back and forth between sides to rock the driver out Installing Standoffs There are 4 holes on the L...

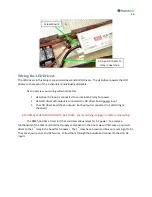
Page 25: ...t Installing the HLG Driver We mounted the HLG driver into the hood by repositioning one of the original LED moonlight drivers as shown in the picture below and using one of the existing screw mounts from one of the removed T5 drivers Reposition LED Moonlight Driver Screw Here use screw from removed T5 ballast ...

Page 26: ...d has 4 outputs Each output is connected to 1 LED string 4 channels BE CAREFUL WHEN WORKING WITH AC POWER Ensure nothing is plugged in before proceeding The RSM hood has a timer in it that controls various relays for AC power To preserve functionality of the timer and fit all LED supply components in the hood we will first wire up our HLG driver to the 1st relay in the hood for AC power The 1st re...

Page 27: ...coded wires ACL ACN and Ground to the HLG driver as shown in the photo below 1st Relay 1st Relay ACL wire connects to HLG ACL Input 1st relay ACN wire connects to HLG ACN Input Connect to HLG Ground HLG Driver AC Input driver is off photo to the right ...

Page 28: ...28 Next trim and cap the remaining ACL and ACN wires with wire nuts from the other relays 2nd and 3rd unused relays ACL and ACN wires from 2nd and 3rd relays Trim and cap with wire nuts ...

Page 29: ... may be various versions of this product that are wired differently from what is shown in this document Connecting HLG LED Output to LDD Input The LDD H 4 is powered by the HLG driver Simply attach some jumper wires with wire nuts from the V and V outputs of the HLG driver and insert them into the corresponding V and V inputs of the LDD H 4 driver board Do not hook them up backwards You will destr...

Page 30: ...inks and LEDs should be fully mounted into your reflector You should have 4 LED jumper wires coming from your LED strings We need to drill a hole in the center of the reflector to route the LED strings to the LDD driver board We used a drill bit for this hole Hole for LED String Power Wiring ...

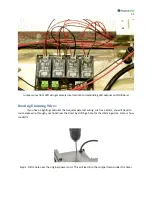
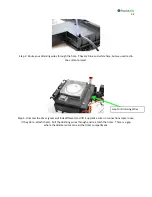
Page 31: ...ires If you have a lighting controller that requires external wiring such as a Storm you will need to route some wire through your hood near the timer by drilling a hole for the dimming wires Here is how we did it Step 1 Drill a hole near the original power cord This will lead into the compartment under the timer ...

Page 32: ... in the current project Step 3 Unscrew the timer yours will look different and lift it up make sure no connections come loose if they do re attach them Pull the dimming wires through and re attach the timer There is a gap where the dimmer wires can exit the timer compartment Gap for Dimming Wires ...

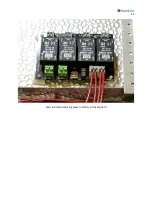
Page 33: ...33 Step 4 Attach dimming wires to LDD H 4 Driver Board ...

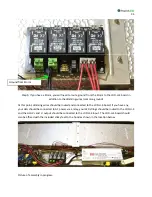
Page 34: ...ed and connected to the LDD H 4 board if you have any your HLG should be connected to AC power via a relay your LED strings should be routed to the LDD H 4 and the HLG V and V output should be connected to the LDD H 4 input The LDD H 4 board should also be affixed with the included sticky feet to the hood as shown in the location below Picture of assembly in progress Ground from Storm ...

Page 35: ...35 LED String Jumper Wires to LDD H 4 Power to LDD H 4 Dimming Wires Entering from bottom of Timer Compartment via Drilled Hole Dimming Wires Exiting Timer Compartment to LDD H 4 LDD H 4 ...

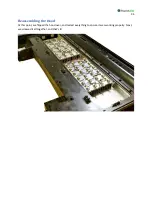
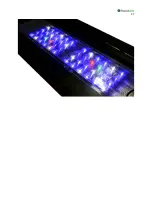
Page 36: ...36 Reassembling the Hood At this point we flipped the hood over and tested everything to ensure it was working properly Next we screwed it all together and that s it ...

Page 37: ...37 ...

Reviews: