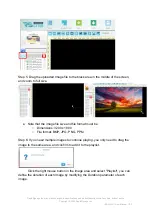
Step 4: After removing the USB flash drive from the computer normally, connect it to
the USB port of EDA-253C on the power off.
Step 5: After powering up EDA-253C and seeing the RS Logo twice (the Logo will
appear in about 2 minutes), it indicates that the USB is detected, will start playing
images imported from the USB. At this moment, you can unplug the USB.
● Note that the image file size and file format must be
○ Dimensions: 3200 x 1800
○ File format: BMP, JPG, PNG, PPM
[RS-CMS: Wireless network setting ]
To set up a WiFi connection for EDA, please follow the steps below:
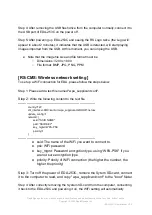
Step 1: Please add a text file named "wpa_supplicant.conf".
Step 2:
Write the following content to the text file
---------------------------------------------------------------------------
country=TW
ctrl_interface=DIR=/var/run/wpa_supplicant GROUP=netdev
update_config=1
network={
ssid="SSID NAME"
psk=”SSID KEY"
key_mgmt=WPA-PSK
priority=1
}
---------------------------------------------------------------------------
● ssid
:
The name of the WiFi you want to connect to.
● psk
:
WiFi password
● key_mgmt
:
Password encryption type, using “WPA-PSK" if you
are not sure encryption type
● priority
:
Priority of WiFi connection (the higher the number, the
higher the priority)
Step 3: Turn off the power of EDA-253C, remove the Sytem SD-card, connect
it to the computer to read, and copy "wpa_supplicant.conf" to the "boot" folder.
Step 4
:
After correctly removing the System SD-card from the computer, connecting
it back to the EDA-253C and powering it on, the WiFi setting will automatically
RapidSignage Inc. may make changes to specifications and product descriptions at any time, without notice.
Copyright © 2022 RapidSignage Inc.
--EDA-253C User Manual V0.3--


