background image

__1111

113

3

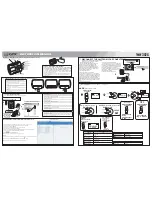
Right-click  an  [Unallocated]  drive  in  Drive

Management and select [New Partition] from

the menu that appears.

114

4

Enter the desired partition size in [Partition

size in MB] and click [Next] to continue. 

9

9

In the Format Partition window, select [Format

this  partition  with  the  following  settings]  and

F

FA

AT

T3

32

2,  and  then  check  [Perform  a  quick

format] box. Click [Next] to continue.

1111

When [Completing the New Partition Wizard]

appears, click [Finish].

112

2

When  the  [driver  letter]  is  assigned,  click

[Next].

110

0

A new NTFS partition was created .

115

5

When  the  New  Partition  Wizard  is  shown,

click [Next] to continue.

Partitioning and Formatting Hard Disk(windows 2000/XP)

www.rapsody.ch

Summary of Contents for RSH-300

Page 1: ...www rapsody ch...

Page 2: ...USER GUIDE...

Page 3: ...are Recovery Troubleshooting Warranty 17 20 21 22 23 24 25 26 27 28 29 30 31 32 Product features Online Registration and Customer Service Safety and Other Instructions Product Specification Product Co...

Page 4: ...0p p 7 72 20 0p p 1 10 08 80 0i i p pr ro og gr re es ss si iv ve e s sc ca an n O Op pt ti ic ca al l o ou ut tp pu ut t f fo or r d di ig gi it ta al l 5 5 1 1 c ch ha an nn ne el l s so ou un nd d...

Page 5: ...odel this product for yourself which could result in malfunction of this product Warranty services are not applied to remodeled products L Lo oa ad di in ng g Do NOT put heavy objects on this product...

Page 6: ...en permission permission of Dacos Technologies Co Ltd Except rights expressly granted to the user by Dacos Technologies Co Ltd upon the use of this product supplying this document does not permit any...

Page 7: ...fo or r U US SB B C Co on nn ne ec ct ti io on n USB 2 0 USB 1 1 Interface USB 2 0 recommended Operating System Windows 98SE ME 2000 XP Linux 2 4 or later Mac OS 9 1 or later Product Specifications Sy...

Page 8: ...ab bl le e A Ad da ap pt te er r f fo or r H Ho om me e U Us se er r G Gu ui id de e R Re em mo ot te e C Co on nt tr ro ol ll le er r B Ba at tt te er ry y A AA AA A 2 2 A A V V C Ca ab bl le e Prod...

Page 9: ...his output jack 1 12 2 A Au ud di io o L L Left audio output of 2 channel audio Connect white audio cable to this output jack 1 13 3 C Co om mp po os si it te e V Vi id de eo o Standard video output C...

Page 10: ...1 2 2 I In ns si id de e p pi ic ct tu ur re e a af ft te er r o op pe en n Picture shown is inside of RSH 300 after open the covers from RSH 300 HDD power cable and Enhanced IDE cable toward to the p...

Page 11: ...t to continue When Write Signature and Disk Upgrade Wizard is completed click Finish Right click an Unallocated drive in Drive Management and select New Partition from the menu that appears 3 3 4 4 5...

Page 12: ...indow select Format this partition with the following settings and F FA AT T3 32 2 and then check Perform a quick format box Click Next to continue 1 11 1 When Completing the New Partition Wizard appe...

Page 13: ...ard disk size unallocated 1 17 7 When the driver letter is assigned click Next 1 18 8 In the Format Partition window select Format this partition with the following settings and N NT TF FS S and then...

Page 14: ...o NOT select to use Compressing Files and Folders option If the specified file system is FAT32 on Windows 2000 XP it is not possible to have one drive letter on large hard disk over 32GB In order to h...

Page 15: ...n use after log in again Create mount pointer in the same way as above and then mount this product by typing as follows Mount t vfat dev sda mnt rhapsody for HDD formatted with FAT32 Mount t ntfs dev...

Page 16: ...d C Co on nn ne ec ct t t to o T TV V u us si in ng g C Co om mp po os si it te e c ca ab bl le es s Connect component video output Y green Pb Blue Pr Red to the same colored component input jacks on...

Page 17: ...oy 5 1ch audio as if you are in a theatre As shown in the picture connect optical cable from digital optical output jack of RSH 300 to the digital optical input jack of your audio device O Op pt ti ic...

Page 18: ...1 2 _ _1 17 7 Remote Controller www rapsody ch...

Page 19: ...eft and right side of the image are lost 2 Clicks Pan Scan Regardless of the aspect ratio of a file fills up the screen 3 Clicks Full Screen Sets the screen to the original aspect ratio of a file 4 Cl...

Page 20: ...1 2 _ _1 19 9 Remote Controller www rapsody ch...

Page 21: ...he menu INFO 28 Displays the information of a played file Multi Angle 29 During a DVD playback it changes the camera angle only for multi angle titles TV Output Mode 30 Changes the TV output mode acco...

Page 22: ...ottom of the screen to be displayed in a wide mode 4 3 Pan Scan This aspect ratio displays the content based on its vertical length It fills up the screen but some portion of the left and right side o...

Page 23: ...Korean English Espanol etc Selects a subtitle size among Small subtitle Big subtitle and No subtitle Color Selection Selects a subtitle color among White Black Yellow Black Green Black White Blue Yell...

Page 24: ...Picture Icons and Screen Components HDD Selection 1 If you select the icon of USB Disk Selection RSH 300 will search and display USB devices that are connected via a USB HOST port You can play a medi...

Page 25: ...the following files AVI MPG MPEG DAT VOB TP TRP WMV MP5 ISO etc Playback order and method are determined by a selected repeat mode Buttons and functions for movie playback RHS 300 system setting Setup...

Page 26: ..._ _2 25 5 Movie Play www rapsody ch...

Page 27: ...files can be played RHS 300 also provides a slideshow function The display duration for each picture can be set in the SETUP menu by seconds When 0 second is given the system keeps displaying a specif...

Page 28: ...middle of playing music files you can search folder and files After selecting a new file and pressing the OK button the selected file will be played B Bu ut tt to on ns s a an nd d f fu un nc ct ti io...

Page 29: ...the contents in the HDD and plays the saved contents as if playing the same DVD With this function you can prevent any damages of original disks and can easily play movies without swapping disks Butt...

Page 30: ...6 The following screen appears when the firmware upgrade is completed successfully 7 7 The device starts automatically Post upgrade firmware version can be seen at the upper right corner of the SETUP...

Page 31: ...escue process starts During the process the TV screen remains blank D Du ur ri in ng g t th he e p pr ro oc ce es ss s U US SB B L LE ED D a an nd d H HD DD D L LE ED D o on n t th he e f fr ro on nt...

Page 32: ...r When video out setting is incorrect the screen remains blank or shows black and white picture or flicker In this case please push the TV OUT button on the remote controller slowly until video outpu...

Reviews: