Chapter 9: Security Management
187
Accept - IP addresses are allowed access to the Dominion KX II
device.
Drop - IP addresses are denied access to the Dominion KX II
device.
Note: Both IPv4 and IPv6 addresses are supported.
To add (append) rules:
1. Type the IP address and subnet mask in the IPv4/Mask or
IPv6/Prefix Length field.
Note: The IP address should be entered using CIDR (Classless
Inter-Domain Routing notation, in which the first 24 bits are used as a
network address).
2. Choose the Policy from the drop-down list.
3. Click Append. The rule is added to the bottom of the rules list.
To insert a rule:
1. Type a rule #. A rule # is required when using the Insert command.
2. Type the IP address and subnet mask in the IPv4/Mask or
IPv6/Prefix Length field.
3. Choose the Policy from the drop-down list.
4. Click Insert. If the rule # you just typed equals an existing rule #, the
new rule is placed ahead of the exiting rule and all rules are moved
down in the list.
Tip: The rule numbers allow you to have more control over the order in
which the rules are created.
To replace a rule:
1. Specify the rule # you want to replace.
2. Type the IP address and subnet mask in the IPv4/Mask or
IPv6/Prefix Length field.
3. Choose the Policy from the drop-down list.
4. Click Replace. Your new rule replaces the original rule with the same
rule #.
To delete a rule:
1. Specify the rule # you want to delete.
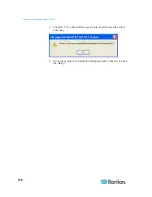
2. Click
Delete.
Summary of Contents for Dominion KX II
Page 10: ......
Page 14: ...Chapter 1 Introduction 4...
Page 16: ...Chapter 1 Introduction 6 Product Photos Dominion KX II KX2 832...
Page 17: ...Chapter 1 Introduction 7 KX2 864...
Page 89: ...Chapter 4 Virtual Media 79...
Page 111: ...Chapter 6 User Management 101...
Page 144: ...Chapter 7 Device Management 134 3 Click OK...
Page 154: ...Chapter 7 Device Management 144 3 Click OK...
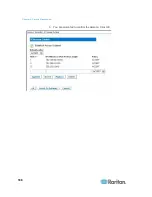
Page 198: ...Chapter 9 Security Management 188 3 You are prompted to confirm the deletion Click OK...
Page 277: ...Appendix B Updating the LDAP Schema 267...
Page 324: ......


