Chapter 13: Dominion KX II Local Console
223
Dominion KX II Local Console Interface
When you are located at the server rack, the Dominion KX II provides
standard KVM management and administration via the Dominion KX II
Local Console. The Dominion KX II Local Console provides a direct KVM
(analog) connection to your connected servers; the performance is
exactly as if you were directly connected to the server's keyboard,
mouse, and video ports.
There are many similarities among the Dominion KX II Local Console
and the Dominion KX II Remote Console graphical user interfaces.
Where there are differences, they are noted in the help.
The Dominion KX II Local Console Factory Reset option is available in
the Dominion KX II Local Console but not the Dominion KX II Remote
Console.
Security and Authentication
In order to use the Dominion KX II Local Console, you must first
authenticate with a valid username and password. The Dominion KX II
provides a fully-integrated authentication and security scheme, whether
your access is via the network or the local port. In either case, the
Dominion KX II allows access only to those servers to which a user has
access permissions. See
User Management
(on page 97) for additional
information on specifying server access and security settings.
If your Dominion KX II has been configured for external authentication
services (LDAP/LDAPS, RADIUS, or Active Directory), authentication
attempts at the Local Console also are authenticated against the external
authentication service.
Note: You can also specify no authentication for Local Console access;
this option is recommended only for secure environments.
To use the Dominion KX II Local Console:
1. Connect a keyboard, mouse, and video display to the local ports at
the back of the Dominion KX II.
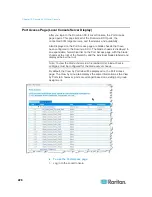
2. Start the Dominion KX II. The Dominion KX II Local Console interface
displays.
Summary of Contents for Dominion KX II
Page 10: ......
Page 14: ...Chapter 1 Introduction 4...
Page 16: ...Chapter 1 Introduction 6 Product Photos Dominion KX II KX2 832...
Page 17: ...Chapter 1 Introduction 7 KX2 864...
Page 89: ...Chapter 4 Virtual Media 79...
Page 111: ...Chapter 6 User Management 101...
Page 144: ...Chapter 7 Device Management 134 3 Click OK...
Page 154: ...Chapter 7 Device Management 144 3 Click OK...
Page 198: ...Chapter 9 Security Management 188 3 You are prompted to confirm the deletion Click OK...
Page 277: ...Appendix B Updating the LDAP Schema 267...
Page 324: ......

