Chapter 2: Installation and Configuration
15
- Accessing the Mouse Properties, Keyboard Properties, and Phone
and Mode Options from the Windows Control Panel.
2. Disable transition effects:
a. Select the Display option from the Control Panel.
b. Click the Appearance tab.
c. Click the Effects button.
d. Deselect the "Use the following transition effect for menus and
tooltips" option.
e. Click
OK.
3. Close the Control Panel.
Note: For KVM target servers running Windows 2000 or XP, you may
wish to create a user name that will be used only for remote connections
through the Dominion KX II. This will enable you to keep the target
server's slow mouse pointer motion/acceleration settings exclusive to the
Dominion KX II connection.
Windows XP and 2000 login pages revert to preset mouse parameters
that differ from those suggested for optimal Dominion KX II performance.
As a result, mouse synchronization may not be optimal for these screens.
WARNING! Proceed only if you are comfortable adjusting the registry
on Windows KVM target servers. You can obtain better Dominion KX II
mouse synchronization at the login pages by using the Windows
registry editor to change the following settings:
HKey_USERS\.DEFAULT\Control Panel\Mouse: > MouseSpeed =
0;MouseThreshold 1=0;MouseThreshold 2=0.
Windows Vista® Settings
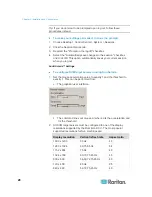
To configure KVM target servers running Microsoft Windows
Vista:
1. Configure the mouse settings:
a. Choose Start > Settings > Control Panel > Mouse.
b. Click the Pointer Options tab.
c. In the Motion group:
Set the mouse motion speed setting to exactly the middle
speed.
Disable the "Enhanced pointer precision" option.
Click
OK.
2. Disable animation and fade effects:
a. Select the System option from the Control Panel.
Summary of Contents for Dominion KX II
Page 10: ......
Page 14: ...Chapter 1 Introduction 4...
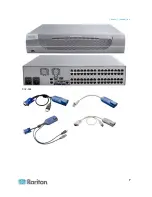
Page 16: ...Chapter 1 Introduction 6 Product Photos Dominion KX II KX2 832...
Page 17: ...Chapter 1 Introduction 7 KX2 864...
Page 89: ...Chapter 4 Virtual Media 79...
Page 111: ...Chapter 6 User Management 101...
Page 144: ...Chapter 7 Device Management 134 3 Click OK...
Page 154: ...Chapter 7 Device Management 144 3 Click OK...
Page 198: ...Chapter 9 Security Management 188 3 You are prompted to confirm the deletion Click OK...
Page 277: ...Appendix B Updating the LDAP Schema 267...
Page 324: ......


