Chapter 2: Installation and Configuration
17
c. From the Advanced tab, verify that the Refresh Rate is supported
by the Dominion KX II.
Note: Once connected to the target server, in many Linux graphical
environments, the <Ctrl> <Alt> <+> command will change the video
resolution, scrolling through all available resolutions that remain enabled
in the XF86Config or /etc/X11/xorg.conf, depending on your X server
distribution.
To configure KVM target servers running Linux (command line):
1. Set the mouse acceleration to exactly 1 and set the threshold to
exactly 1. Enter this command:
xset mouse 1 1
. This should be set
for execution upon login.
2. Ensure that each target server running Linux is using a resolution
supported by the Dominion KX II at a standard VESA resolution and
refresh rate.
3. Each Linux target server should also be set so the blanking times are
/- 40% of VESA standard values:
a. Go to the Xfree86 Configuration file XF86Config.
b. Using a text editor, disable all non-Dominion KX II supported
resolutions.
c. Disable the virtual desktop feature (not supported by the
Dominion KX II).
d. Check blanking times (+/- 40% of VESA standard).
e. Restart
computer.
Note: If you change the video resolution, you must log off of the target
server and log back in for the video settings to take effect.
Note for Red Hat 9 KVM Target Servers
If you are running Red Hat 9 on the target server using a USB CIM, and
are experiencing problems with the keyboard and/or mouse, there is an
additional configuration setting you can try.
Tip: You might have to perform these steps even after a fresh OS
installation.
To configure Red Hat 9 servers using USB CIMs:
1. Locate the configuration file (usually /etc/modules.conf) in your
system.
2. Using the editor of your choice, make sure that the alias
usb-controller line in the modules.conf file is as follows:
alias usb-controller usb-uhci
Summary of Contents for Dominion KX II
Page 10: ......
Page 14: ...Chapter 1 Introduction 4...
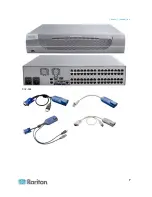
Page 16: ...Chapter 1 Introduction 6 Product Photos Dominion KX II KX2 832...
Page 17: ...Chapter 1 Introduction 7 KX2 864...
Page 89: ...Chapter 4 Virtual Media 79...
Page 111: ...Chapter 6 User Management 101...
Page 144: ...Chapter 7 Device Management 134 3 Click OK...
Page 154: ...Chapter 7 Device Management 144 3 Click OK...
Page 198: ...Chapter 9 Security Management 188 3 You are prompted to confirm the deletion Click OK...
Page 277: ...Appendix B Updating the LDAP Schema 267...
Page 324: ......


