Chapter 2: Installation and Configuration
26
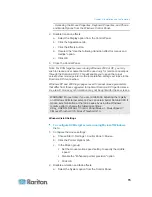
Enable Automatic Failover on the Network Configuration page.
Note: Use both network ports only if you want to use one as a failover
port.
D. Local Access Port (Local PC)
For convenient access to target servers while at the rack, use the
Dominion KX II Local Access port. While the Local Access port is
required for installation and setup, it is optional for subsequent use. The
Local Access port also provides a graphical user interface from the
Dominion KX II Local Console for administration and target server
access.
The KX2-832 and KX2-864 also provide you with an Extended Local port,
labeled EXT LOCAL on the back of the device, for access to target
servers while at the rack. The Extended Local port is not required for the
initial installation and setup. It is configured from the Local Console and
Remote Console. See
Configuring Dominion KX II Local Port
Settings
(on page 171) for additional information.
To connect the local port:
•
Attach a multi-sync VGA monitor, mouse, and keyboard to the
respective Local User ports using either a PS/2 or USB keyboard and
mouse (DKX2-832 and DKX2-864 provide USB only). The physical
connections for the Local User and Extended Local ports can be
found on the back panel of the Dominion KX II.
Connection
Description
Monitor
Attach a standard multi-sync VGA
monitor to the HD15 (female) video
port.
Keyboard
Attach either a standard PS/2
keyboard to the Mini-DIN6 (female)
keyboard port, or a standard USB
keyboard to one of the USB Type A
(female) ports.
Mouse
Attach either a standard PS/2 mouse
to the Mini-DIN6 (female) mouse port
or a standard USB mouse to one of
the USB Type A (female) ports.
Summary of Contents for Dominion KX II
Page 10: ......
Page 14: ...Chapter 1 Introduction 4...
Page 16: ...Chapter 1 Introduction 6 Product Photos Dominion KX II KX2 832...
Page 17: ...Chapter 1 Introduction 7 KX2 864...
Page 89: ...Chapter 4 Virtual Media 79...
Page 111: ...Chapter 6 User Management 101...
Page 144: ...Chapter 7 Device Management 134 3 Click OK...
Page 154: ...Chapter 7 Device Management 144 3 Click OK...
Page 198: ...Chapter 9 Security Management 188 3 You are prompted to confirm the deletion Click OK...
Page 277: ...Appendix B Updating the LDAP Schema 267...
Page 324: ......


