


Chapter 5: Using the Web Interface
131
Assigning or Changing the ID Number
Instead of letting the Dominion PX assign an ID number to the sensor, you
can manually assign any ID number (1 to 16) to a detected or managed
sensor. With the feature, you can:
Have a sensor managed if it has not been managed yet
Change the ID number of a managed sensor
Replace a managed sensor with an identical type of sensor by
assigning its ID number to another one
This feature is especially useful when there are 16 managed sensors
because it removes a sensor from management while assigning its ID
number to a different sensor at the same time.
Tip: You can also rearrange or change the ID numbers of all managed
sensors at once via SNMP. See
Changing ID Numbers of
Environmental Sensors
(on page 171).
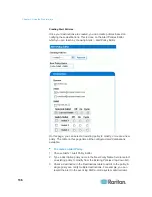
To assign or change the ID number:
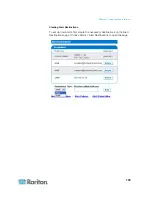
1. Choose External Sensors > External Sensors Details. The External
Sensor Details page opens.
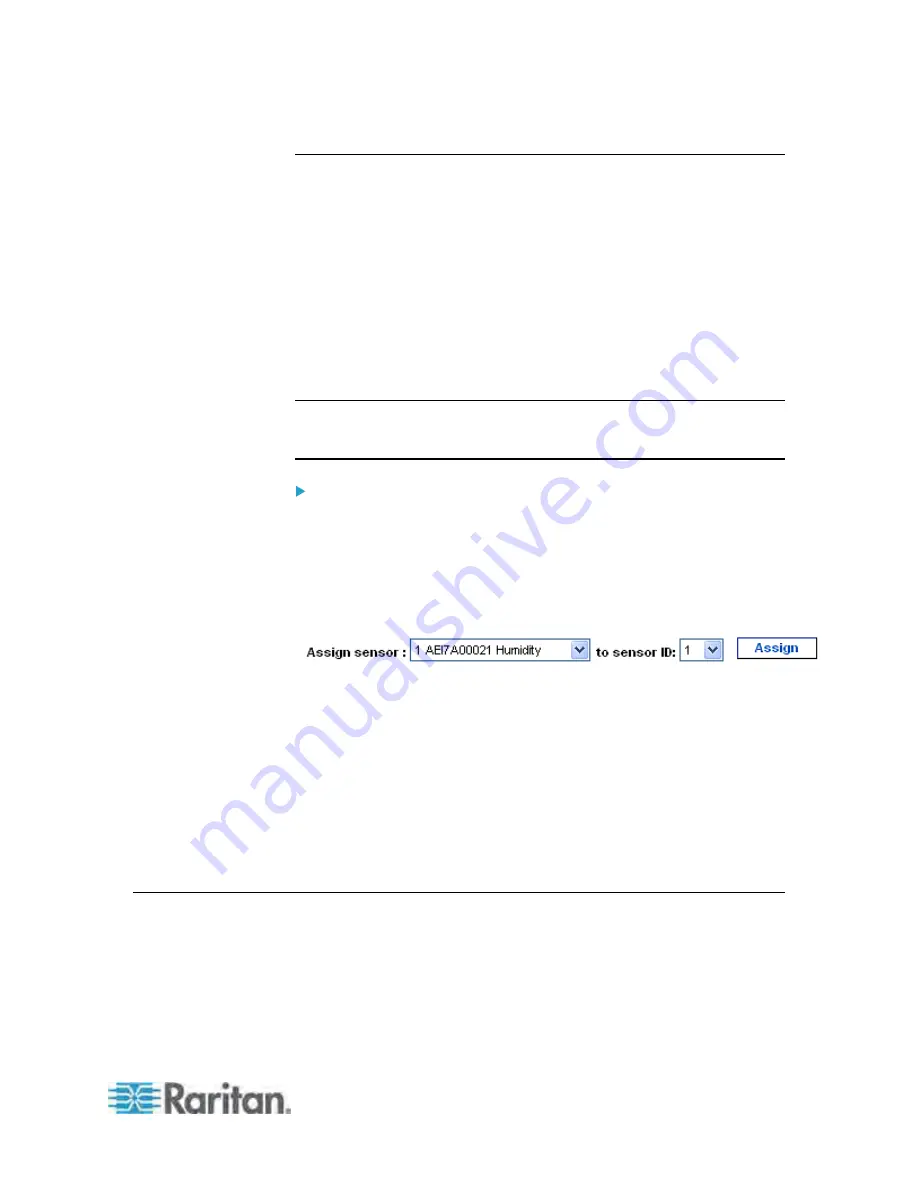
2. In the "Assign sensor" field, select a sensor from the drop-down list.
Each sensor is identified with a combination of the ID number (if
available), serial number and sensor type, such as
1 AEI700021
Humidity.
3. In the "to sensor ID" field, select an ID number from the drop-down list.
4. Click Assign. The selected ID number is assigned to the selected
sensor.
The selected sensor becomes managed if it was not.
If the selected ID number was previously used by a sensor, that
sensor becomes unmanaged after losing this ID number.
If the selected ID number was previously used by a sensor that
had been physically disconnected, that sensor disappears from
the list after losing this ID number.
Configuring and Using Alert Notifications
A benefit of the product's intelligence is its ability to notify you of and react
to a change in conditions. This event notification is an "alert."


