16
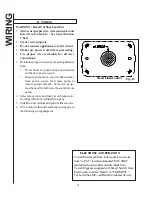
5. Route wire from control per wiring diagrams.
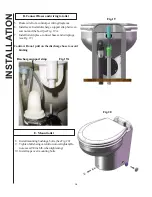
6. Install seat. I nstall discharge support strap between
seat nut and the bowl per Fig. 19A.
7. Install toilet in place, connect hoses and wireplugs.
(see Fig. 19)
Caution: Do not pull on the discharge hose to avoid
kinking
8. Install mounting bushings, bolts. (See Fig. 20)
9. Tighten bolts being careful to not overtighten (Do
not exceed 30 inch lb. when tightening)
10. Install caps over mounting bolts.
D. Connect Hoses and wiring to toilet
E. Mount toilet
Fig. 19
Fig. 20
Fig. 19A
Discharge support strap
INSTALLATION


