


Chapter 6: Using the Web Interface
148
Important: Although it is possible to selectively enable/disable logging for
individual sensors on the PX in Step 4, it is NOT recommended and this
capability may be removed in the future.
Configuring SMTP Settings
The PX can be configured to send alerts or event messages to a specific
administrator by email. To do this, you have to configure the SMTP
settings and enter an IP address for your SMTP server and a sender's
email address.
If any email messages fail to be sent successfully, the failure event and
reason are available in the event log. See
Viewing the Local Event Log
(on page 269).
Note: See
Event Rules and Actions
(on page 222) for information on
creating event rules to send email notifications.
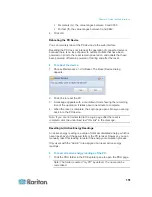
To set SMTP server settings:
1. Choose Device Settings > SMTP Server. The SMTP Server Settings
dialog appears.
2. Type the name or IP address of the mail server in the Server Name
field.
3. Type the port number for the SMTP server in the Port field. The
default is 25.
4. Type an email address for the sender in the Sender Email Address
field.
5. Type the number of email retries in the "Number of Sending Retries"
field. The default is 2 retries.
6. Type the time interval between email retries in the "Time Interval
Between Sending Retries (in minutes)" field. The time is measured in
minutes. The default is 2 minutes.
7. If your SMTP server requires password authentication, do this:
a. Select the Server Requires Authentication checkbox.
b. Type a user name in the User Name field.
c. Type a password in the Password field.
8. If your SMTP server supports the Transport Layer Security (TLS),
select the "Enable SMTP over TLS (StartTLS)" checkbox. Then do
the following:
a. Click Browse to select the TLS CA certificate file. Then you may:
Summary of Contents for PX3-4000 series
Page 5: ......
Page 627: ...Appendix I RADIUS Configuration Illustration 606 Note If your PX uses PAP then select PAP...
Page 632: ...Appendix I RADIUS Configuration Illustration 611 14 The new attribute is added Click OK...
Page 633: ...Appendix I RADIUS Configuration Illustration 612 15 Click Next to continue...
Page 648: ...Appendix J Integration 627 3 Click OK...
Page 661: ...Appendix J Integration 640 2 Launch dcTrack to import the spreadsheet file...


