


Chapter 6: Using the Web Interface
149
Click Show to view the installed certificate's contents.
Click Remove to delete the installed certificate if it is
inappropriate.
b. Select or deselect the "Allow expired and not yet valid
certificates" checkbox.
To always send the email messages even though the
installed certificate chain contains a certificate that is
outdated or not valid yet, select this checkbox.
To prevent the email messages from being sent when any
certificate in the installed certificate chain is outdated or not
valid yet, deselect this checkbox.
9. Now that you have set the SMTP settings, you can test it to ensure it
works properly. Do the following:
a. Type the recipient's email address in the Recipient Email
Addresses field. Use a comma to separate multiple email
addresses.
b. Click Send Test Email.
c. Check if the recipient(s) receives the email successfully.
10. Click OK.
Configuring Data Push Settings
If any Raritan asset sensors have been connected to PX, you can push
the asset sensor data to a remote server for data synchronization. The
data will be sent in JSON format using HTTP POST requests. You need
to set up the destination and authentication for data push on the PX.
For instructions on connecting asset sensors, see
Connecting the
Asset Management Sensor
(on page 43).
After configuring the destination and authentication settings, do either or
both of the following:
To perform the data push after the occurrence of a certain event,
create the data push action and assign it to an event rule. See
Push
Out Sensor Readings
(on page 229).
To push the data at a regular interval, schedule the data push action.
See
Scheduling an Action
(on page 248).
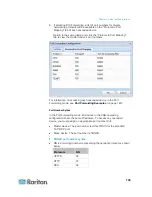
To configure data push settings:
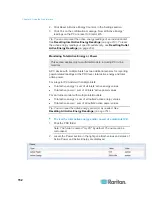
1. Choose Device Settings > Data Push. The Data Push dialog
appears.
2. Click New. The Add New Destination dialog appears.
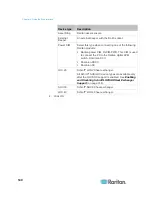
3. In the URL field, determine the following information.
Click the arrow to select http or https.
Summary of Contents for PX3-4000 series
Page 5: ......
Page 627: ...Appendix I RADIUS Configuration Illustration 606 Note If your PX uses PAP then select PAP...
Page 632: ...Appendix I RADIUS Configuration Illustration 611 14 The new attribute is added Click OK...
Page 633: ...Appendix I RADIUS Configuration Illustration 612 15 Click Next to continue...
Page 648: ...Appendix J Integration 627 3 Click OK...
Page 661: ...Appendix J Integration 640 2 Launch dcTrack to import the spreadsheet file...