549
You can use either the reset button or the command line interface (CLI)
to reset the PX.
Important: Exercise caution before resetting the PX to its factory defaults.
This erases existing information and customized settings, such as user
profiles, threshold values, and so on. Only active energy data and
firmware upgrade history are retained.
In This Chapter
Using the Reset Button..........................................................................549
Using the CLI Command .......................................................................550
Using the Reset Button
An RS-232 serial connection to a computer is required for using the reset
button.
To reset to factory defaults using the reset button:
1. Connect a computer to the PX device. See
Connecting the PX to a
Computer
(on page 18).
2. Launch a terminal emulation program such as HyperTerminal, Kermit,
or PuTTY, and open a window on the PX. For information on the
serial port configuration, see Step 2 of
Initial Network
Configuration via CLI
(on page 22).
3. Press (and release) the Reset button of the PX device while pressing
the Esc key of the keyboard several times in rapid succession. A
prompt (=>) should appear after about one second.
4. Type
defaults
to reset the PX to its factory defaults.
5. Wait until the Username prompt appears, indicating the reset is
complete.
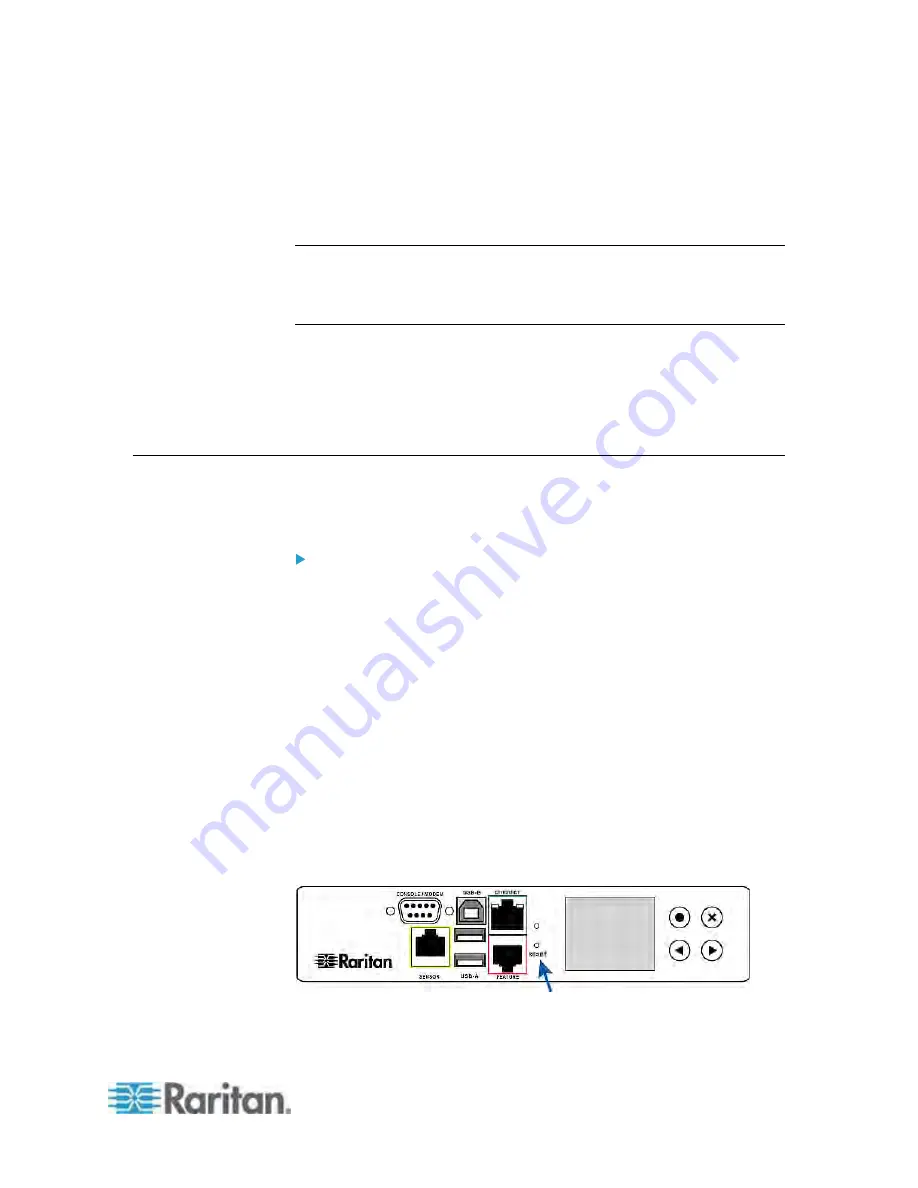
These diagrams show the reset button on Zero U models.
PX3 Phase II models:
Appendix D Resetting to Factory Defaults
Summary of Contents for PX3-4000 series
Page 5: ......
Page 627: ...Appendix I RADIUS Configuration Illustration 606 Note If your PX uses PAP then select PAP...
Page 632: ...Appendix I RADIUS Configuration Illustration 611 14 The new attribute is added Click OK...
Page 633: ...Appendix I RADIUS Configuration Illustration 612 15 Click Next to continue...
Page 648: ...Appendix J Integration 627 3 Click OK...
Page 661: ...Appendix J Integration 640 2 Launch dcTrack to import the spreadsheet file...