background image

KVM D

RAWER 

T1500 U

SER 

M

ANUAL


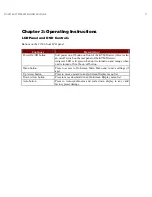
Use the buttons located below the LCD panel to view the 

On Screen Display 

(OSD).  The menu 

functions on the OSD allow you to optimize working with and viewing screen images on the KVM 
Drawer.  


MENU 

UP ARROW 

DOWN ARROW 

AUTO 


• 

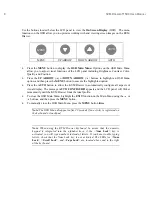
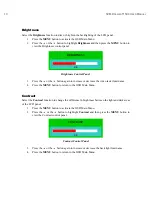
Press the 

MENU

 button to display the 

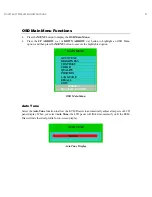
OSD Main Menu

. Options on the OSD Main Menu 

allow you to adjust visual functions of the LCD panel including Brightness, Contrast, Color, 
Quality, and Position.


• 

Press the 

UP ARROW 

(

) or 

DOWN ARROW 

(

) buttons to highlight an OSD Menu 

option, and then press the 

MENU

 button to execute the highlighted option. 

• 

Press the 

AUTO 

button to allow the KVM Drawer to automatically configure all aspects of 

visual display. The message 

AUTO CONFIGURE!

 appears and the LCD panel will flicker 

momentarily until the KVM Drawer finds the ideal profile. 

• 

To close the OSD Main Menu, highlight the 

EXIT

 function on the Main Menu using the 

 or 

 buttons, and then press the 

MENU 

button. 

• 

To manually close the OSD Main Menu, press the 

MENU

 button 

twice

Note

: The OSD Menu disappears after 20 seconds if no activity is registered on 

the keyboard or touchpad.   


Note

: When using the KVM Drawer keyboard, be aware that the numeric 

keypad is integrated into the alphabet keys; if the <

Num Lock

> key is 

activated, you will type numbers instead of letters. If you have trouble typing 
letters, check that the Num Lock key is not activated. The LEDs for <

Num 

Lock

>, <

Scroll Lock

>, and <

Caps Lock

> are located above and to the right 

of the keyboard. 


AUTO 

MENU 

Summary of Contents for T1500

Page 1: ...User Manual T1500...

Page 2: ...This page intentionally left blank...

Page 3: ...B V Eglantierbaan 16 2908 LV C ll d IJ l Raritan Computer Japan Inc Kuga Building 7F 11 6 K 4 h Raritan Computer Taiwan Inc 5F 121 Lane 235 P Chi Rd H i Ti Copyright 2003 Raritan Computer Inc KVM_T15...

Page 4: ...This page intentionally left blank...

Page 5: ...y and if not installed and used in accordance with the instructions may cause harmful interference to radio communications Operation of this equipment in a residential environment may cause harmful in...

Page 6: ...This page intentionally left blank...
Page 7: ...nections 5 Power Indicator 6 Setup for LCD 6 Factory Preset Timing for Reference 6 Panel and OSD Controls 7 CHAPTER 3 OPERATING INSTRUCTIONS 7 OSD Main Menu Functions 9 Auto Tune 9 Brightness 10 Contr...

Page 8: ...d in such a way that people cannot step on it Do not place anything over the power cord The power cord must be rated for the voltage and current marked on the product s electrical ratings label The vo...

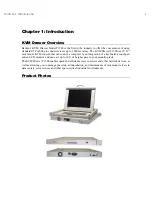
Page 9: ...rack mount KVM console that can control a computer by an integration of a keyboard a touchpad and an LCD monitor and can save up to 10 U of height space in your mounting rack The KVM Drawer T1500 ena...

Page 10: ...tegrated touchpad Package Contents The complete KVM Drawer T1500 package consists of 1 1U 19 Rack Mount KVM Drawer console 1 Mounting Kit includes short and long brackets for customized fit 1 CSW18 Ca...

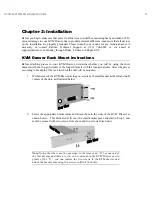
Page 11: ...s with the two grid sliders or the longer brackets with the four grid sliders Select the pieces according to the depth of the rack in which the unit will be mounted 1 With the rear of the KVM Drawer f...

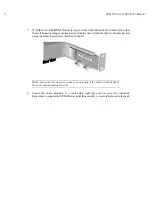
Page 12: ...unit Attach the slider to the bracket arm using the larger head screws included in the kit Note Leave the screws loose so that you can adjust the slider to the depth of the rack when mounting the uni...

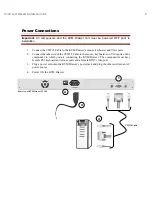
Page 13: ...A ports 2 Connect the other end of the CSW18 Cable to the mouse keyboard and VGA ports on the component to which you are connecting the KVM Drawer The component must have female PS2 keyboard and mouse...

Page 14: ...erlaced 36 00 800 x 600 37 879 60 Non interlaced 40 00 800 x 600 48 077 72 Non interlaced 50 00 800 x 600 46 875 75 Non interlaced 49 50 800 x 600 53 674 85 Non interlaced 56 25 836 x 624 49 715 74 53...

Page 15: ...he rear panel of the KVM Drawer Adjacent LED is lit green when unit is turned on and orange when unit is turned off via the on off button Menu button Press to access to On Screen Main Menu and to save...

Page 16: ...ically configure all aspects of visual display The message AUTO CONFIGURE appears and the LCD panel will flicker momentarily until the KVM Drawer finds the ideal profile To close the OSD Main Menu hig...

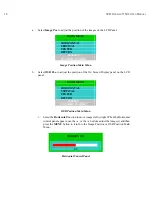
Page 17: ...ighlighted option MAIN MENU AUTO TUNE BRIGHTNESS CONTRAST COLOR QUALITY POSITION LANGUAGE RECALL EXIT 800X600 H37 8KHZ V 59 8HZ OSD Main Menu Auto Tune Select the Auto Tune function to allow the KVM D...

Page 18: ...o increase or decrease the video raster luminance 4 Press the MENU button to return to the OSD Main Menu Contrast Select the Contrast function to change the difference in brightness between the light...

Page 19: ...and then press the MENU button to view the Color Main Menu MAIN MENU 9300 7500 6550 USER AUTO COLOR RETURN 800X600 H37 8KHZ V 59 8HZ Color Main Menu 3 Press the or the button to select the desired col...

Page 20: ...tton to return to the Color Main Menu b Select the Auto Color function on the Color Main Menu to allow the KVM Drawer to automatically adjust the amount of Red Green and Blue on the LCD panel When you...

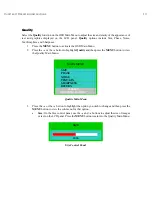
Page 21: ...or the button to highlight Quality and then press the MENU button to view the Quality Main Menu MAIN MENU SIZE PHASE NOISE TEXT GFX SHARPNESS RETURN 800X600 H37 8KHZ V 59 8HZ Quality Main Menu 3 Pres...

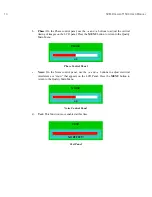
Page 22: ...button to return to the Quality Main Menu PHASE 42 Phase Control Panel c Noise On the Noise control panel use the and buttons to adjust electrical interference or snow that appears on the LCD Panel Pr...

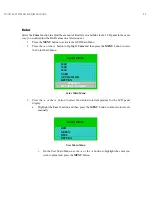
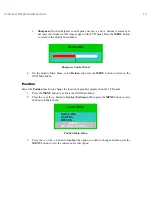
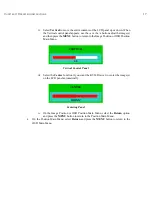
Page 23: ...ENU button to return to the OSD Main Menu Position Select the Position function to change the location of graphics displayed on the LCD panel 1 Press the MENU button to activate the OSD Main Menu 2 Pr...

Page 24: ...the position of the On Screen Display panel on the LCD panel MAIN MENU HORIZONTAL VERTICAL CENTER RETURN 800X600 H37 8KHZ V 59 8HZ OSD Position Main Menu i Select the Horizontal function to move image...

Page 25: ...Position or OSD Position Main Menu VERTICAL 45 Vertical Control Panel iii Select the Center function if you want the KVM Drawer to center the image s on the LCD panel automatically CENTER DOING Center...

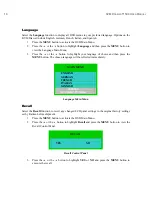
Page 26: ...of choice and then press the MENU button The chosen language will be reflected immediately MAIN MENU ENGLISH GERMAN FRENCH ITALIAN SPANISH 800X600 H37 8KHZ V 59 8HZ Language Main Menu Recall Select t...

Page 27: ...e the OSD Main Menu 1 Press the MENU button to activate the OSD Main Menu 2 Press the or the button to highlight Exit and press the MENU button to close the OSD Main Menu Note The OSD Menu disappears...

Page 28: ...20 KVM DRAWER T1500 USER MANUAL...

Page 29: ...x 13 1 2mm x 249mm x 333 mm Maximum Resolution XGA 1024 x 768 Input signal format RGB Analog Video Keyboard PS 2 notebook style with touchpad Touchpad Integrated touchpad with two button control Gross...

Page 30: ...less KVM switch and enables selection and control of up to 42 servers It is ideal for server management where space is at a premium or where access distance is up to 1 000 feet in areas such as corpor...

Page 31: ...for more information Press the AUTO button Unstable Screen Check if PC display resolution is no greater than 1024 x 768 at 85hz Check if PC display resolution matches the factory preset timings Chang...

Reviews: