Chapter 6: LCD Panel Operation
61
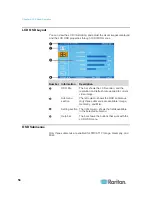
2. Press or
to select the submenu (icon) you want, and press
to confirm. When a submenu is selected, it is highlighted in
orange.
3. Press or
to select the field whose value or option you want to
change. When a field is selected, it is highlighted in blue.
4. Press or
to adjust the value or switch among available
options.
5. To adjust more fields on the same submenu, repeat Steps 3 to 4.
Note: Some settings like the Display Mode field may close the LCD
OSD menu after changing the option or value. If so, start from Step 1 if
you want to change other LCD OSD settings.
6. Press to quit the current submenu.
7. To adjust the settings on the other submenus, repeat Steps 2 to 6.
8. Press to quit the LCD OSD menu.
Auto-Adjusting Display Settings
Instead of customizing the LCD display settings manually, you can have
the LCD automatically configure all visual settings according to the video
signals it receives.
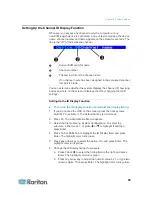
There are two ways to perform the auto-adjustment function: the UP
botton on the LCD control or the LCD's OSD interface.
To auto-adjust visual display settings using a button:
1. Ensure you have accessed a channel, and the LCD OSD menu is not
displayed on the screen.
2. Press .
A message "Auto Adjusting" is displayed on the screen, and the screen
flickers momentarily until it finds the ideal profile.
To auto-adjust visual display settings using the LCD OSD:
1. Press . The LCD OSD menu appears.
2. Press or
to select the Geometry submenu, and press
to
confirm.
3. Press or
to select the Auto Adjust field.


