background image

Rasha Professional A/S 1800 Rustin Ave., Riverside CA, 92507 

951-654-3585

rashaprofessional .com 

|

 info@rashaprofessional.com

3

1. Before You Begin ................................. 4 

What Is Included .................................. 4
Claims .................................................. 4 
Manual Conventions ............................ 4 
Symbols ............................................... 4  
Safety Notes ......................................... 5
Personal Safety .................................... 5 

Mounting And Rigging .......................... 5
Power And Wiring ................................. 5
Operation ............................................. 5

2. Introduction .......................................... 7 

Description ........................................... 7 
Features ............................................... 7 
Overview .............................................. 7 
Dimensions .......................................... 7 

3. Setup..................................................... 8 

AC Power ............................................. 8 
AC Plug ................................................ 8
Fuse Replacement ............................... 8 
Power Linking ....................................... 8 
DMX Linking ......................................... 8 
DMX Personalities ................................ 8 

Mounting .............................................. 9 
Orientation ............................................ 9 
Rigging ................................................. 9 
Procedure ............................................  9 
 

4. Operation............................................ 10 

Control Panel Description .................. 10
Menu Map .......................................... 11           
Menu Intro .......................................... 11
Operations .......................................... 12 

Parameter Value Settings .................. 12 
Sub-menu ........................................... 12
Set Dmx Address ............................... 13
Set Fixture Mode ................................ 13
Set Display Mode ............................... 14
Set Test Mode .................................... 14

Set Light Run Parameter .................... 15
View Status ........................................ 15
DMX Channels ................................... 16

Specifications

 ..................................... 18

5. Technical Specifications

 ................... 19 

Returns ............................................... 19
Contact Us ......................................... 20

Table of Contents

Summary of Contents for Kanon

Page 1: ...RASHA PROFESSIONAL A S Rasha Professional A S 1800 Rustin Ave Riverside CA 92507 951 654 3585 rashaprofessional com info rashaprofessional com 1 QUICK USER MANUAL...

Page 2: ...rademarks and resources Copyright 2015 RASHA All rights reserved Electronically published by Rasha in the United States of America Manual Use Rasha authorizes its customers to download and print this...

Page 3: ...res 7 Overview 7 Dimensions 7 3 Setup 8 AC Power 8 AC Plug 8 Fuse Replacement 8 Power Linking 8 DMX Linking 8 DMX Personalities 8 Mounting 9 Orientation 9 Rigging 9 Procedure 9 4 Operation 10 Control...

Page 4: ...ay Void your claim In addition keep the box and contents for inspection For other issues such as missing components or parts damage not related to shipping or concealed damage file a claim with Rasha...

Page 5: ...his product in a location with adequate ventilation at least 20 in 50 cm from adjacent surfaces Make sure there are no flammable materials close to this product while it is operating Always carry this...

Page 6: ...wash Create coordinated light shows by linking other fixtures in master slave mode Daisy chain linkable power and signal Enhance light shows with adjustable electronic strobe and dimmer effects Compac...

Page 7: ...Rasha Professional A S 1800 Rustin Ave Riverside CA 92507 951 654 3585 rashaprofessional com info rashaprofessional com 7 OVERVIEW...

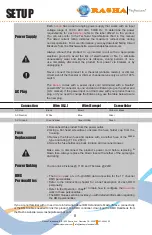
Page 8: ...input cord that came with your product has no plug or if you need to change the Edison plug use the table below to wire the new plug Fuse Replacement 1 Disconnect this product from the power outlet 2...

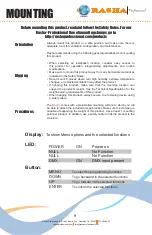
Page 9: ...humidity extreme temperature changes or restricted ventilation may affect the product If hanging this product make sure that the mounting location can support the product s weight See the Technical S...

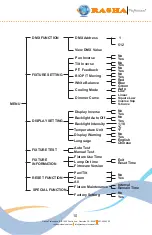
Page 10: ...st Fixture Maintenance Fixture Use Time Pan Tilt B O P T Moving Display Warning Manual Test Factory Setting Lamp On time Zoom Firmware Version All White Balance Language Cooling Mode Dimmer Curve 1 51...

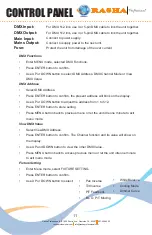
Page 11: ...DMX Value DMX Address Select DMX Address Press ENTER button to confirm the present address will blink on the display Use UP or DOWN button to adjust the address from 1 to 512 Press ENTER button to st...

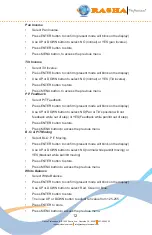
Page 12: ...confirm present mode will blink on the display Use UP or DOWN button to select NO Pan or Tilt s position will not feedback while out of step or YES Feedback while pan tilt out of step Press ENTER but...

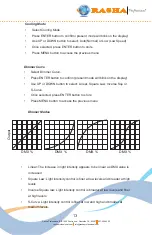
Page 13: ...s ENTER button to confirm present mode will blink on the display Use UP or DOWN button to select Linear Square Law Inverse Squ or S Curve Once selected press ENTER button to store Press MENU button to...

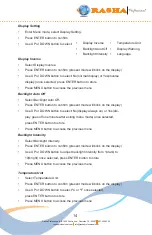
Page 14: ...o Off Select Backlight Auto Off Press ENTER button to confirm present mode will blink on the display Use UP or DOWN button to select No display always on or Yes dis play goes off one minute after exit...

Page 15: ...ixture Test Press ENTER button to confirm present mode will blink on the display Use UP or DOWN button to select Auto Test or Manual Test Once selected press ENTER button to store Press MENU button to...

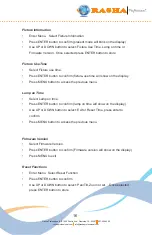
Page 16: ...ton to confirm fixture use time will show on the display Press MENU button to access the previous menu Lamp on Time Select Lamp on time Press ENTER button to confirm lamp on time will show on the disp...

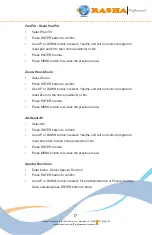
Page 17: ...to confirm Use UP or DOWN button to select Yes the unit will run built in program to reset Zoom to the home positions or No Press ENTER to store Press MENU button to access the previous menu All Reset...

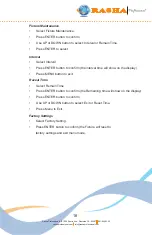
Page 18: ...o select Factory Settings Select Factory Setting Press ENTER button to confirm the Fixture will reset to factory settings and exit menu mode Interval Select Interval Press ENTER button to confirm the...

Page 19: ...m Color 245 249 Random Color 250 255 Open KANON DMX CHART Kanon 14 Channel DMX CHANNEL VALUE FUNCTION 1 0 255 Pan 2 0 255 Pan Fine 3 0 255 Tilt 4 0 255 Tilt Fine 5 0 255 P T Speed Fast Slow 6 0 9 No F...

Page 20: ...for the return Clearly label the package with an RMA number Rasha will refuse any product returned without an RMA number DO NOT write the RMA number directly on the box Instead write it on a properly...

Page 21: ...GUANGZHOU CHINA VOICE 00866 020 37726213 Technical Support Email Support rashaprofessional com www rashaprofessional com www rashalight com UNITED STATES Rasha Professional A S LLC General Informatio...

Page 22: ...Rasha Professional A S 1800 Rustin Ave Riverside CA 92507 951 654 3585 rashaprofessional com info rashaprofessional com 22 NOTES...

Page 23: ...Rasha Professional A S 1800 Rustin Ave Riverside CA 92507 951 654 3585 rashaprofessional com info rashaprofessional com 23...

Reviews: