Panta-V7 DMX Mode
DMX Mode:
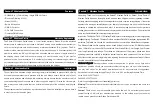
Operating through a DMX controller gives the user the freedom to create their own programs tailored to their
own individual needs. This function also allows you to use your fixtures as spot lights. The Panta Wireless
Profile has 5/9 DMX Mode (for each modes
’
DMX traits See below dmx chart).
1. This function will allow you to control each individual fixture
’
s traits with a standard DMX 512 controller.
2. To run your fixture in DMX mode press the Addr button until
“
Addr
”
is displayed.
“
ADDR
”
represents the
current displayed address then press A001. Use the UP or DOWN buttons to select your desired DMX address,
then press the SETUP button to select your DMX Channel mode.
3. Use the UP or DOWN buttons to scroll through the DMX Channel modes. The Channel modes are listed
below:
To run the 5 Channel Mode, press the CHND button then use UP/ Down Button unit
“
5CH
”
is displayed. This is
the 5 Channel DMX Modes.
To run the Channel Mode, press the CHND button then use UP/ Down Button unit
“
9CH
”
is displayed. This is
the 9Channel DMX Mode.
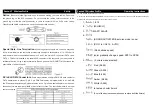
4. Please see below pages for DMX values and traits.
5. After you have chosen your desired DMX Channel mode plug in the fixture via the XLR connections to any
standard DMX controller.
Panta
–
V7 Wireless Profile Operating Instructions
Display Inversion:
Menu down up Enter
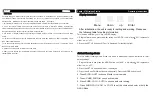
After initialization, the unit is ready for setting and working. Please see
the following table for setting information
This function will allow you to
“
flip
”
the LED display.
1. Plug the fixture in and press the Addr button until
“
ADDR
”
is dis- played
.
“
001
”
represents
either
“
on
”
or
“
oFF
”
.
2. Press the SET UP button until
“
Test
”
is displayed. For testing the light
Default Running Mode:
This is a default running mode. When this mode is activated all modes will return to their
default settings.
1. Plug the fixture in and press the MODE button until
“
dXX
”
is dis- played
.
“
XX
”
represents
either
“
on
”
or
“
oFF
”
.
2. Press the SET UP button until
“
Addr
”
is displayed.
3. Press the UP and DOWN buttons simultaneously. Press the MODE button to exit.
4. Press SLDN
–
NAST to choose Master or salve mode
5. Press
–
SHND-SOUN for sound active mode
6. Press SHND-COLO
–
AUTO to choose auto color mixing
7. Press SHND-COLO-COL1 to COL16 to set the customized color or hold the
NANU Mode

