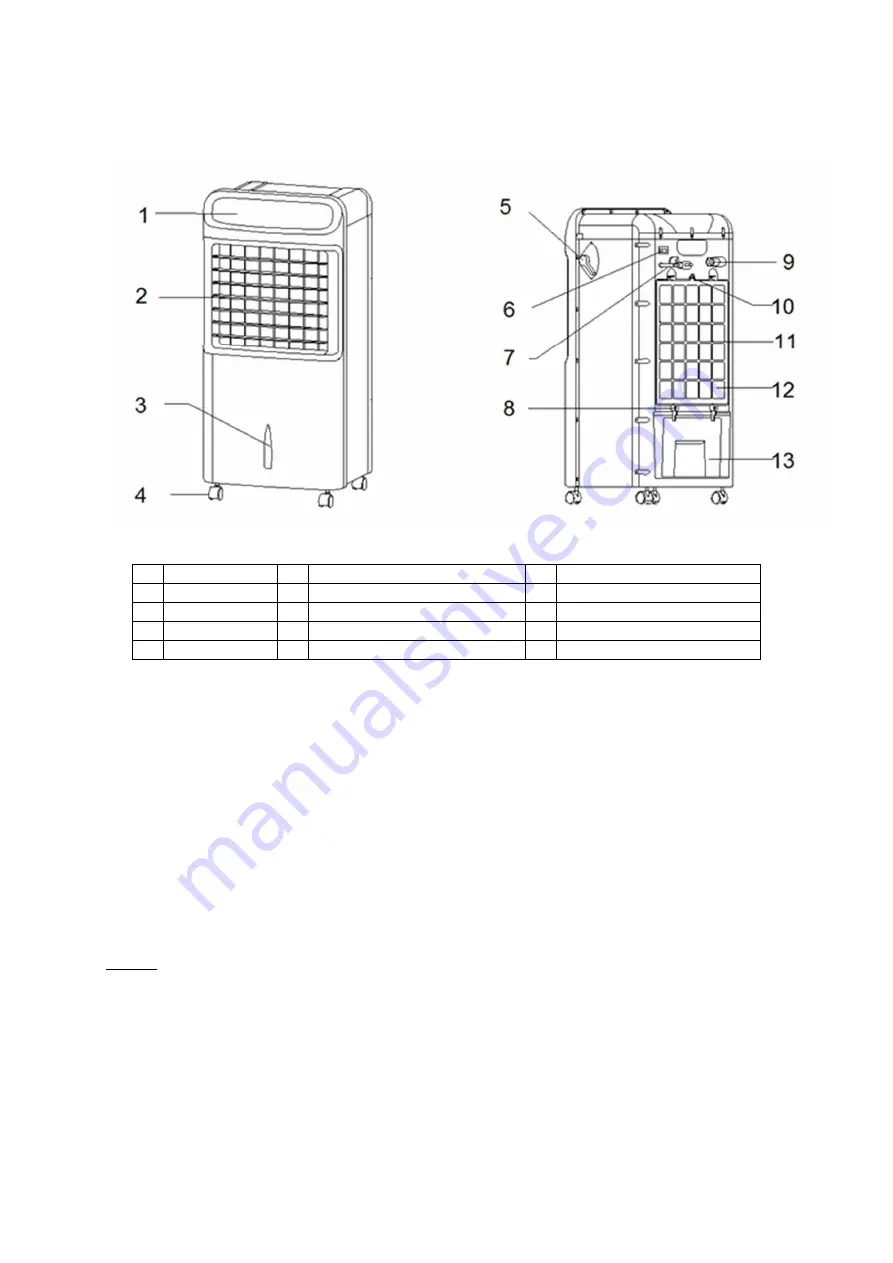
Specifications
1
Control panel
2
Louver
3
Water tank inspection window
4
Wheel
5
Change-over switch ()
6
Power switch
7
Cable
8
Water tank lock
9
Cable holder
10 Screw
11 Filter
12 Cooling pad
13 Water tank
Assembly of the Air Cooler
1.Remove the packaging carefully taking care not to damage the plastic body with the scissors or knife
2.Installation of Wheels: place 4 wheels to the holes located at the base of the air cooler. Insert the wheels tightly
to the air cooler’s body.
3.Set the unit on a stable and horizontal base, keeping it away from radiating heat sources and naked flame.
4. Filling Water: Turn the water tank lock to horizontal position, taking out the water tank, put in the ice boxes
and add clean tap water to the tank. Be sure that water level in the tank does not exceed the level “MAX” which
is located at the back of the tank.
5. Push the water tank to its housing and turn the tank lock to the vertical position.
6. Remote control: It is with CR2025 button cell. Before use, please pull out the card which is inserted at the
button of the remote control.
OPERATING INSTRUCTIONS
Start-up
ATTENTION!
Make sure that the power source to which the appliance is to be connected is accordant with the parameters
specified on the rating plate.
Attention!
Before every use, inspect the device for any signs of mechanical damage. Inspect the power cord. If the power
cord is damaged, do not plug the device in.
Attention: cut the power when you pour the water into the tank.


