


11
then press and hold [6] for 3 seconds. The display
will show “SCREW STATE”.
2. Use Button [1] to turn the Auger On “SCREW 1” and
button [2] to turn it OFF.
3. Once started auger will run for a couple of minutes
4. Remember to turn the screw OFF (SCREW 0) with
button [2] before exiting, button [3]
5. Empty the burner pot of any pellets before starting
Also see “6.6 Menu Five - Stove State (Fire Status)” on
page 10.
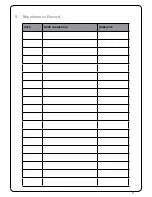
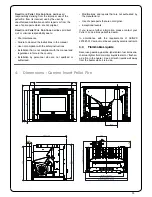
6.7
Menu Six - Working Hours
The WORKING HOURS Menu shows the total run hours
To enter this menu, proceed as follows:
1. Press Buttons [7] (Menu 01 “Set Clock” will appear).
2. Press button [1] twice until you see (Menu 06
“WORKING HOURS MENU.
3. Press [7] to enter this menu .
4. Press [3] to return to the main screen.
SCREEN DISPLAY
DESCRIPTION
FINAL CLEANING
The stove is switching off, the cooling phase is not yet completed
LIGHT
WAIT FOR FLAME
The pellet’s are ignited by the hot air passing through the ignition
candle
FLAME PRESENT
WORK
The stove has completed the switch ON phase; you can now
change the power
MODULATION WORK
The set room temperature has been reached
T ON
The room sensor is off or an external thermostat has been
connected
COOLING/WAITING FOR START
The stove is cooling DOWN. When stove has cooled down it will
start automatically.
ON/WAITING FOR RESTART
The switch ON phase, when the stove is warm, started. The
operation is same as phase ON
HOT SMOKE
The max temperature of smokes is reached: to reduce
temperature, feeding pellets and air draft reduce at POWER 01
OFF
The stove is off
6.8
Description of Screen Displays
7. Troubleshooting
7. Troubleshooting
Unscrew
button
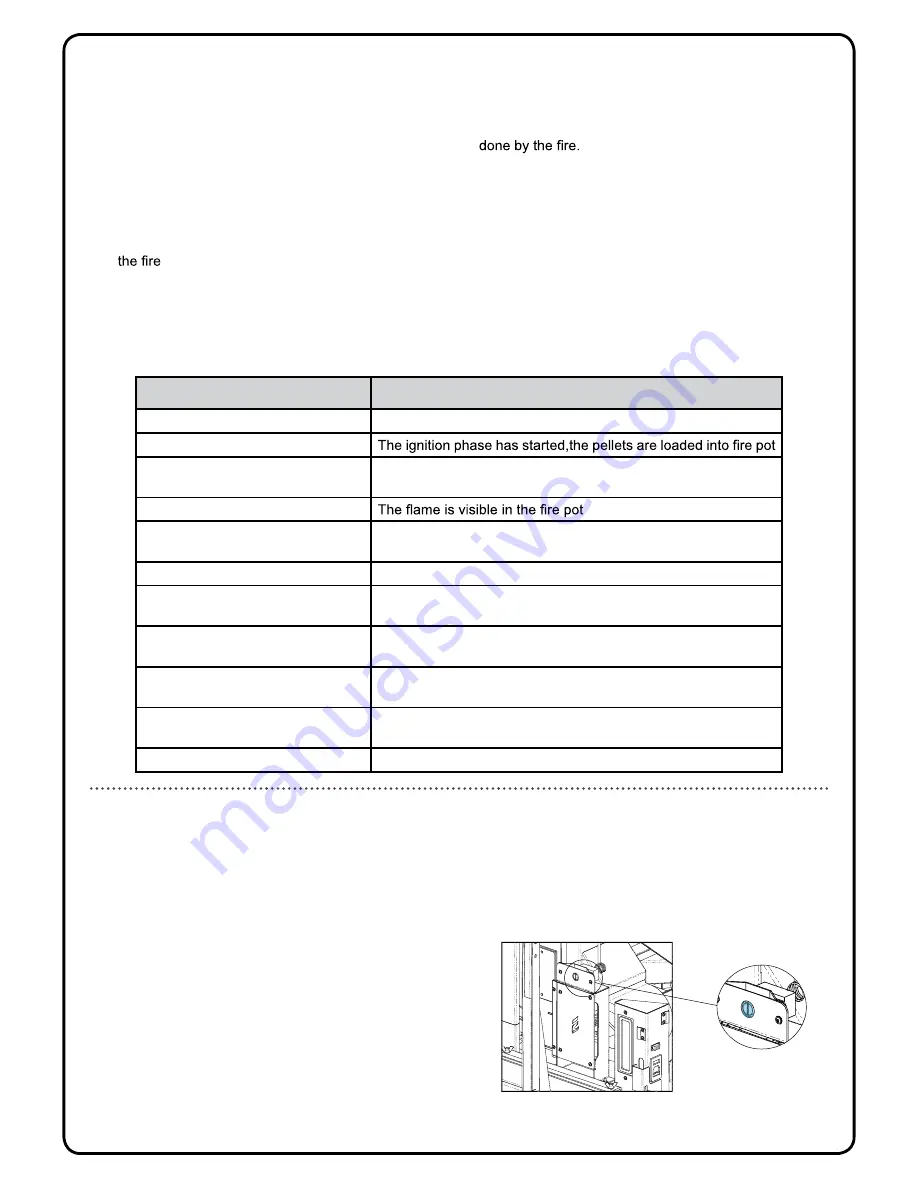
Make sure you ascertain the reason for this
safety device to trip before restarting the fire.
to
the
reset
protection
the thermostat
cap and
alarm.
press
the
In the event of a problem with the fi re it will sound an
alarm and display a fault code and description, see
“7.1 Explanation of Alarms” on page 12 for more
information on the cause and what to do.
The fault can be cleared by pressing and holding button
[3] on the remote. Note which fault is displayed on the
screen before re-setting the alarm.
For basic faults follow the steps to resolve the problem
and try restarting the
fi
re. For more complex issues
contact your local dealer/service agent.
If the fire gets too hot this will trip a safety device and
display “THERMAL ALARM” . The safety device will
need
This is located under the black cap above the
electronics panel (see below).
to be manually re-set before the fire will work.
Page 9


