Brochure for models with FLASH motherboard
( firmware version ECT2008air - & ECT2008box - )
PAGE
17
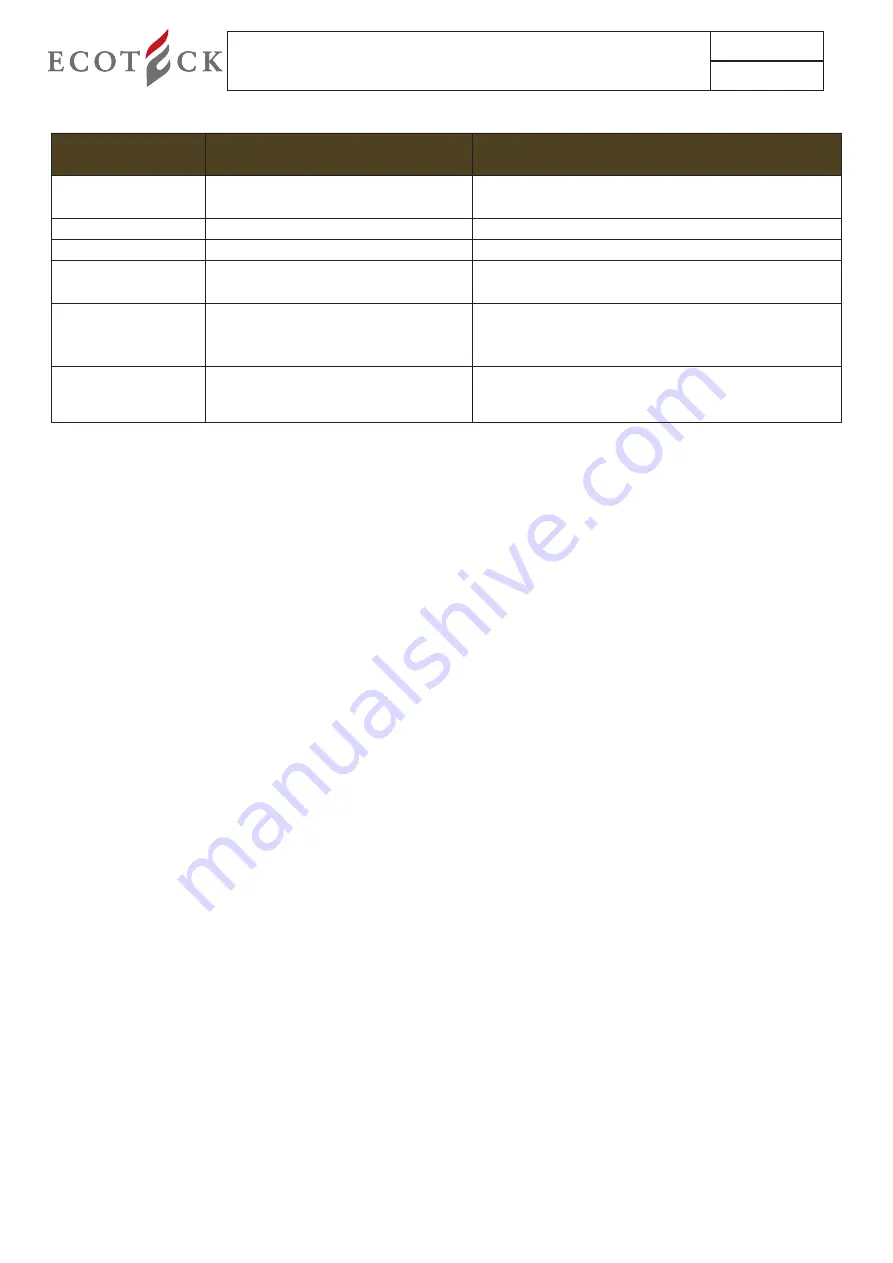
3.4 Rapid access menu
KeY COMBinatiOns
aCCess tO
DesCRiptiOn
p5 for 4 sec
statUs MenU
stove, auger, exhaust blower and smoke temperature
status
p4 for 4 sec
COMFORt CLiMate
see point e par. 1.2.1
p6
DRaUght/peLLet MenU
see par. 2.3
p1 for 4 sec
DispLaY VeRsiOn anD CURRent
ReCeipt
Display firmware name and current receipt type
p3 for 4 sec + p2
WORK
Method useful during the assistance phase for passing
straight to the work phase without going through
previous phases.
p5 + p6
COMFORt CLiMate tiMeR
eCO stOp activation timer after MODULate WORK
3.5 “tiMe CLeaR“ menu
in the tiMe CLeaR menu it is possible to clear the total working time of the stove. Once the menu has been selected input with key
p2 the value 35 as access key and confirm with key p7. “eXeCUteD” will appear on the screen confirming the clear operation.
3.6 “DeFaULt settings” menu
to change the stove parameters value, enter the DeFaULt settings menu and with key p2 set value a9 as access key and confirm
with p7. to scroll the list use keys p1 and p2, to change the parameter value use keys p6 and p7. to exit the menu default settings
press key p3.
3.7 “DataBase“ MenU
in processing phase.
3.8 “set CLOCK“ menu
to set the clock, proceed as follows:
1. Keep the p7 button pressed, CLOCK set MenU will appear and confirm with the button p7.
2. DaY CLOCK will appear: with buttons p1 and p2 set the current day according to the table shown below and confirm with button
p7.
3. tiMe CLOCK will appear on the display and the current time will be shown: using keys p1 and p2 adjust the time and confirm with
key p7.
4. MinUtes CLOCK will appear on the display; set the minutes with buttons p1 and p2 and confirm with button p7.
5. Confirming with key p7 you return automatically to the 01 set CLOCK MenU.
For specifications relating to clock setting parameters refer to paragraph 2.8
3.9 “set CROnO“ menu
With the chronothermostat function, switching on and off the stove for each day of the week can be programmed in two indepen-
dent time intervals (pROgRaM 1 and pROgRaM 2).
to enter this menu, proceed as follows:
1. press button p7, CLOCK setting MenU will appear.
2. press button p2 1 time: the screen will display the 02 set CROnO MenU.
3. access with button p7. the display will show the desired screen.
For the description of the strings refer to paragraph 2.9


