Manual No. 016-0197-003
15
Installing SmarTrax with Cruizer
5.
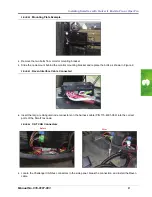
Remove protective cover and connect to the Raven cable.
6.
Locate the Challenger CANbus connectors in the side panel.
FIGURE 5.
CAT CAN Connectors
7.
Break the connectors and connect the Raven cable
.
FIGURE 6.
Foot Switched Installed
8.
Mount the foot switch to the floor of the cab using screws or double-sided tape (not included in the
installation kit).
Note:
The foot switch should be mounted in a location that allows the front of the pedal to be fully
pressed without interference.
9.
Connect the foot switch to the node cable.
Install the Cruizer Equipment
1.
Connect the display cable to the Cruizer port A (the connector underneath the coaxial antenna connector).
2.
Connect the DGPS out connector to supplied Cruizer cable (P/N 115-0171-796).
3.
Connect GPS source to the cable labeled DGPS.
Before
After
Summary of Contents for Challenger MT 7XXC Series
Page 4: ...Table of Contents ii Challenger MT 7XXC and MT 8XXC Series SmarTrax Installation Manuall ...
Page 18: ...Chapter 4 16 Challenger MT 7XXC and MT 8XXC Series SmarTrax Installation Manual ...
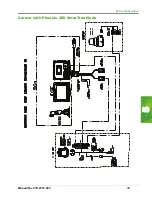
Page 21: ...5 Manual No 016 0197 003 19 Wiring Schematics Cruizer with Phoenix 200 SmarTrax Node ...
Page 23: ...5 Manual No 016 0197 003 21 Wiring Schematics Cruizer with Helix Antenna SmarTrax Node ...
Page 24: ...Chapter 5 22 Challenger MT 7XXC and MT 8XXC Series SmarTrax Installation Manual ...
Page 26: ...Index 24 Challenger MT 7XXC and MT 8XXC Series SmarTrax Installation Manual ...


