3
Care and Maintenance
• Harsh chemicals may damage the touch screen. Clean the touch screen
and console exterior as needed with a soft cloth dampened with glass
cleaner. Apply the cleaner to the cloth and then wipe the screen gently.
• To avoid scratching the touch screen, do not use any type of sharp
instrument. Only a fingertip or an approved stylus should be used.
• Do not expose the Cruizer II console to precipitation, condensation, or other
liquids. Store the console in a dry environment when not in use.
• The suction cup is not meant as a permanent mounting solution. It is
recommended that the suction mount only be used when the console is in
operation. Clean the mounting surface with alcohol or a similar cleaner prior
to attaching the suction mount. Clean the mounting surface and suction cup
periodically.
• Route cables to prevent tripping hazards and to keep wires from pinching or
breaking.
• When temperatures are expected to be 10° F (-12° C) or lower, remove the
console from the vehicle and store it in a climate controlled environment.
• Even when powered down, the Cruizer II console will draw a small amount
of power from the vehicle battery. If the machine will not be in operation for
an extended period of time (e.g. more than a couple weeks), disconnect the
power cable from the back of the console.
Installation
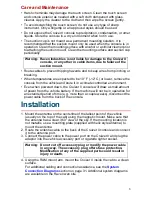
1. Mount the antenna on the centerline of the tallest point of the vehicle
(usually on the top of the cab) using the magnetic mount. Make sure that
the antenna has a clear, 360° view of the sky. If the mounting location is
not metallic, use a mounting plate (supplied with helix style antenna) to
mount the antenna.
2. Route the antenna cable to the back of the Cruizer II console and connect
it to the antenna port.
3. Connect the power cable to the power port on the Cruizer II and plug the
adaptor into the vehicle accessory port or cigarette lighter socket.
4. Using the RAM mount arm, mount the Cruizer II inside the cab to a clean
surface.
For additional cabling and connection assistance, see the
System
Connection Diagrams
section on page 31. Additional system diagrams
are available on the Raven web site.
Warning: Raven Industries is not liable for damage to the Cruizer II
console, or any other in cabin items, due to failure of the
suction mount.
Warning: Do not cut off accessory plug or modify the power cable
in any way. The accessory plug offers fuse protection.
Modification of any of the supplied parts could result in
injury or death.
Summary of Contents for Cruizer II
Page 1: ... Software Version 3 0 Cruizer II Operation Guide ...
Page 34: ...3 2 FIGURE 3 Cruizer II with SmartSteer 3D SmartBoom and SCS 440 ...
Page 35: ...3 3 FIGURE 4 Cruizer II RTK with Slingshot and SmarTrax ...
Page 36: ...3 4 ...
Page 37: ......
Page 38: ......

