Quick Start Guide
Getting started with Raven Scanner
3
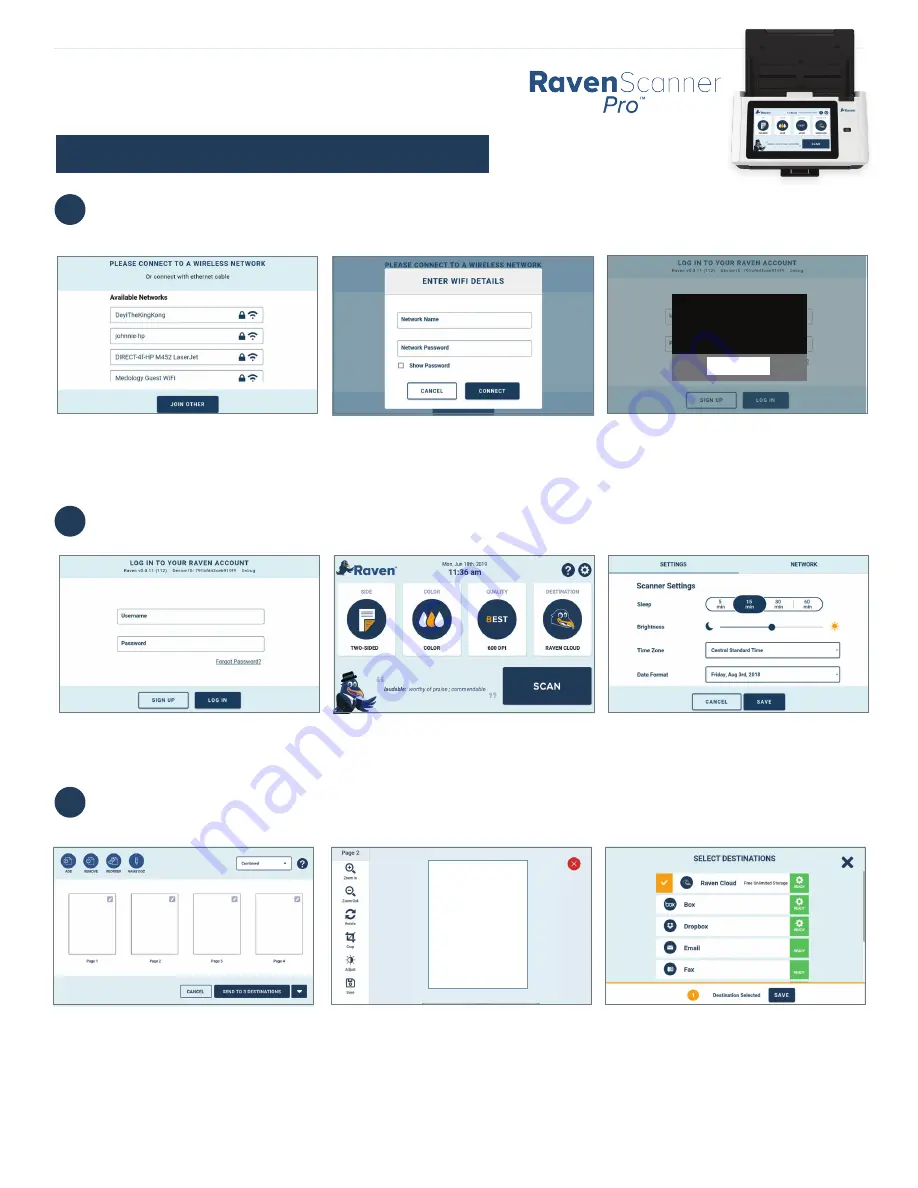
Scan preview shows scanned pages and allows you to change the scanned file destination.
3.1 On the scan preview screen, you can
remove or reorder pages, select combined
or single output files, or name the
document.
YOUR
SCANNED
DOCUMENT
3.2
You can edit individual pages by
clicking on preview thumbnails.
3.3
Set up destination connections at
app.Raven.com/connect.
Version 5
Download the user manual and the TWAIN driver at
raven.com/downloads
Our support team is available to answer any questions and take your feedback.
Call us at
1-800-713-9009
or email
support@raven.com
2
Sign in to your Raven account, or sign up for free if you don’t already have an account.
2.1 Sign in to your Raven account, or sign
up for a free account.
2.2 Welcome screen shows scan options,
and access to the settings menu.
2.3 Settings allow making changes to the
scanner and network.
1
Power on and get connected via Ethernet cable, or
your preferred wireless network.
1.1 Connect to an available wireless
network, or connect via ethernet cable.
1.2 “Join Other” if your network is not listed
to enter manually.
1.3 If an update is required, choose "Update"
then "Install", "Install Manually" or "OK"
when prompted.
New update
A software update
is required.
UPDATE
Claim Your
FREE
Product - visit Raven.com/freeproduct


