8
Manual No. 016-0171-122 Rev. I
141
Advanced Settings and Features
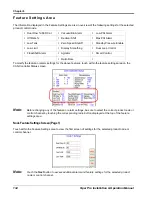
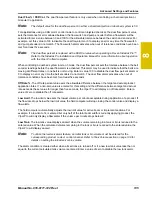
Valve Adv. (Advance - Standard, or Fast Valves).
While in the automatic rate control mode, the value
entered in the valve advance field sets the time (in seconds) which the field computer will allow the control
valve to remain open after boom sections are toggled off. The valve advance feature is best used in
conjunction with the valve delay value to build up boom pressure for low rate product applications or with
valves with “flow back” features.
Enter a value between 1 and 9 seconds to enable the valve advance feature or a value of 0 to disable this
feature if a Fast Close, PWM, or PWM Close control valve is used for product control.
Note:
For best results, approach headlands areas at a consistent speed while turning boom sections off.
The Valve Advance feature should only be used with Standard or Fast valves and the assigned
product control node must have software version 1.50 or higher. This setting must remain at zero
for products using a Fast Close, PWM, or PWM Close control valve.
Fan/Pump Cal.
The fan/pump cal value is only used to monitor product pump speed during standard liquid
applications or to monitor fan or spinner speed during granular applications.
Enter the number of pulses detected per one revolution of the fan, spinner or pump shaft.
Note:
The fan/pump cal value is only used to monitor the RPM of a fan, spinner or product pump. To
control fan or spinner RPM, refer to the Spinner RPM section on page 250.
Min PW.
Use the Min PW (Pulse Width) feature to set the minimum desired RPM or hydraulic output (zero
point or shutoff point) for a Pulse Width Modulated (PWM) control valve.
Note:
Refer to PWM Calibration Assistance section on page 236 for details on using the calibration
assistance to calculate the Min and Max PW values.
Max PW.
Use the Max PW (Pulse Width) feature to set the maximum desired RPM or hydraulic output (zero
point or shutoff point) for a Pulse Width Modulated (PWM) control valve.
Note:
Refer to PWM Calibration Assistance section on page 236 for details on using the calibration
assistance to calculate the Min and Max PW values.
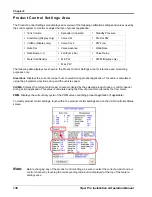
Node Control Settings Screen (Page 3)
Standby Pressure.
When controlling a liquid product with a PWM valve selected (not PWM close), the
standby pressure value sets the pressure which the system will maintain in the product lines when the master
or all boom sections are toggled off.
Note:
The standby pressure setting is only accessible when controlling products in liquid control modes
with a boom pressure transducer detected by the field computer. Refer to the Standby Pressure
section on page 137 for details. If the system pressure does not reach the set standby pressure, or
if the observed pressure oscillates, when the master switch is toggled off, the Sgain value will
need to be adjusted. See the Sgain (Pressure System Gain - Dual Loop Control Mode) section on
page 235 to adjust the Sgain value.
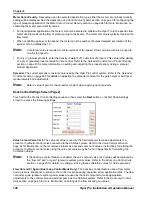
Pre Set PW.
Use the pre-set PW (Pulse Width) setting to set an initial target pulse width value when using a
valve that is programmed in PWM Close mode. Enter a value between 1 (slow pulsed width) to 255 (full-scale
pulsed width). Viper uses this value to send an initial pulse width to the valve when the booms or nodes are
turned on. When a value is entered in this field, the PWM output will not exceed this value when any sections
with a non-zero boom cal are off.
When the pre-set PW value is set to zero, the initial pulse width will be equal to the previous state.
Summary of Contents for Viper Pro
Page 1: ... Software Version 3 10 Viper Pro Installation Operation Manual ...
Page 42: ...Chapter 3 32 Viper Pro Installation Operation Manual ...
Page 132: ...Chapter 6 122 Viper Pro Installation Operation Manual ...
Page 138: ...Chapter 7 128 Viper Pro Installation Operation Manual ...
Page 180: ...Manual No 016 0171 122 Rev I 170 Advanced Settings and Features ...
Page 194: ...Chapter 9 184 Viper Pro Installation Operation Manual ...
Page 214: ...Chapter 11 204 Viper Pro Installation Operation Manual ...
Page 262: ...Appendix B 252 Viper Pro Installation Operation Manual ...
Page 276: ...Appendix F 266 Viper Pro Installation Operation Manual ...
Page 284: ...Appendix I 274 Viper Pro Installation Operation Manual ...
Page 292: ...Appendix J 282 Viper Pro Installation Operation Manual ...
Page 299: ......

