nVent.com | 3
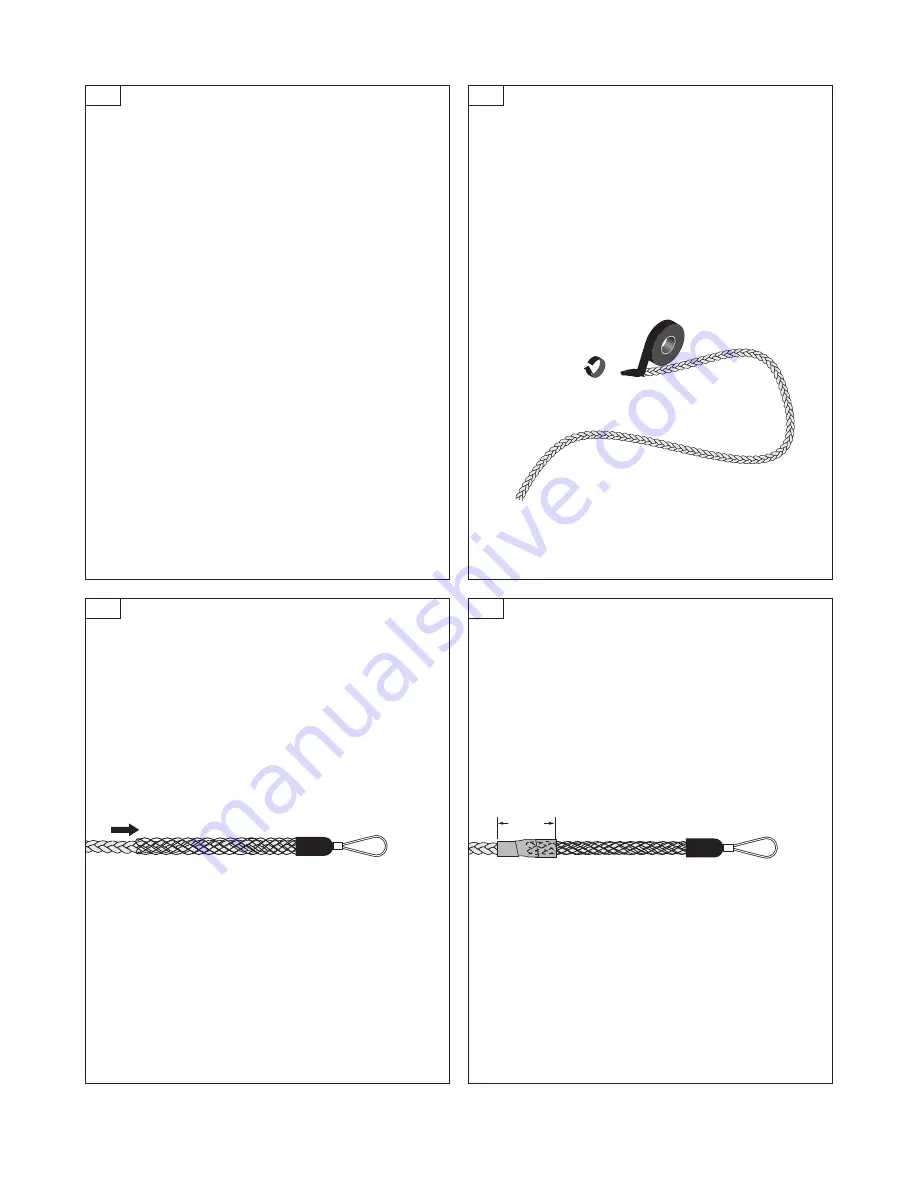
2 in
(50 mm)
Tape over here.
3A
3C
3B
3D
Install sensing cable in accordance with the leak detection
layout plan.
Planning the cable pull:
• Verify that each end is terminated in a rope overbraid
loop. Identify which end of the cable (Pin or Socket) is
on the outside of the reel by examining the label near the
overbraid loop.
• Attach the pull rope to the rope overbraid loop only
after planning the direction of the cable pull based
on which cable end is on the outside of the reel.
Note the PIN connector end of cable is always
oriented towards the TraceTek alarm module.
• If PIN connector end is on the outside of reel, pull cable
into conduit towards the TraceTek alarm module.
• If SOCKET connector end is on the outside of reel, pull cable
into conduit away from the TraceTek alarm module.
Common mistakes include pulling the cable into the wrong
conduit, and pulling the wrong end of cable into the conduit.
Before pulling the cable into any conduit, verify that correct
conduit is being used. Good conduit installations will use a
strategy to mark conduits. Check with project supervisors
if any doubt exists as to how the conduit is labeled. Errors
in conduit identification and cable orientation can result in
compromised cable quality.
• Insert the end of the rope braid as far as possible into
the cage end of the Kellems grip.
Attach the Kellems grip (if necessary):
• For TT500X-HS bulk cable, you may need to use a
Kellems grip to perform the cable pull when the rope
overbraid loop is not available.
• Make sure the end of the sensing cable has been
properly prepared.
• The end of TT500X-HS sensing cable should be sealed
with heat shrink tubing, and the end of the rope braid
should be taped to form a tapered end.
• Tightly wrap electrical tape over last 1 inch of the
Kellems grip cage, and also over 1 inch of the rope
braid. Make a smooth transition with the tape. The tape
is necessary to prevent the Kellems grip cage from
releasing the cable in the event of a backwards pull.


