background image

Bedienungsanleitung 

R/C Rayline „R201“ Geländewagen 


2


DE 

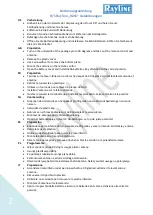
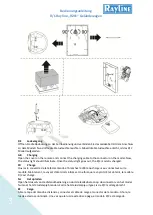
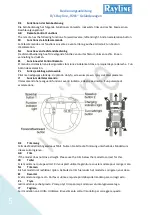
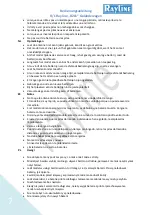
Vorbereitung 


Drehen Sie an der Unterseite der Verpackung den Pin um 90° und holen Sie die 
Fernbedienung und Antenne heraus. 


Entfernen Sie die Kunststoff Abdeckung 


Benutzen Sie einen Schraubendreher zum Entfernen der Bodenplatte. 


Befestigen Sie die Antenne an der Fernbedienung. 


Öffnen Sie die Batterieabdeckung und installieren Sie 4xAA Batterien. Achten Sie hierbei auf 
die korrekte Polarität 

GB 

Preparation


Turn on the underside of the package pin to 90 degrees and take out the remote control and 
antenna. 


Remove the plastic cover 


Use a screwdriver to remove the bottom plate. 


Mount the antenna on the remote control. 


Open the battery cover and install 4xAA batteries. Pay attention to the correct polarity 

FR 

Préparation


Tournez sur la face inférieure de la broche paquet de 90 degrés et sortez la télécommande et 
antenne. 


Retirez le couvercle en plastique. 


Utilisez un tournevis pour enlever la plaque de fond. 


Installez l'antenne sur la télécommande. 


Ouvrez le couvercle de la batterie et installez les piles 4xAA. Faites attention à la polarité 

NL 

Voorbereiding


Draai aan de onderzijde van het pakket pin 90 graden en de afstandsbediening en antenne 
nemen. 


Verwijder de plastic kap 


Gebruik een schroevendraaier om de bodemplaat te verwijderen. 


Monteer de antenne op de afstandsbediening. 


Open het batterijklepje en plaats 4 AA-batterijen. Let op de juiste polariteit 

ES 

Preparación


Encienda la parte inferior del pin paquete de 90 grados y sacar el mando a distancia y antena. 


Retire la tapa de plástico 


Utilice un destornillador para quitar la placa inferior. 


Monte la antena en el mando a distancia. 


Abra la tapa de las pilas y coloque pilas 4xAA. Preste atención a la polaridad correcta 

PL 

Przygotowanie


Włącz spodem pin do 90 stopni i wyjąć pilota i antenę. 


Usunąć plastikową osłonę 


Za pomocą śrubokręta usunąć płytę dolną. 


Zamontować antenę na pilocie zdalnego sterowania. 


Otwórz pokrywę baterii i zainstalować 4xAA baterie. Należy zwrócić uwagę na polaryzację 

IT 

Preparazione


Accendere il lato inferiore del perno pacchetto a 90 gradi ed estrarre il telecomando e 
antenna. 


Rimuovere il coperchio di plastica 


Utilizzare un cacciavite per rimuovere la piastra inferiore. 


Montare l'antenna sul telecomando. 


Aprire il coperchio della batteria e inserire le batterie 4xAA. Fare attenzione alla corretta 
polarità 


Summary of Contents for R201

Page 1: ...t pas nécessairement à l original NL Gebruiksaanwijzing Lees deze instructies aandachtig en zorgvuldig bewaar ze in staat zijn om omhoog te kijken in de toekomst De afbeeldingen in deze handleiding zijn alleen ter referentie en niet noodzakelijkerwijs overeenkomen met de oorspronkelijke ES Usuario Lea atentamente estas instrucciones y guárdelas cuidadosamente para ser capaz de buscar en el futuro ...

Page 2: ...tention à la polarité NL Voorbereiding Draai aan de onderzijde van het pakket pin 90 graden en de afstandsbediening en antenne nemen Verwijder de plastic kap Gebruik een schroevendraaier om de bodemplaat te verwijderen Monteer de antenne op de afstandsbediening Open het batterijklepje en plaats 4 AA batterijen Let op de juiste polariteit ES Preparación Encienda la parte inferior del pin paquete de...

Page 3: ...s out the R C model is charged FR Charge Ouvrez le couvercle de la télécommande et branchez le câble du chargeur au connecteur sur le modèle Maintenant le voyant d état doit s allumer Une fois que le voyant d état s éteint le modèle R C est chargé NL Het opladen Open het deksel van de afstandsbediening en sluit de laadkabel aan op de connector van het model Nu moet het statuslampje branden Zodra h...

Page 4: ...stato si spegne il modello R C è carico DE Inbetriebnahme Ziehen Sie die Antenne aus und schalten Sie die Fernbedienung und das Modell ein GB Commissioning Pull out the antenna and turn on the remote control and model FR Mise en service Sortez l antenne et tournez sur la télécommande et le modèle NL Inbedrijfstelling Trek de antenne en zet de afstandsbediening en het model ES Puesta en marcha Tire...

Page 5: ...ia Pilot ma następujące funkcje do przodu do tyłu w lewo iw prawo I przycisk przyspieszenie IT Funzioni del telecomando Il telecomando ha le seguenti funzioni avanti indietro a destra ea sinistra E un pulsante di accelerazione DE Trimmung Falls das Modell nicht geradeaus fährt Nutzen Sie bitte die Trimmung unterhalb des Modells um dieses zu korrigieren GB Trim If the model does not drive straight ...

Page 6: ...this could have a range loss The model is very fast you can use it very carefully because it can not stop immediately If the model during the service very slow it is because of a dead battery Please charge the battery as described Slow the model before a curve otherwise it could overturn any If you find that the remote control batteries have run out replace them quickly Let charging unattended Whe...

Page 7: ...que la antena durante el uso esto podría tener una pérdida de rango El modelo es muy rápido se puede utilizar con mucho cuidado porque no puede cesar de inmediato Si el modelo durante el servicio es muy lento es debido a una batería muerta Cargue la batería como se describe Disminuya la velocidad del modelo antes de una curva de lo contrario podría volcar todo Si usted encuentra que las pilas del ...

Page 8: ...di una batteria scarica Caricare la batteria come descritto Lento il modello prima di una curva altrimenti potrebbe ribaltare qualsiasi Se si scopre che le batterie del telecomando sono esaurite sostituirle rapidamente Lasciate che la ricarica automatica Se non sei un modello per un lungo periodo di tempo rimuovere le batterie dal telecomando e memorizzare il modello in un luogo sicuro Non ci devo...

Reviews: