9.2 Tracks
A track is an on-screen trail that shows the passage you have
taken. This trail is made up of a series of track points which
are created automatically. You can save the track to create a
permanent record of where you have been.
D
11754-2
Creating a track
From the chart application menu:
1. Select
Navigate
.
2. Select
Start Track
.
The start track pop up message is displayed.
3. Select
Ok
.
As you navigate your vessel, your journey is automatically
recorded as a track.
Note:
If the power fails whilst a track is being recorded or the
position fix is lost, a break will occur in the track.
Note:
If the maximum number of tracking points is reached,
you will be warned. The track will continue to be recorded with
the earlier tracking points being overwritten.
4. To complete your track select
Stop Track
from the
Navigate
menu:
Menu > Navigate > Stop Track
.
The track stopped pop up message is displayed.
5. Select
Save
,
Erase
or
Cancel
.
•
Save
— Will save the track and open the Edit track
Properties dialog where you can name the track and
choose a color for the track line.
•
Erase
— Will erase the track.
•
Cancel
— Will cancel the Stop Track action.
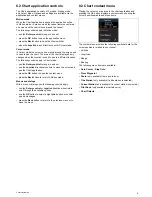
Track context menu
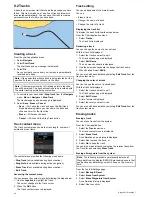
The Track context menu shows the track length, number of
points and menu items.
The context menu provides the following menu items:
•
Stop Track
(only available during track creation.)
•
Stop Goto
(only available during active navigation.)
•
Erase Track
(not available during track creation.)
•
Edit Track
Accessing the context menu
You can access the context menu by following the steps below.
1. Use the
Joystick
to highlight the Track.
The cursor changes to the Track cursor.
2. Press the
OK
button.
The Track context menu is displayed.
Track editing
You can edit aspects of the stored tracks.
You can:
• Erase a track.
• Change the name of a track.
• Change the color of a track.
Displaying the track list
To display the track list follow the steps below.
From the Chart application menu:
1. Select
Tracks
.
The track list is displayed.
Renaming a track
You can change the name of a saved track.
With the track list displayed.
1. Select the track you want to edit.
The track options page is displayed.
2. Select
Edit Name
.
The on-screen keyboard is displayed.
3. Use the on-screen keyboard to change the track name.
4. When finished Select
SAVE
.
You can also edit track details by selecting
Edit Track
from the
track context menu.
Changing the color of a track
You can change the color of a saved track.
With the track list displayed.
1. Select the track you want to edit.
The track options page is displayed.
2. Select
Edit Colour
.
A list of colors is displayed.
3. Select the color you want to use.
You can also edit track details by selecting
Edit Track
from the
track context menu.
Erasing tracks
Erasing a track
You can erase tracks from the system.
From the Chart application:
1. Select the
Track
on-screen
The track context menu is displayed.
2. Select
Erase Track
.
A confirmation pop-up dialog is displayed.
3. Select
Yes
to erase the track, or
4. Select
No
to keep the track.
You can also erase a track by selecting the relevant track from
the Track list and selecting
Erase Track
.
Erasing all waypoints from the system
Note:
The following procedure permanently deletes all
Waypoints from the display. BEFORE proceeding, ensure that
you backup any data that you want to keep on to a memory
card.
From the Tools & Settings page:
1. Select
Backup & Reset
.
2. Select
Erase from System
.
3. Select
Erase Waypoints from System
.
A confirmation dialog is displayed.
4. Select
Yes
to confirm.
64
Dragonfly / Dragonfly 7
Summary of Contents for Dragonfly
Page 2: ......
Page 4: ......
Page 10: ...10 Dragonfly Dragonfly 7...
Page 14: ...14 Dragonfly Dragonfly 7...
Page 34: ...34 Dragonfly Dragonfly 7...
Page 66: ...66 Dragonfly Dragonfly 7...
Page 78: ...78 Dragonfly Dragonfly 7...
Page 90: ...90 Dragonfly Dragonfly 7...
Page 102: ...102 Dragonfly Dragonfly 7...
Page 105: ......
Page 106: ...www raymarine com...


