7.1 GPS Check
Checking GPS operation
You can check that the GPS is functioning correctly
using the chart application.
1. Select the Chart page.
2. Check the screen.
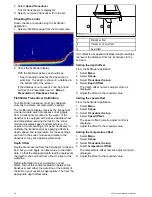
With the chart displayed, you should see:
Your boat position (indicates a GPS fix)
. Your
current position is represented by a boat symbol
or solid circle. Your position is also displayed in
the data bar under VES POS.
A solid circle on the chart indicates that neither
heading nor Course Over Ground (COG) data
is available.
Note:
Raymarine recommends that you check the
displayed vessel position in the chart application
against your actual proximity to a known charted
object. GPS receivers typically have an accuracy
of between 5 and 15 m.
Note:
A GPS Status screen is available within the
Setup menu of Raymarine multifunction displays.
This provides satellite signal strength and other
relevant information.
7.2 Radar check
Warning: Radar scanner safety
Before rotating the radar scanner, ensure
all personnel are clear.
Warning: Radar transmission
safety
The radar scanner transmits
electromagnetic energy. Ensure all
personnel are clear of the scanner when
the radar is transmitting.
Checking the radar
From the Radar application:
1. Select
Menu
.
2. Select
Power
so that On is highlighted.
The Radar scanner will now initialize in standby
mode. This process will take approximately 70
seconds.
3. Select
Radar
so that Transmit is highlighted.
The radar scanner should now be transmitting
and receiving.
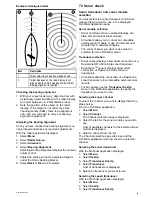
4. Check that the radar screen is operating correctly.
Typical HD radar screen
Note:
The example above is representative of the
enhanced output provided by a HD radar scanner.
Points to check:
• Radar sweep with echo responses are shown
on screen.
• Radar status icon rotating in top right hand
corner of the status bar.
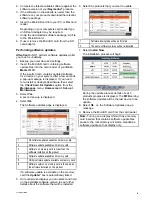
Check and adjust bearing alignment
Bearing alignment
The radar bearing alignment ensures that radar
objects appear at the correct bearing relative to your
boat’s bow. You should check the bearing alignment
for any new installation.
88
eS Series installation instructions
Summary of Contents for eS Series
Page 2: ......
Page 4: ......
Page 30: ...30 eS Series installation instructions...
Page 56: ...56 eS Series installation instructions...
Page 92: ...92 eS Series installation instructions...
Page 114: ...114 eS Series installation instructions...
Page 124: ...124 eS Series installation instructions...
Page 128: ...128 eS Series installation instructions...
Page 138: ...138 eS Series installation instructions...
Page 146: ...146 eS Series installation instructions...
Page 147: ......
Page 148: ...www raymarine com...


