40
Raymarine H6 - System Installation Manual
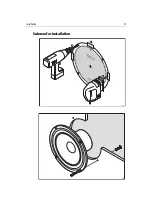
Each enclosure should be loosely filled with a suitable acoustic wadding.
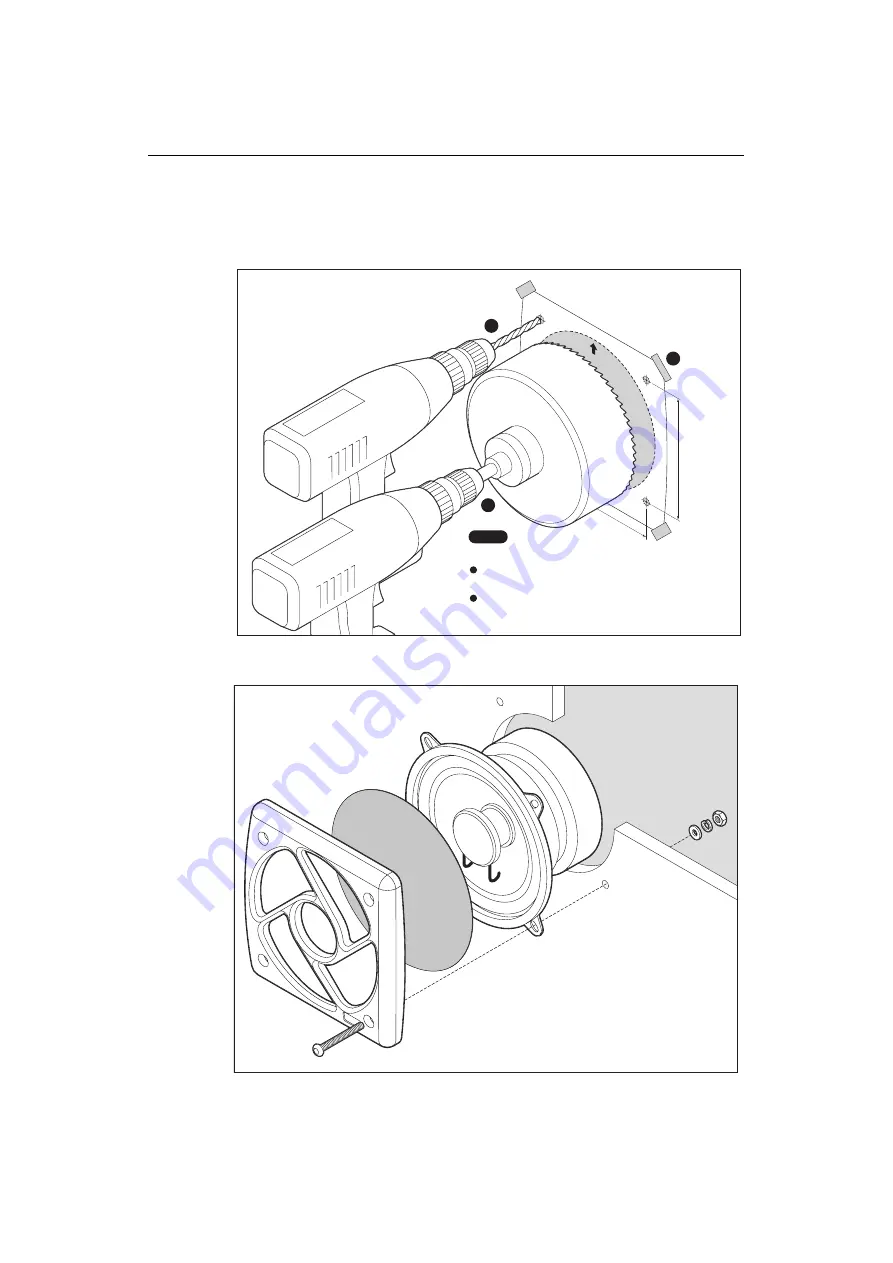
Speaker installation
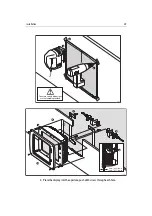
Fascia edge
UP
Remove material
from shaded area
s only
H6 Speaker Unit
Mounting Template
97.58 mm (3
27
/
32
in)
97.58 mm (3
27
/
32
in)
Cut hole
,
114 mm
(4
1
/
2
in)
diameter
Hole
A
Hole
A
Hole
A
Hole
A
PLEASE CHECK M
EASUREM
ENTS ON
TEM
PLA
TE BEFORE USE.
D
732
4-1
D7421_1
Check
Hole
A
If you are using the Button-Head screws supplied,
drill 6 mm (
1
/
4
in) holes.
If you are using Self-Tapping screws, then drill holes
of a suitable size to ensure secure fixing.
1
2
3
D7422_1
Note
: Speaker grille material is local supply
to suit interior.
Summary of Contents for H6
Page 1: ...System Installation Manual Document number 87035_1 Date November 2004 D7579_1...
Page 6: ...4 Raymarine H6 System Istalation Manual...
Page 16: ...10 Raymarine H6 System Installation Manual...
Page 17: ...11 This page should be replaced with the A3 sheet System Schematic...
Page 18: ...12 Raymarine H6 Installation Manual...
Page 26: ...20 Raymarine H6 System Installation Manual...
Page 27: ...21 This page should be replaced with the A3 sheets Cables...
Page 28: ...22 Raymarine H6 Installation Manual...
Page 48: ...42 Raymarine H6 System Installation Manual...
Page 62: ...56 Raymarine H6 System Installation Manual...
Page 72: ...66 Raymarine H6 System Installation Manual...
Page 98: ...92 Raymarine H6 System Installation Manual No Check Confirmed...
Page 103: ...Raymarine H6 Connection diagrams Raymarine 2004...
Page 104: ...98 Raymarine H6 System Installation Manual...
Page 110: ...104 Raymarine H6 System Installation Manual...
Page 121: ...115 This page should be replaced with the A3 sheet VGA Connections...
Page 122: ...116 Raymarine H6 Installation Manual...
Page 123: ...Installation templates D7579_1...

