


System set up
45
Set up menu
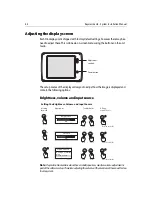
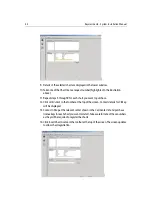
To adjust the display settings:
1. Press and hold either of the adjustment buttons at the top right of the display. An
on-screen menu appears.
2. Press either of the adjustment buttons to scroll through the menu to the required
option.
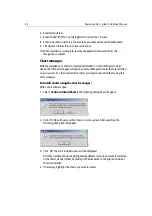
3. Press and hold the adjustment button. The selected menu appears.
4. Use the adjustment buttons to scroll and select your option.
5. Select the adjustment by pressing the Power button.
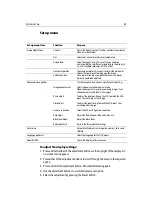
Set up menu item
Function
Purpose
Image Adjust Menu
Contrast
Adjust the display contrast (this has no effect in composite
video or s-video mode).
Tint
Select cool, neutral or warm color temperature.
Aspect ratio
Select the aspect ratio; this is useful if you choose a
resolution that has a different aspect ratio to the display (4
x 3 at its standard resolution of 1024 x 768)
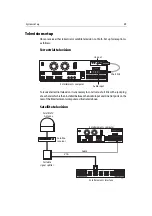
Horizontal position
They can be used for VGA inputs to adjust the horizontal
and vertical position of the image on the screen.
Once commissioning is complete these controls do not
normally need to be adjusted
Vertical position
Advanced menu options
The following controls do not normally need adjusting
Image enhancement
Phase adjust
Clock adjust
Gamma correction
RGB adjust
Black level adjust
Restore defaults
Select video or text enhancement mode
Video enhancement may improve moving images. Text
enhancement is suitable for static images
To adjust the pixel position on the LCD to match the VGA
input, thus ensuring a clear image.
To adjust the pixel timing to mach the VGA input, thus
ensuring a clear image.
Select the LCD or CRT gamma correction.
Adjust the Red, Green or Blue color intensity.
Adjust the black level.
Restore the factory default settings.
Auto set up
Automatically adjusts the image size, contrast, focus and
stability.
Language option list
Select the language for the OSD menus.
About M1500
Shows the display software version.
Summary of Contents for H6
Page 1: ...System Installation Manual Document number 87035_1 Date November 2004 D7579_1...
Page 6: ...4 Raymarine H6 System Istalation Manual...
Page 16: ...10 Raymarine H6 System Installation Manual...
Page 17: ...11 This page should be replaced with the A3 sheet System Schematic...
Page 18: ...12 Raymarine H6 Installation Manual...
Page 26: ...20 Raymarine H6 System Installation Manual...
Page 27: ...21 This page should be replaced with the A3 sheets Cables...
Page 28: ...22 Raymarine H6 Installation Manual...
Page 48: ...42 Raymarine H6 System Installation Manual...
Page 62: ...56 Raymarine H6 System Installation Manual...
Page 72: ...66 Raymarine H6 System Installation Manual...
Page 98: ...92 Raymarine H6 System Installation Manual No Check Confirmed...
Page 103: ...Raymarine H6 Connection diagrams Raymarine 2004...
Page 104: ...98 Raymarine H6 System Installation Manual...
Page 110: ...104 Raymarine H6 System Installation Manual...
Page 121: ...115 This page should be replaced with the A3 sheet VGA Connections...
Page 122: ...116 Raymarine H6 Installation Manual...
Page 123: ...Installation templates D7579_1...


