System set up
47
• Rudder - if maximum rudder angle is different to default.
• Windforce.
• Speed.
• Alarms - set beeper.
• Startup - change totem pole displays.
To modify the files:
1. Connect a keyboard and mouse to the rear of the navigation computer using the
Trackball MUX connection and keyboard connection below this.
2. Power up the system as described in
Initial system startup
above. H6 will load.
3. Press the Windows key on the keyboard. The Windows task bar is displayed.
4. Select
Start/Programs/Accessories/Notepad
. The Notepad is displayed.
5. Select
File/Open/C:/H6
. The H6 directory is displayed.
6. Double-click ‘setup’. The file directory is displayed.
7. At the bottom of the dialog box locate the field named ‘Files of type’.
i. Click the arrow to the right of the field. A drop-down menu is displayed.
ii. Select
All Files
. All files in the directory are displayed.
8. Double-click ‘cam.ini.’ The contents of the file open in Notepad.
9. Modify the file script as necessary, making sure that it is done correctly as described
in the instructions at the start of the file.
10. Save any changes that are made to the file.
11. Repeat steps 8 through 10 for the files named ‘datasources.ini’ and ‘setup.ini’.
12. Turn H6 off and restart the system.
13. Check all expected data is displayed.
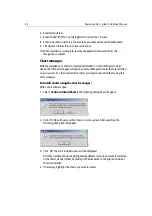
Online setup
With H6 connected to the off-boat communication, On-line can be setup so that
connection to the Internet is made by simply pressing the GPRS or GSM button on the
browser screen.
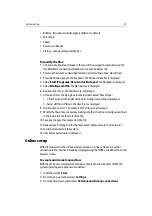
To create an internet connection:
With the off -boat communication modem connected to the serial port COM 2,the
system operating and a keyboard connected:
1. In Windows click
Start
.
2. From the pop-up tool bar select
Settings
.
3. From the drop-down menu select
Network and Dial-up connections
.
Summary of Contents for H6
Page 1: ...System Installation Manual Document number 87035_1 Date November 2004 D7579_1...
Page 6: ...4 Raymarine H6 System Istalation Manual...
Page 16: ...10 Raymarine H6 System Installation Manual...
Page 17: ...11 This page should be replaced with the A3 sheet System Schematic...
Page 18: ...12 Raymarine H6 Installation Manual...
Page 26: ...20 Raymarine H6 System Installation Manual...
Page 27: ...21 This page should be replaced with the A3 sheets Cables...
Page 28: ...22 Raymarine H6 Installation Manual...
Page 48: ...42 Raymarine H6 System Installation Manual...
Page 62: ...56 Raymarine H6 System Installation Manual...
Page 72: ...66 Raymarine H6 System Installation Manual...
Page 98: ...92 Raymarine H6 System Installation Manual No Check Confirmed...
Page 103: ...Raymarine H6 Connection diagrams Raymarine 2004...
Page 104: ...98 Raymarine H6 System Installation Manual...
Page 110: ...104 Raymarine H6 System Installation Manual...
Page 121: ...115 This page should be replaced with the A3 sheet VGA Connections...
Page 122: ...116 Raymarine H6 Installation Manual...
Page 123: ...Installation templates D7579_1...

