Chapter 2: Installation
2-7
Se
lect
in
g t
he
Eq
ui
pm
en
t
Loc
at
ion
2.3 Selecting the Equipment Location
Display Unit Mounting Location
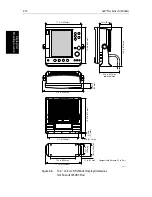
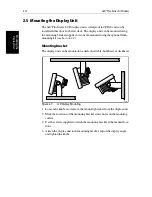
The display unit can be mounted using the mounting bracket supplied, or
console mounted using the optional flush-mounting kit. The dimensions of the
display units, including the bracket, are shown below in
Figure 2-4
,
Figure 2-5
and
Figure 2-6
.
When planning the display installation, the following should be considered to
ensure reliable and trouble free operation:
•
Convenience:
The contrast and colors seen on all LCD displays vary
slightly with viewing angle; this is more noticeable on the left hand side.
Power the unit and select a suitable mounting location prior to installing
the display. The mounting location should be easily accessible to allow
operation of the front panel controls.
•
Access:
There must be sufficient space behind the display to allow cable
connections to the rear panel connectors, avoiding tight bends in the cable.
•
Interference:
The selected location should be far enough away from
devices that may cause interference, such as motors, generators and radio
transmitter/receivers (see the EMC guidelines earlier in this section).
•
Magnetic compass:
Mount the display unit at least 3 ft (1m) away from a
magnetic compass.
•
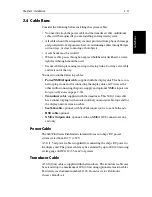
Cable runs:
The display unit must be located near a DC power source. The
power cable supplied is 4.9 ft (1.5m), but a longer cable can be used if
required: refer to
Section 2.4
.
The maximum length of cable between a master display and the trans-
ducer unit should not normally exceed 30 ft (10 m). If you need to use a
longer cable, refer to
Section 2.4.
•
Environment:
Do not restrict airflow at the rear of the display unit;
the display incorporates Cold Cathode Florescent Lamps (CCFL),
which have a reduced light output when the unit is very hot. Ventila-
tion is required to prevent the unit from overheating.
The display should be protected from physical damage and excessive
vibration. Mount the display in a protected area away from prolonged and
direct exposure to rain and salt spray.
Summary of Contents for hsb2 PLUS
Page 1: ...hsb2 PLUS Series Fishfinders Owner s Handbook Document number 81195_2 Date August 2002...
Page 2: ......
Page 34: ...1 22 hsb2 Plus Series Fishfinders Database Lists...
Page 64: ...2 30 hsb2 Plus Series Fishfinders Transmitted Data...
Page 110: ...4 14 hsb2 Plus Series Fishfinders MOB...
Page 160: ...5 50 hsb2 Plus Series Fishfinders Review Your Passage Plan...
Page 172: ...6 12 hsb2 Plus Series Fishfinders Data Log Mode...
Page 200: ...8 8 hsb2 Plus Series Fishfinders Worldwide Support...
Page 204: ...A 4 hsb2 Plus Series Fishfinders Appendix A Specifications...
Page 216: ...C 6 hsb2 Plus Series Fishfinders Appendix C C MAP Chart Card Features...
Page 228: ...viii hsb2 Plus Series Fishfinders...

