VRM (Variable Range Marker) / EBL (Electronic Bearing
Line)
The VRM/EBL is used to determine range and bearing of radar objects.
Variable range marker (VRM)
The VRM is a circle centered on one object and then adjusted so that the
circle meets a second object. The range between the 2 objects is displayed
along the circle.
Electronic Bearing Line (EBL)
The EBL is a straight line from the center of the VRM to the edge of the
screen and signifies the bearing from the object in the center of the VRM to
the second object which the EBL should pass through.
1.
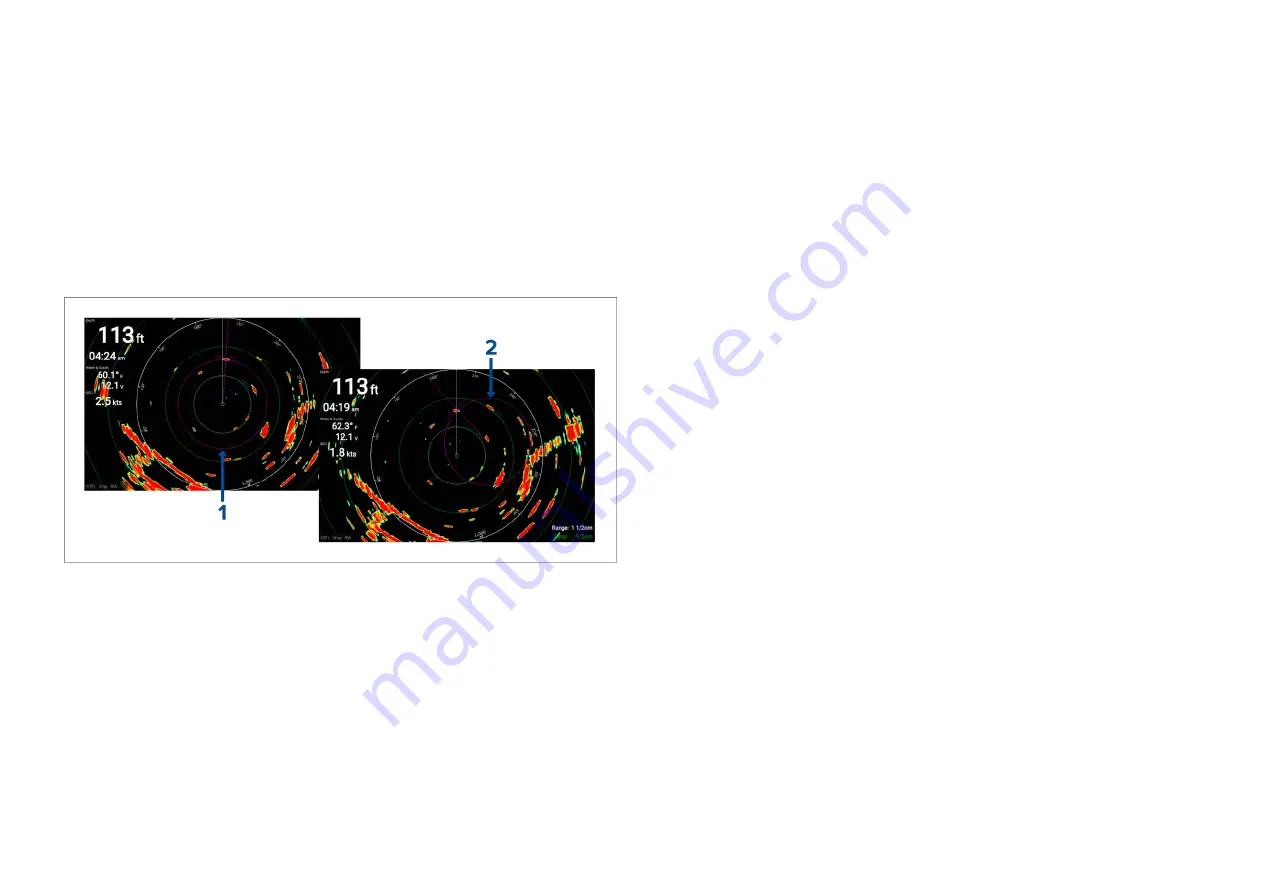
Centered VRM/EBL
By default when the VRM/EBL is enabled it will be
centered around your vessel. You can use the ‘centered’ VRM/EBL to
determine the range and bearing of an object in relation to your vessel.
2.
Floating VRM/EBL
You can adjust the VRM/EBL so that it is centered on
another object, know as a ‘floating’ VRM/EBL. You can use the floating
VRM/EBL to determine the range and bearing between the 2 objects.
The reference point used for the VRM/EBL can be configured to either
measure bearing from true north / magnetic north or be a bearing relative to
your vessel.
When set to
[True/Mag]
bearing is measured from the display’s selected
bearing reference (i.e.: True or Magnetic north). The display’s bearing
reference can be specified from the
[Units]
menu:
[Homescreen > Units >
Bearing]
.
When set to
[Relative]
bearings are taken from the Ships Heading Marker
(SHM).
Creating a centered VRM/EBL
To create a VRM/EBL centered on your vessel follow the steps below.
From the Radar app:
1. Press a button on the
[Directional pad]
to enter cursor mode.
2. Press the
[OK]
button.
The radar context menu is displayed.
3. Enable the
[VRM/EBL]
toggle switch.
4. Use the
[Directional pad]
to change the size of the VRM and location
of the EBL.
5. Press the
[Back]
button to place the VRM/EBL.
Creating a floating VRM/EBL
To create a floating VRM/EBL follow the steps below
From the Radar app:
1. Press a button on the
[Directional pad]
to enter cursor mode.
2. Press the
[OK]
button.
The radar context menu is displayed.
3. Enable the
[VRM/EBL]
toggle switch.
4. Press and hold the
[OK]
button for approximately 3 seconds, until the
VRM/EBL lines turn White.
5. Use the
[Directional pad]
to change the center location of the VRM.
6. Press and hold the
[OK]
button for approximately 3 seconds, until the
VRM/EBL lines turn Blue.
7. Use the
[Directional pad]
to change the location where the VRM and
EBL intersect.
8. Press the
[Back]
button to place the VRM/EBL.
Editing a VRM/EBL
Once the VRM/EBL has been placed you can adjust its size and position.
With a VRM/EBL displayed:
1. Press a button on the
[Directional pad]
to enter cursor mode.
2. Press the
[OK]
button.
The radar context menu is displayed.
127


