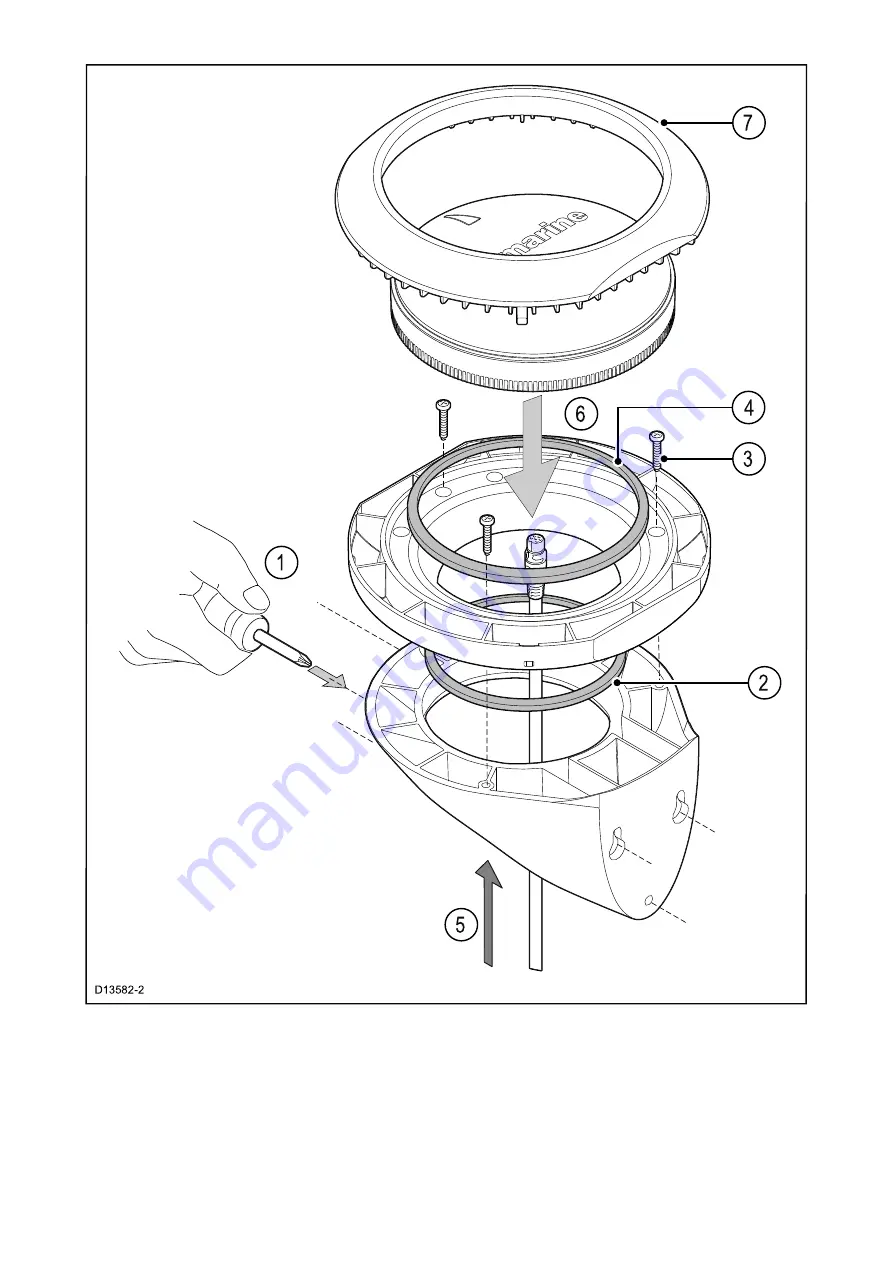
1. Use the Mounting bracket template (87170) to drill 3 pilot holes in the vertical mounting surface.
Secure the mounting bracket to the surface using the supplied screws.
2. Place the small sealing ring in the groove located on the bottom of the Mounting tray.
3. Secure the tray to the bracket using 3 of the supplied screws, in the positions indicated in the
illustration above.
4. Place the large sealing ring into the groove on the upper side of the Mounting tray.
5. Pull the SeaTalkng ® cable through the canter of the bracket and tray. Plug in the cable connector
on the underside of the unit and secure by rotating the locking collar clockwise 2 clicks.
35
Summary of Contents for MICRO-TALK
Page 2: ......
Page 4: ......
Page 8: ...8...
Page 12: ...12...
Page 21: ...Chapter 4 Parts supplied Chapter contents 4 1 Parts supplied on page 22 Parts supplied 21...
Page 24: ...5 1 Product dimensions 24...
Page 40: ...40...
Page 62: ...62...
Page 68: ...68...
Page 78: ...78...
Page 80: ......
Page 83: ......


